All In Good Taste

Last night at The 78 pub we came across this tasty morsel — what our friends called a hozuki, and what our server called a physalis. It’s a cape gooseberry — and we’d never had one. It’s really tasty!

Another foodie meme/survey is floating through the blogosphere today, one that doesn’t require anyone to be tagged, which is a good thing. A food blogger has created what he calls the omnivore’s hundred which has of course since spawned a vegan’s one hundred, a vegetarian’s one hundred, an American’s one hundred, etc. ad nauseum, ad infinitum. (We bloggers are nothing if not self-obsessed.) Anyway, blogger Andrew wants to know — what have you eaten?

The rules are (or were, about five hundred responses ago — who knows if he’s even reading them anymore):

  1. Copy this 100-item list on your blog or site.
  2. Bold the foods you’ve eaten.
  3. Strike through foods you will not eat.
  4. Post a comment on Very Good Taste (where the challenge originates).

Obviously, this isn’t going to work for me — I’m not an omnivore. But I did think that the list was interesting. Kaolin — clay dirt that some people eat — sits in the same list as carob chips, durian and fugu, Krispy Kremes, Big Macs and pho. Head cheese, dulce du leche, carp, aloo gobi… the list is really unique. If you’re an omnivore, you might want to check it out.


Meanwhile, the cool, misty days are accompanying the running down of the clock. D.’s dissertation is coming due, and my end-of-the-month deadline is approaching all too quickly. Which is, of course, the reason I decided to do some baking — because what’s life without a little more procrastination?

An impulse buy of two sweet potatoes was staring at me reproachfully from the potato-and-onion basket, and threatening to sprout leaves, so I skinned and boiled them. (Yes, Mama. I skinned them. Yes, I know all the nutrients are under the skin. I know, I know. I’m sorry. I’ll eat some extra kale.) And then, I set them in a bowl and looked at them. Where was I going with this?

I finally decided on bread. I mashed the sweet potatoes, and discovered I had a little over a cup and a half, so I decided to make two loaves of sweet potato bread. Before I did anything, I seasoned the potatoes — adding a scant 1/4 tsp. of salt, two teaspoons of our garam masala mix, 1/2 c. of brown sugar, 1/4 cup of oil, and a little grating of nutmeg. Simply because I had it, I added 1/4 c. of clementine marmalade, for a little bittersweet zing.

Next, In my coffee grinder, I placed four allspice seeds, and 1/3 c. of flax seeds. I placed four cups of flour in a bowl, and added three tablespoonfuls of baking powder, and a 1 tsp. of baking soda to the flour. I mixed them together meditatively, and wondered if I could sneak in some coconut.

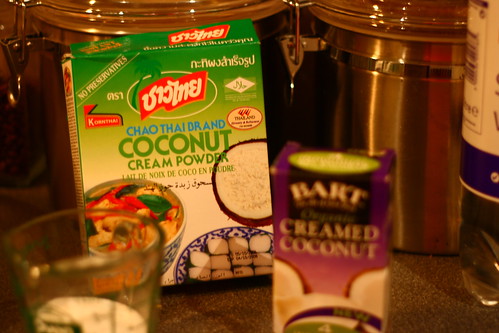
The coconut thing… has started to edge toward obsession. Coconut is common enough on the West Coast of the United States, but for some reason, here I find I’m having fun with all of its forms. Not just canned coconut milk, in full-fat and “skimmed” varieties. Not just dried coconut cream in familiar Thai packaging (we used the very same kind at home — was really nice to find it at Sea Woo!), but dried coconut milk, flakes, and sealed packets of paste, which are available at regular grocery stores. The ability to add the richness and flavor of coconut without adding the liquid was too good to pass. I added 1/4 c. of the coconut cream — next time I will use a single packet of the coconut paste, as it has a richer flavor.

Of course, since this was a random, dreamy, experimental dish, it didn’t come together even remotely as smoothly and coherently (hah!) as I’m writing this. Potatoes are starchy, and when starch is stirred it gets sticky. Sweet starchy potatoes? Are even stickier. I knew this… but didn’t remember. Therefore, do as I say, not as I do: mix your wet and dry ingredients separately, then combine. Things go much better that way.

The sweet potato dough was heavy and very moist — and a little worrisome but I went ahead and lightly spritzed two pans with oil, divided the sticky mass, and put them in pans. I would have had photographic evidence of this, but you know, some of us couldn’t be bothered to set up the tripod when we weren’t sure this would work out, anyway. We just snapped off a few pictures, and not surprisingly, many of them were blurred because we couldn’t just take our time. *Ahem.* We have paid for this lapse with receiving more tutelage in the art of using the camera… *sigh*.

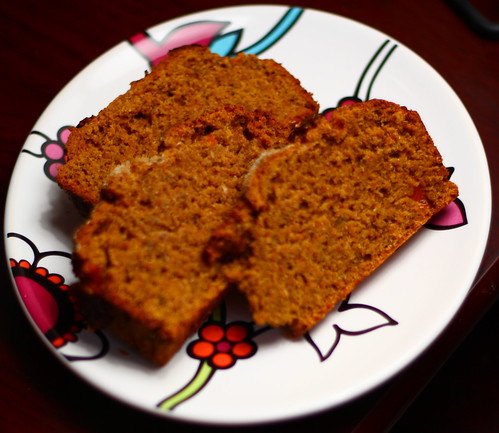
I divided a half cup of white sugar between the two loaves, hoping to make up some sweetness in case the potatoes were for some reason not as tasty as usual. With fingers crossed, I put it in the oven at 350° for about fifty minutes, doing the toothpick test to be sure it was baked thoroughly. This bread produced an even better crumb than I expected, and was still dense, moist, and slightly sweet, with a burr of pleasantly bittersweet citrus.

Even with the slightly more-than-caramelized top (the oven bakes seriously unevenly, due to the fact that the door doesn’t close all the way — what on earth the people who lived her previously did to it [lay on it?], no one knows. A new oven or a new door is on order, God help me, I cannot yet quite understand my trusty handyman. But he’s adorable, with his standing-on-end silver hair [I think I make him run his hands through it a lot — in aggravation] and his tone is reassuring — whatever the heck it is he’s said.) this bread was lovely. The sugar on top was a nice touch of sweetness, and next time, I think I’ll add more clementine… This was a lovely result for an experiment! Next time, I’ll make the loaves into scones. Sounds great, doesn’t it? Sweet potato clementine scones.

Until next experiment!

Sweet Potato Bread

  • 1 1/2-2 c. sweet potatoes
  • 1/4 tsp. of salt
  • 2 tsp. garam masala
  • 1/2 c. brown sugar
  • 1/4 c. oil
  • 1/4 c. marmalade
  • 4 c. flour
  • 1/3 c. flax seed
  • 1 tsp. freshly ground allspice
  • 3 tbsp baking powder
  • 1 tsp. baking soda
  • 1/4 c. coconut cream, dry

Preheat oven to 350°. Combine dry and wet ingredients separately, then combine. Divide dough, place in oiled pans and bake for fifty minutes. If you try this as scones, let me know how it goes!

Cardomom Pear Cake


We’re starting to enjoy the last summer pears, while fellow baker, Haalo, is coming to the middle of winter pears, but recently cake was on both our minds. A mildly sweetened batter atop thick slices of ripe pears baked up into a light, moist cake. It’s a quick recipe that’s essentially a half step away… from cornbread.

Cardamom Pear Cake

  • 1/2 c. fine cornmeal
  • 1/2 c. white flour
  • 1/2 c. whole meal flour
  • 1/2 c. almonds, ground
  • 1/2 c. white sugar
  • 1/2 c. + 2 tbsp. brown sugar
  • 5 whole cardamom pods
  • 1 tsp. cinnamon
  • 2 Tbsp. baking powder
  • 2 Tbsp. ground flax seeds
  • 1/4 c. oil
  • 1/3 tsp. vanilla
  • 1/2 c. milk
  • 50 ml Tallinn Vana liquor
  • 5 ripe pears

  1. Preheat oven to about 350° degrees.
  2. First, wash and slice pears to a desired thickness. Lay them in the bottom of a non-stick, springform pan.
  3. Assemble the dry ingredients, leaving aside 2 Tbsp. brown sugar. Thoroughly combine dry ingredients, as once you add your liquids, your stirring should be limited.
  4. Add your liquid ingredients, including liquor. Tallinn Vana is a sweet rum-esque liquor. Stir sparingly, but thoroughly incorporate the dry ingredients with the liquid.
  5. Sprinkle the remaining 2 Tbsp. brown sugar on top of pears, then smooth cake batter over sugared fruit.

Bake for forty-five to fifty minutes, until cake pulls slightly away from pan edges, and a toothpick test comes out clean. Let the cake sit for ten minutes before flipping it onto a platter. Be sure and remove the cake while it is still hot, or the pears will weld themselves to the pan.


This is a very soft cake, and if your pears are perfectly ripe, they will break down to pearsauce. Not to worry! Though the cake will always be quite moist, it will regain a bit of solidity as it cools. A vanilla-bean ice cream is the perfect compliment to this cake when warm, or a nice cup of Almond Sunset tea is a flavorful accompaniment as well.

Coconut Almond Macaroons

This is just a quick “throw together” recipe, for when you’re in the mood for some coconut goodness, but don’t really want to go to a whole lot of effort. If we’d been wanting to go to a bit more effort, we would have used marshmallow-root water instead of soy milk, but weren’t in the mood to boil the root and let it cool before making the cookies. Next time….

Coconut Almond Macaroons:

  • 2 cups unsweetened, shredded coconut
  • 1 cup almonds, ground
  • 3 Tbsp flaxseeds (linseeds), powdered
  • 1 cup strong flour
  • 2 tsp baking powder
  • pinch salt
  • soy milk, to hydrate (maybe 1 cup, maybe 2)
  1. Mix dry ingredients together thoroughly
  2. Add soymilk and stir until just combined
  3. Spread on an oiled baking sheet
  4. Divide into cookies using a spatula or bench scraper
  5. Press an almond onto each cookie
  6. Bake until dry
  7. Remove to cooling rack
  8. (Optional: toast in toaster oven the next day!)

Tasty Tamarind

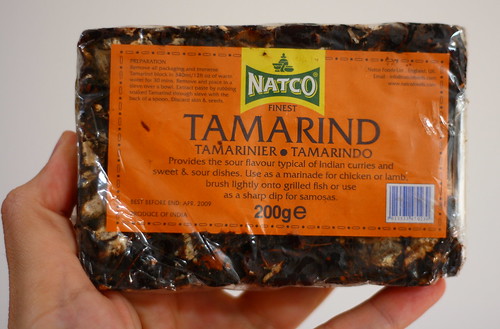
It’s one of those curious ingredients we keep playing with — sticky, sweet, sour tamarind paste. Growing up with Hispanic neighbors, we often had tamarind candy, which was tamarind fruit deseeded (sometimes) and dusted with sugar and chili powder. Another way our Mexican friends used it was to drink it like lemonade; agua de tamarindo is a popular regional drink in some areas of Mexico. Neither of these treatments really utilize tamarind as more than a single ingredient, so we’ve tried to incorporate it elsewhere. Because it’s already sticky/pulpy, it’s packaged semi-dried in stores, and can easily cook up into a jam, to be used in thumbprint cookies (your favorite sugar cookie recipe plus a puckerish-sweet jam.). Its stickiness means it’s also makes a great sauce — found this recipe for an orange and tamarind glaze, and haven’t been able to stop imagining how good it will taste.

There’s still got to be more to do with tamarind than this. Maybe tamarind bars, kind of like fig newtons, only sour-sweet?? A tamarind based salad dressing, instead of using vinegar for the puckery notes, tamarind and something else? Would coconut or chocolate pair with tamarind? The mind boggles…

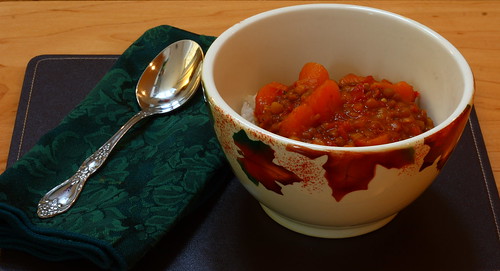
When in doubt, we usually think: beans. Since beans are so, so good and good for us, we try and eat all kinds, and though I hated lentils growing up, I’ve found they’re flavorfully flexible, and that if you’re creative, with them, they won’t get boring. Lentils can absorb many flavors, so the sweet/sour/tangy tamarind added to spicy lentils can be pretty darned tasty. If you don’t like sour/tangy flavors, don’t be afraid that you’ll be overwhelmed by the tamarind — you won’t. Either way, experiment with the amount of tamarind you add. As ever, none of our recipes are written in stone; they’re all a work in progress, but this is a basic plan, based on a recipe found in Veganomicon. Enjoy.

Curried Tamarind Lentils

  • 2 small onions (or one huge one), finely minced
  • 2 carrots, scrubbed or peeled and diced
  • 4 medium sized tomatoes, deseeded (if you like) and roughly chopped
  • 1 tsp. garam masala – store bought, or your own recipe
  • 1/4 tsp. curry powder, or wet curry paste
  • 1/2 tsp. toasted ground cumin seeds (if I don’t have garam masala, I add coriander, too
  • chipotle powder — to taste
  • 1 c. dried lentils, soaked in cool water for 20 min.(
  • 1 c. tomato juice and 1 c. unsalted vegetable broth or water
  • 2 tsp. tamarind paste

Before you do anything else, prep your tamarind. We buy ours “wet,” which is in a sort of dried fruit brick, which contains seeds and peels. We break off a chunk and place it in a bowl, pouring boiling hot water over it. After it sits for about three minutes, we work it with our fingers until the seeds are fully separate from the pulp, press it through a sieve, and discard the skin and seeds. Next:

  1. In a dry saucepan, toast your cumin seeds. Just let them heat up, swirling the pan repeatedly so they won’t burn. Dump them into a mortar bowl, grind them, and set them aside. This will take just a minute, and adds so much flavor. (some people say to let them cool before grinding – play with it)
  2. Now add oil to your pan, and sauté your onions, carrots, and chopped tomatoes. Okay, this isn’t really sautéing, just getting them used to the idea of being in your dish.
  3. Next, add your cumin, coriander, garam masala, etc. This is the point during which you’ll need to turn on your exhaust fan. Careful with the chipotle (or cayenne, if you don’t have any)! If you’re using curry paste, this is the time for it. (The amount is a guideline; sometimes I put a whole tsp. of curry paste),
  4. Your saucepan mixture will be a bit juicy, so it’s time to add your soaked lentils and one cup of water or unsalted broth. The lentils are presoaked because it cuts their cooking time tremendously, and allows them to absorb flavor faster. The broth is unsalted, because one should never, never, never, NEVER salt beans until they’re off of heat, or the skin will toughen.
  5. Your beans, spices and veggies are bubbling now over a medium flame for about twenty minutes. From time to time, stir them – depending on the juiciness of your tomatoes, they may seem too thick. It’s okay to add a tiny bit of water, but don’t forget about your tomato juice!
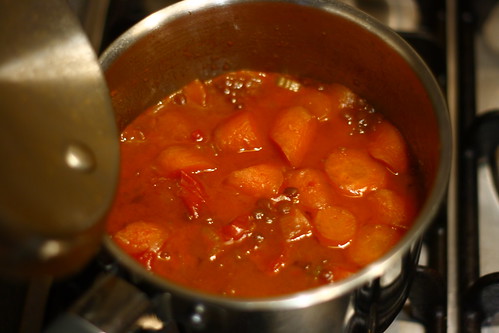
  6. Finally, combine your tamarind paste and tomato sauce in a small cup or bowl. If you choose to add salt to your beans, and you’re using brown lentils (or other lentils with skin, not the red dahl lentils) I’d still hold off on the salt. Add the tomato and tamarind blend to the lentils, and allow it to bubble for another five minutes, then whisk it off of the heat, and serve over hot rice.

These lentils are savory and tasty, and the various spices aren’t tasted individually, rather as a lingering flavor in the back of the mouth (and a lingering spice in the throat from the chipotle and the ginger in the garam marsala). Some people add a teaspoon of sugar with the tamarind in the end, but I’ve never felt a need. According to the food encyclopedia, tamarind pulp has a high vitamin C, Vitamin B and calcium content it’s said to “improve digestion and relieve gas.” Temple of Thai says it will soothe a sore throat, act as a mild laxative and can even be used as an effective antiseptic for eye baths. I’m not going that far, but I will say it’s a tasty ingredient, and in this dish will definitely replace common, everyday lentils.


In the category of weekend recipes that make me want to drop by for lunch are Cynthia’s coconuty corn and breakfast bread, Holler’s blueberry (but could be raisin) scones with the built-in jam, and Dad, Baker & Chef’s Mocha Biscuit Pudding. Oh, yum. I need dessert…

No-boil Vegetable Lasagne

We’re trying to get a bit back into the practice of cooking dishes with more than just a single-meal in mind, so that we can keep our time a bit better in hand. Cooking is something that we enjoy … but we both now have writing deadlines (I for my Master’s dissertation, and T. for her a latest work-in-progress), so we’re trying to cut down on the time in the kitchen.

What we’re not going to fall into is the prepared-food trap, nor into the restaurant trap: we’ve been there, and neither one saves time nor money. (Honestly, think about the time you spend getting to and from a restaurant, and the time you spend waiting, and you might just as well have stayed home!) Plus … we’re better cooks than that, really. So, with that in mind, we return to the tried-and-true, no-boil vegetable lasagne

This recipe is more of an assembly than a true recipe. The trick is to get enough moisture from things like the sauce, the tofu, the raw tomatoes, mushrooms, and the zucchini (courgette), so that you don’t have to boil the noodles, and can just put it into the oven and walk away for an hour or so. The mushrooms and zucchini really do have enough moisture to cook the noodles, and things will look a bit wet for the first half-hour or so: don’t worry, this is how it’s supposed to be. This time we used:

  • lasagne noodles
  • pasta sauce
  • zucchini / courgette
  • mushrooms
  • onion
  • tomato
  • basil leaves
  • silken tofu
  • smoked torula yeast
  • garlic powder
  • port salut cheese
  • sharp cheddar cheese
  • quorn burger

Just … layer it all in, in no particular order (except that you need a bit of sauce on the bottom, and on the top). Each layer can be different, and will be happier (and thinner) that way. You can also add thinly sliced onions, freshly chopped herbs, etc.

We’ve baked this dish both covered and uncovered, and don’t find that it makes that much of a difference to the end product. If you do feel that you need to cover it, though, be aware that tomato sauce acids + aluminum foil = nasty dissolved aluminum foil on your lasagne. It’s just not pretty, so make a bechamel cream sauce for the top layer if you’re going to go with a foil covering, or tent the foil so that it doesn’t touch.

Awhile back, Elle posted about unlovely looking foods that taste good. This is one of those! Many people put a ton of cheese atop their lasagne and that covers a multitude of sins, as it were, but sometimes overwhelms the balance of flavors with an onslaught of cheese. A little less fat, a little more flavor and a little less than lovely? Who cares, bring it on.

Enjoy!

Rhubarbarama

People in California eat rhubarb. Occasionally. It shows up at Farmer’s Markets from time to time, but primarily from the coolest, loamiest, more northern California farms. Most of the time, rhubarb is a regional favorite from Maine south to Illinois and west to the Pacific Northwest, as well as Canada, because much of the Cali climate, the Southwest and the South is just too warm for it to thrive. Which is a bummer, for some people. Not so much us — we’d never really eaten rhubarb.

This shocking lapse in our rhubarb education was remedied this past Friday when our farm box produced a half pound of red and green rhubarb. What to do with it? We’d heard it was kind of like string-less, sour celery… (Er…? Okay.) We decided quickly that the sour stalks could first be enjoyed as jam.

Rhubarb Jam

  • 1/2 lb. fresh rhubarb, sliced
  • 3/4 c. granulated sugar
  • 1/2 c. crystallized ginger, chopped
  • grated orange zest, to taste

Combine all ingredients in heavy saucepan, and stir over medium-high heat until sugar dissolves. Bring to boil, then reduce heat to medium, and simmer, stirring frequently until jam thickens and mounds on spoon, about twenty minutes. DO NOT ALLOW TO SCORCH. Remove from heat and transfer to jar or dish to cool.

Now that we had jam, which was fairly tasty, we tried to figure out how best it could be shared. (Share!? you gasp. Why? Because T. has a severe sensitivity to foods high in oxalic acid. A#1 on that list? Rhubarb. More on that later.) D’s PhD lecture group has been enjoying having him around not just for his mind, but for the goodies he brings to lectures. Why not share the jam with them? We decided to make jam tarts.

Rhubarb Jam Tarts

  • 1 c. sugar
  • 2 c. all purpose flour
  • 1 tsp. baking powder
  • 1/3 c. ground flax seeds, aka linseeds
  • 2 tsp. Garam Masala
  • 1/4 tsp. salt
  • 1 Tbsp. olive oil
  • 3/4 c. soymilk (more or less)

Combine all ingredients in a mixing bowl. This is a very sticky dough, and the cookies must be shaped with either oiled hands or with two spoons. Whichever way works best for you. Form cookies into balls, and place on parchment paper lined baking sheet. Next, fill a measuring cup with water, and dip your thumb into the water, then make a thumbprint on top of each cookie. Dip your thumb back into the water for each cookie, or your thumb will stick! Don’t do more than three or four at a time; the dough is springy, and the thumbprint won’t last.

Spoon about 1/4 tsp. of jam into each thumbprint. Bake until lava-like boiling occurs in jam and cookies are golden-brown, about fifteen minutes at 350° degrees.

The cookie recipe we used is made over from our original Tangerine Sugar Cookies, except we cut the amount of oil and added flax seed to give them a bit more lift. The cookies are chewy and well spiced, but very light and mild. The jam gives them quite a punch of sharpness – sour, sweet and citrusy. Yum. The recipe yields two dozen cookies, but …the PhD class …is going to get…twenty-one. *Ahem*.

Note: Rhubarb is tasty but can be a problem for people with rheumatoid arthritis, gout, kidney problems or other health issues where joint inflammation occurs. The oxalic acid rhubarb contains is highly irritating, and bonds with the metal in the body in a chemical reaction, and becomes metal oxalate — a combination of the two in sharp crystalline form — which irritate the tissues. It can cause severe gastrointestinal pain and joint swelling and inflammation.

A 2006 study published at The National Center for Biotechnology Information indicates that it may be possible to cause that chemical reaction which creates oxalate to take place outside the blood and tissues and inside the stomach if calcium supplements are taken when foods high in oxalic acid are consumed. Now, whether or not you want to then risk having some kind of really bad stomachache/gastrointestinal disruption instead of “just” a rheumatoid flareup or kidney stones… would be entirely up to you!

Spicy Kohlrabi Salad with Tofu


OK, folks: we’re still sticking with the ‘salad’ theme here, primarily because we find it so easy and so much in keeping with the season (meaning that our CSA keeps on sending us odd veg that we have to do something with, so we figure out a salad of some sort to bodge it into). Today’s recipe comes in three parts, of which the salad and the dressing could really stand alone. It may seem a wee bit intimidating, but give it a minute, and you will be rewarded.

Salad:

  • 1/4 Cup Kohlrabi, match-sticked (using a Benriner Slicer, if you’ve got it)
  • 1/4 Cup Cabbage, finely sliced (again, using the dreaded Benriner)
  • 1/4 Cup Green Beans, topped / tailed and cut into 1-inch lengths
  • 2 small Tomatoes, diced
  • 1/8 Cup Pumpkin Seeds, bashed about a bit in your mortar & pestle
  • 1/2 Grapefruit, skin and membrane removed
  1. Mix
  2. Put in bowls

Dressing:

  • 1 Slice Grapefruit Zest (use a vegetable peeler, peel a bit of the skin)
  • 1/2 Grapefruit
  • 1 Tbsp Soy Sauce
  • 2 Tbsp Vinegar (I used 1 Tbsp Distilled White and 1 Tbsp Balsamic)
  • 1 Tbsp Extra-Virgin Olive Oil
  • 2 Cloves Garlic
  • 1 tsp Pepper Flakes
  • 3 Tbsp Thai Pepper Sauce
  1. Blend (immersion / ‘stick’ blender)
  2. Put in container (you’ll have more than 1 serving, by quite a bit)
  3. Pour on salad

Meat:

  • 1 ‘brick’ Firm Tofu, cubed
  • 3 fillets ‘Chicken’ (we used Quorn in this case), cubed
  • 1/2 of an Onion, diced
  • 4 large Mushrooms, halved and sliced
  • 1/4 tsp Garam Masala (follow the link, look at the notes, grind it all up, you’re there)
  • 1/4 tsp Chipotle Powder
  • 1/8 tsp Seaweed Flakes (optional: gives a bit of a fishy flavor, if you’re into that)
  1. Throw everything except the spices into a pan
  2. Brown
  3. Add spices

At this point, you’ve done all the work: dress the salad, put the warm ‘meat’ on top of the salad, and you’re done! The different spices in the dressing and the ‘meat’ make for wonderful mouthfuls of flavor, and the dish itself is really actually very easy, provided you’ve made your Garam Masala ahead of time (we make ours as needed by the 1/2 Cup, so that we don’t have to go through all that every time we need it).

Raita Salad

Continuing the theme of vaguely middle-eastern cuisine, and because it’s been downright hot here (17°C / 63°F), this evening’s meal was based around a cucumber salad, with barely warm veggie-mince and a wedge of cool rice.

Raita Salad
Raita Salad

  • 1 English Cucumber, peeled and diced
  • 3 small Tomatoes, seeds removed, diced
  • 1 small Onion, finely diced
  • 1/2 cup Plain Yogurt
  • 1 pinch salt
  • Black Pepper
  • Ground Cumin
  • 1 tsp Balsamic Vinegar
  1. Mix everything and let stand for 10 minutes

Veggie Mince

  • 1 cup Quorn Mince
  • 1 large onion, finely diced
  • 3 large mushrooms, diced
  • Ground Cumin
  • Chipotle Powder
  1. Sautee everything until done.

Spicy Tomato Rice

  • 2 Cups Rice, washed
  • 2 Cups water
  • 1 Cup crushed tomatoes (or unsalted tomato juice)
  • 1 Tbsp Chipotle Powder
  1. Cook in a small pot, medium, until liquid is absorbed.
  2. Let cool, in the pot.
  3. Slice into wedges and … wiggle them out of the pot.

As the days have been getting longer, we’ve been considering moving to a new flat, and scheduling that in amongst things like traveling back to California, with some possible side-trips to Portland, New Orleans, and Miami. We’re not too sure whether I’ll be called on (by work) to go anywhere at all, but those cities are the possibilities, so we’ll see.

We’ve been traveling all over the country lately, it seems, and haven’t been really doing anything much with food, per se. I’ve been knitting a wee bit, but with classes having slowed down to only two papers* per week, knitting hasn’t happened much either. What have I been up to? Well, in the past month I’ve added nearly 2,000 pictures to our Flickr stream, and every one of those amounts to at least three having been taken, so I guess I’ve just been taking pictures. *A ‘paper’ is when a visiting professor or a graduate student presents the outline of a paper that they’re working on … for an hour. After that, the audience asks questions for another hour. The questions usually aren’t nice.

Enjoy the cool salad, and feel our fear that 17°C / 63°F causes us to open the windows and break out the shorts and t-shirts. What will we do when we go back to the States?

Onion Leek Souffle and an update

Things have been a bit frantic over here, as the term has come to an end, I’ve had an exam to sit (for the entire year – one exam), and we’ve had friends visiting from California. So, last weekend was a frenzied tour of the Scottish Midlands, with Glasgow & Edinburgh featuring prominently. This next weekend we’ll rejoin our friends (they’ve been touring the Highlands this week) for a visit to Stirling. Last weekend I took over 4,000 pictures, and ended up with over 1,000 which were worth keeping … or, at least, that I decided to keep – some of them are probably redundant, particularly when looking at bits of architecture, as, for example, who really cares about the individual clan crests scattered about the Kelvingrove Museum’s facade?

Next weekend we’ll be off to see the scenic town of Pitlochry and also visit Blair Castle, and then we’re spending Sunday with Holler‘s Graham (with Holler to follow later, we’ll presume). We’ll try to save some of of the Daring Bakers’ treat for this month for when she joins us later, but … well, we make no promises.

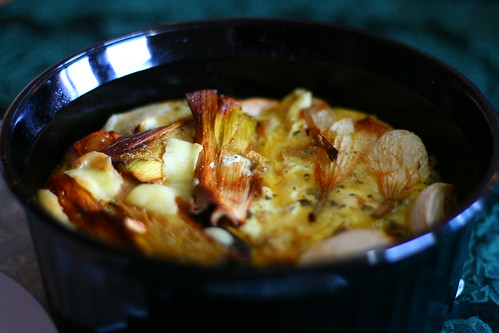
All of that chaos aside, we have been cooking, of course, and have come up with something fabulous to do with the breadcrumbs you end up with if you hollow out bread for soup: you make soufflé! It’s kind of a cheater soufflé, if you’re going to be picky about it, but it sure is a wonderful dish – it lasted not very long at all!


Easy Soufflé

  • 4 eggs
  • 1/2 C milk
  • 2 Tbsp onion & chive cream cheese
  • 1.5 C fresh bread crumbs
  • 1/4 C cheddar, crumbled
  • 2 onions, grilled
  • 2 leeks, grilled
  • pinch Sage
  • pinch Salt
  • freshly ground Pepper
  1. Whip eggs, milk, and cream cheese until smooth
  2. Mix liquid with bread crumbs, cheddar, and spices
  3. Pour into vessel of your choice
  4. Set onions and leeks on top
  5. Bake until set (a skewer comes out wet, but not runny)
  6. Let set for at least 10 minutes before serving

A Tale of Two Sandwiches

Life has shifted here somewhat, with the (wishful) coming of spring. We’ve begun cycling indoors on our trainers (the term is over so I don’t have to go to the University that often), I’m working a part-time job, and our taste has turned more to things which are fresher, faster, and easier to prepare. So, the soup season has officially ended for the year, and we’re entering the sandwich season.

Because the vast majority of our cooking tends to be done in the manner of “oh, that’s really good, what did we put in it?” we’re trying to make more of an effort to document things.

The measurements won’t be quite right, as there were no measurements done in the first place, but they’ll at least approximate what we think we put in things. Truthfully, though, we’re pretty good at estimating quantities, so you should be OK.

Both of these recipes only take about 10-15 minutes to come together, which is an added bonus.

This first one could use any product, really, but we’re using Quorn because it’s what we had on hand. It could just as easily be made using Quorn Fillets, for example, or any chicken-style burger product.

Mock Chicken Sandwiches

  • 1 Quorn Family Roast, baked according to packet instructions, cooled, chopped.
  • 5 stalks Celery, chopped
  • 2 spring onions, chopped
  • 1/2 ‘brick’ Silken Tofu (firmness doesn’t matter)
  • 2 Tbsp Mustard of your choice (we prefer spicy)
  • 3 slices sweet pickled cucumber
  • 1 Tbsp Salted Capers (leave the salt on)
  • 2 Tbsp Tomato Ketchup
  • 1 Tbsp Soy Sauce
  • 2 Tbsp Yogurt
  1. Add Family Roast, Celery, Onions to bowl.
  2. Add everything else to separate bowl & puree using your immersion blender.
  3. Mix resulting sauce with your roast, celery, and onions.
  4. Serve on toast, Ryvita, whatever makes you happy.

This next one was this evening’s dinner, and is something that we’ll be repeating soon! Oh, my! Do NOT leave out the spices – not even the Chipotle powder!

Moroccan-Inspired Pita Sandwiches
For Filling:

  • 1 ‘brick’ NON-silken style Tofu, cut to 1cm cubes
  • 1 small Onion, diced fine
  • 1 cup leftover Rice
  • 1/4 cup Dried Cranberries
  • 20 Cumin seeds, ground (approx 1/2 tsp)
  • 1 tsp Chipotle powder
  • 2 Tbsp roasted Pumpkin Seeds
  • 2 Tbsp Sunflower Seeds
  • Nutmeg (20 passes on the microplane)
  • Cinnamon (likewise, but maybe more)

For Dressing:

  • 3 Tbsp Olive Oil
  • 5 Tbsp Balsamic Vinegar
  • 1/2 ‘brick’ Silken Tofu (again, firmness doesn’t matter)
  • 2 Tbsp Bitter-Orange Marmelade
  • 1 Tbsp Mustard (again, hot is good)
  • 1 Tbsp Salted Capers, salt on

To assemble the filling:

  1. Spritz hot frying pan with olive oil & add tofu, pushing it to the center of the pan (or wherever’s hottest in your pan).
  2. Add diced onion around the outside of pan.
  3. When tofu has browned on one side, turn it (perfect doesn’t matter here, just getting it unstuck from the pan).
  4. Sprinkle on spices & continue to sautee gently until onions are slightly changed in color.
  5. Add rice and seeds, remove from heat, and cover.
  6. Assemble your dressing.

To assemble the dressing: Blend it.
While washing & chopping lettuce, lay a few slices of pita bread on top of your filling, to warm while you’re otherwise occupied.
Cut pita bread, fill with some lettuce, some filling, and some dressing.
Eat!