A Tale of Two (Apple) Sauces


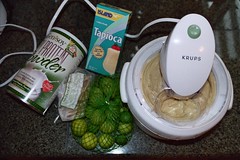
We begin our tale of two applesauces by introducing our 3kg bag of apples, courtesy of our local Box Scheme (everything seems to be a scheme here in Scotland – it baffles us, as a scheme has quite a negative connotation in the US, but apparently is perfectly reasonable over here), which arrived at our door by accident. Yes, we’d ordered windfall organic apples — once. The second week they arrived, we were a little nonplussed. So, what does one do with 6.5 pounds of apples? Sauce presented itself, naturally!

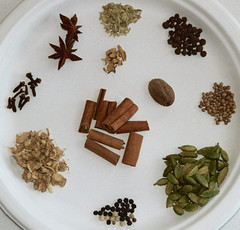
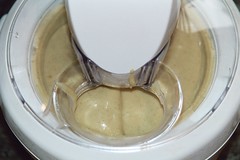
We fortunately brought out our beloved manual peeler to the UK & turned the handle for quite some time, ending up with a bowl of cores, a pile of peelings, and a heaping pot full of apples. Adding some spices (ginger, cinnamon, nutmeg), a squeeze of lemon, and a bit of time and heat produced sauce! We prefer lovely, chunky sauce (we added about 4 granny smith apples, as well, to increase the chunk/tangy factor). But that’s not the end of the story, quite … as we also made sauce from the peels! If you look carefully at the little glass, you’ll be able to pick out the two different colors of sauce. The peels got whizzed up with the stick blender (yes, it does everything in this kitchen). Funnily enough, it kind of tasted like pear. Strange, but good.

~~~~~~~~~~~~~~~~~~~~~~~~~~~~~~~~

You might wonder what to do with so much applesauce (other than eat it out of the pot, warm, with a bit of freshly grated cinnamon and nutmeg, or as a snack with unsweetened soy yogurt and a drizzle of honey – yum).

Applesauce keeps pretty well, so don’t panic if you can’t think of two hundred things to do with it right off. We use ours in a variety of ways. Some vegans use applesauce as an egg substitute – 1/3 c. per egg called for. While we’ve never personally tried that, we do know that applesauce is a great substitute for added fat in baking. You can substitute up to 3/4 of the amount of butter with applesauce when making muffins — and voilá, your muffins or quick breads are a little less pound-friendly. And then, there’s applesauce cake… which is deadly dangerous and addictive…

Applesauce Spice Cake
This recipe is a fiddled-with-it adaptation of one from Vegetarian Times.

* 1/2 cup molasses (or treacle if you’re in the UK!**)
* 1 cup applesauce
* 1 tsp. freshly ground cinnamon
* 1/2 tsp. cloves
* 1 tsp. baking powder
* 1/4 tsp. baking soda
* 1 3/4 cup flour (I use whole wheat pastry flour)
* 2 Tbsp. ginger (I use grated fresh and candied as well – it’s a SPICE cake!)

Combine the molasses and applesauce in a large bowl. Combine remaining ingredients and stir into the liquid. (If the batter seems very dry, add a little more applesauce or a little milk.) Bake in a nonstick or pan-sprayed 8*8-inch baking pan, in a 350 degree oven, for 30-45 minutes or until it tests done.

The optional ginger makes an amazingly good ginger bread. Another option is leaving out the ginger and adding 3 or 4 tablespoons of a good quality cocoa powder and a cup of semi-sweet chocolate chips to make a tasty but not very rich chocolate cake. If you use cocoa alone you might need to add extra sweetening, or really go all out on the frosting, but that depends on your taste.

We used the peels of the apples because… well, our parents weren’t old enough to go through the Depression (the most depressing thing that happened to them was probably JFK being shot and The Supremes splitting up), but both of us were brought up with parents who wanted us to clean our plates and not waste… so perfectly good apple peels being tossed, especially when we don’t have a compost pile here, made us a little sick. So, we knew we had to use them. One idea for using peels is to dip them in a little lemon juice to stop them from browning and then chop them and toss them with balsamic vinegar, stone ground mustard, and a little maple syrup as an accompaniment for salad of spinach, red onions, and mandarin orange slices. It’s very haute cuisine, yet simple.

Our first thought, because of the abundant pectin beneath the skin, was to make Apple Peel Jelly. Though we’ve heard it’s gorgeous and delicious, that really doesn’t taking advantage of the fiber in the peels, which is also so good and cholesterol-lowering, so we couldn’t use all of them that way. We came up with making a sauce from the peels – ’cause our immersion blender can do anything. And it turns out we were right not to toss them anyway — Cornell University published a study this last spring about the cancer-preventative properties found in apple peels. Score one for us!


**Treacle is a real pain — because we can’t find any unsulphured molasses, we’re using something called ‘molasses sugar’ which is dark, dark, DARK brown, dense and moist sugar. We just add a little extra applesauce to compensate for the moisture and go on. We’re learning to do that a lot here!


Golden Chick-pea Soup

Despite the push to read & write, we do manage to eat around here, and occasionally to create new recipes. Thus, with no ado whatsoever, I present to you a new one which we’ve particularly enjoyed with the rising darkness of Scotland’s winter.

Golden Chick-pea Soup

5 whole cloves garlic
3 Tbsp olive oil
500g frozen chick-peas (cooked, unsalted)
1 bullion / stock cube
4 medium tomatoes, chopped
1/2 cup dried chantarelle mushrooms
1/8 tsp freshly ground black pepper
1/8 tsp chipotle powder
1/16 tsp cumin seeds
1/4 tsp saffron threads
1/4 tsp dried sage (whole leaves – you can subst. 1/8 tsp or less powdered)
Water

Pour oil into your cold stock-pot & add whole cloves of garlic. Turn heat on to medium & let oil heat, covered, until your garlic starts to “pop” – not so it cooks, really, so much as just browns a tiny bit. Remove from heat until it stops popping – or you’ll be splattered with hot oil. Add in everything but the dried mushrooms, return to heat, and bring to a boil. Ladle out about 1 cup of your broth & use it to rehydrate your mushrooms. Let soup boil gently for 30 minutes, with your mushrooms sitting to the side. When you’ve grown tired of waiting, remove it from the heat, drain off the liquid from your mushrooms into the main soup, and puree the soup (I used a stick-blender) until thoroughly creamy. Add in your mushrooms. Serve alongside a portion of steamed rice.

Back to my cave of writing horror.

Baking for the Holidays


Starting with a very rough interpretation of the recipe Alton uses, I finally got around to putting together some fruitcake. It won’t be really done until around Christmas, of course, because of the need to spritz it every day for several weeks, and then to let it age, and let the sugars crystallize.

The fruit in these cakes is roughly equal portions of dried mango, pineapple, cherries, apricots, crystallized ginger, and raisins. This came out to about double what the recipe called for, in terms of fruit volume, so I doubled the dry ingredients in the recipe; it’s much easier to measure larger quantities of fruit, I say, and much better to be on the safe side with the amount of cake you make! What I ended up with in the end was the following recipe:

Ingredients:

  • 8 cups dried fruit, chopped
  • Zest of 2 oranges, chopped
  • Zest of 2 grapefruit, chopped
  • 2 Cups fresh-squeezed orange & grapefruit juice
  • 1 Cup vodka
  • 1 Cup cranberry juice
  • 1 large hunk fresh ginger, crushed
  • 3″ cinnamon stick
  • 20 allspice berries
  • 10 black peppercorns
  • 10 whole cloves
  • 1 Tbsp dessicated ginger
  • Guts of 1 vanilla bean
  • 2 Cups port wine
  • 1/2 Cup butter
  • 3 Cups whole wheat flour
  • 1/2 Cup oat bran
  • 1 Tbsp salt
  • 1 Tbsp baking soda
  • 1 Tbsp baking powder
  • 4 eggs, whisked

Steps:

  1. Mix fruit, peels & spices with juices & vodka. Let macerate overnight.
  2. Add fruit, port wine, and butter to a large non-reactive pot; heat to boiling; let simmer for 15 minutes, then cool to room temperature.
  3. Sift in dry ingredients; mix.
  4. Gradually mix in eggs.
  5. Pour into greased pans; bake at 325F / 160C for 1 hour
  6. Test with a toothpick.
  7. Spritz with port wine.
  8. Spritz with more port wine.
  9. De-pan onto a cooling rack, and spritz some more.
  10. Spritz for several weeks, once or twice a day.

Using Garam Masala: Chai Tea


As I’d said in my post on making Garam Masala, we like to do up our own. As to what to do with it, well, we usually end up using it in shakes or in various sweet dishes, but as I was making my morning pots of tea (I have two French Presses … so I make two), I realized that I’d left out an important bit: you don’t necessarily end up with one batch when you grind whole spices into masala.

You see, when you grind up all of your spices using a blade grinder, you usually get sick of the whole fine-mesh strainer process after about half an hour of grinding, sifting, grinding, sifting… so you just give up & bodge the larger bits into a jar & leave well enough alone. What to do with the leftovers, though? Well, if you’re like me, you put them into cheap black tea, and have your own version of Chai Tea. You get a subtly different flavor from the coarse bits than from the fine bits, primarily because the pieces which get left behind tend to be largely comprised of coriander hulls. But there’s enough of the other spices to give you that distinctive Masala flavor, and it’s a good use of something which would sit until chutney-making season. Of course, for the decaffeinated version, you can still use the fine-powdered Masala with your hot soy-milk & a bit of sweetener, but for the tea version, the coarse grind make for a clearer brew.

Apricot-Orange Scones


I’m going to present two methods to the following recipe: one for those who’ll be using a sourdough starter, and those who’re simply interested in making scones. If you’re not using the starter, you’re still going to be OK, because using a sourdough starter doesn’t add any mass to the party – it simply means that you’re going to let your starter play around in the flour & filtered water for a bit, and then you’re going to remove the same portion as you’d added. So, using a sourdough starter results in zero added liquid or solid to the recipe (we’ll ignore the bacteria and yeast). The sourdough changes the equation very little, except in terms of time, so it’d probably be easier to do this recipe without the sourdough … but, if you’re like me, you’ve got a starter sitting in the fridge, sulking, and you use it every chance you get, because baking bread twice a week is a bit much, but that’s what keeps the starter happy.

Apricot – Orange Scones:

  • Sourdough Starter
  • 5 C Whole Wheat Flour
  • 5 C Whole Oat Flour
  • 1 C Oat Bran
  • 1 tsp Salt
  • 2 Tbsp Baking Powder
  • 1/2 tsp Baking Soda
  • 2 C Filtered Water
  • 1 C Unsweetened Soy Milk
  • 1/2 C Sugar
  • 3 Tbsp Molasses
  • 3 Tbsp Honey
  • 3 Tbsp Maple Syrup (substitute Honey if you don’t use Maple, and vice versa)
  • 2 Tbsp Olive Oil
  • 1 tsp Vanilla Extract
  • 2 tsp Almond Extract
  • Zest of 1 Large Orange, Chopped
  • 1 C Dehydrated Apricots, cut into ribbons
  • 2 Tbsp Ginger Powder
  • 2 Cardamom Pods, seeds only, ground
  • 1 tsp Cloves, ground
  • 1 tsp Cinnamon / Cassia, ground
  • 1/4 tsp Nutmeg, ground
  • 2 Tbsp Fennel Seed, whole – don’t grind

    If you’re using sourdough starter, go through feeding & prepping step:
    Add filtered water to sourdough starter; add wheat flour to hydrate enough so that your starter can “feed” for several hours. After starter has fed, mix in enough wheat flour to bring it to the same consistency it was when you removed it from its home; remove same quantity of starter back to its home.
    Continue, or if you’re not using sourdough starter, simply start here:
    Mix dry ingredients, spices, fruit, and zest in one bowl, reserving some of the flour so that you don’t end up too dry (you can always add it, you can’t ever get it back out). Mix wet together in a separate bowl (sugars count as “wet” in this game). Add the wet to the dry and fold to combine, as you would biscuits. Turn out onto a floured board, knead briefly until the dough just comes together, then roll into a sheet approximately 1 inch thick. Sprinkle tops with sugar. Cut into triangles (I use a pizza cutter, cut into squares, then run through on the diagonal), place onto an oiled baking sheet, and bake at 400°F (205°C) for approximately 12 minutes, being careful not to overbake (you can always toss them back into the oven). Remove to cooling racks … or, you know, to your awaiting plate.


Disclaimer: this recipe was something whipped up today without a “base” recipe, and, thus, quantities listed are rather approximate (except for the baking powder & soda). This works for us because we can feel our way through. I strongly encourage you to reserve quantities of flour out, or to add more flour if needed, because the addition of flour to things in our household involves tipping a 5 pound sack and stopping when it looks to be a goodly amount.

This recipe yielded about 40 scones. They lasted a day – most were given away, but there were casualties. Be warned.

Bagels 1.0

I don’t know what it is that led somebody to poke a hole in a perfectly good roll, boil it, then bake it … but they’re tasty, I’m told, despite the labor involved. I’m sure that our kitchen will recover from the spatters and splashes, and I’m sure that I’m sucker enough to try it again.

I started with the basic olive bread recipe (see “What Goes Into Bread”), but instead of putting diced onions I went with onion powder, and I backed off on the seeds a bit, so that the dough would be a bit more bread & a bit less … “stuff.” From there, it was a matter of forming things into little doughnut-esque things and letting them rise … and then beginning the insanity.

After you’ve got enough of a rise out of them, you boil each bagel (I worked in batches of 4) for 5 minutes, with at least one “turn-over” in that period. I used the handle of a wooden spoon along with a large “spider” (one of those things you use to fish stuff out of the deep-fry). After their requisite 5 minutes of boiling, you place them onto an oiled pan in the oven at 500°F. The oil is important, ladies and gentlemen. I used canola spray … starting with the second batch of 4, of course, ’cause … well, just ’cause I wasn’t really thinking about it.

After they go into the oven, they’ve got to bake for about 15 minutes. You could go 20 – and I did, on a few – but 15 seemed to do the trick for me, as I wanted them to be a bit soft. I figured that you can always toast them, but you can’t un-cook them, so it was better to go a little underdone. I’m sure that nobody’s out there complaining.

But wait. Did you see it, friends? Did you see the fatal flaw in this whole mess? Let me hint at a bit more: you boil for 5 minutes; you bake for 15 minutes. What happens to the third batch of bagels that you threw into the boiling water? Oh, you mean, you’re going to reach into the (very steamy) oven, pull out a tray of partially baked bagels, skooch them over so that you can fit four more on there, and then keep on doing the same thing for the next, oh, hour or so? And what, pray tell, happens when you end up with four batches going, all underdone, and another batch coming off of the boil? Because unless you’ve got an awesome oven, one rack is going to cook differently then the other, and with all the opening and closing, there’s no chance you’re going to get things to cook according to some mathematically-possible scheme. (I did the math … and then did the thinking to determine why the math sucked).

Suffice it to say that I need a larger oven & to do a bit of pre-planning on this next time. I believe that this is why some recipes say to dunk your bagels in cold water after you’ve boiled them. You could probably float them all in the cool water bath & then load them into the oven all at one time, if you were smart. Or if you thought about it. Or if you planned to try this more than once.

Next time. Next time, it will be different.

Garam Masala


Shown here is our first (photographed) effort at making Garam Masala. We generally use this mix in something we’ll call chai … but which is actually just hot soy-milk, this spice blend, & a little sweetener. The quantities shown are what we used in this latest mix; each spice is labeled on the Flickr site, if you follow the link. You can also use this Garam Masala as a spice for black tea, to give you that authentic chai flavor, but with ingredients that you trust.

Laying out the spices like this is actually kind of important, if you want to know what you did, so that you can either duplicate the mix or change it later. In this mix I’ve incorporated slightly more anise-flavored elements, to provide more natural sweetness, and also tried to balance out all of the different flavors, so that you’re not overwhelmed by the cassia / cinnamon.

If you’re using this in a savory dish, you could add onion powder & garlic powder, and perhaps some hot pepper / capsicum. I tend to like the option, though, so leave this powder “plain.” With this mix, I’ll run it through the coffee grinder & then through a fine sieve / strainer, repeating several times until I’m sick of trying to grind dust. I’ll then take the coarse (leftover) bits & put them in one container, and the fine goes into another. We’ll use the coarsely ground pieces in spiced apples or something, as it generally has more of the ginger / cinnamon / allspice bits, which don’t really like to break down.

Note: I tend to avoid using too much of the actual licorice root, because it closely resembles – and behaves like – the hormone aldosterone; aldosterone regulates the body’s salt levels, and playing with that system tends to raise your blood pressure.

Leftovers Become Gelato


So last weekend we had some friends over, and we ended up with some leftovers. Now, I’m not talking about the little bits of prepared food which would soon be eaten (and were), but about leftover, perishable, raw ingredients such as a half-gallon of whole milk, and a couple of avocados. So, what to do? Gelato!

There really wasn’t much of a recipe, but … well, I’m going to try to document it, as it’s marvelously green, tasty, and a good use of ingredients. So here goes:

  • 1/2 Gallon Whole Milk
  • 16 oz Large (bubble-tea size) Tapioca pearls
  • 2 Vanilla Bean Pods
  • 2 Avocados, just ripe
  • Zest and Juice of 10 “key” limes
  • Assorted sweeteners (xylitol, honey, sugar, maple syrup) to taste
  • 3 Tbsp Ginger powder
  • 1 Cup Candied Ginger, chopped
  • 4 Tbsp Soy Protein Powder

Soak tapioca pearls in the milk overnight.
Add Vanilla Bean Pod guts, sweeteners, and soy protein powder, then bring to a rolling simmer (doesn’t make sense unless you’ve done tapioca – in which case, it makes sense) in a pan which looks too large for the purpose (you’ll need the room, for the rolling simmer).
Simmer, stirring constantly, until you get sick to death of standing there or until the tapioca doesn’t taste raw any longer.
Remove from heat, strain out the bubble tea bits and … dispose of as you see fit, as they’re no longer needed.
When liquid has cooled to a reasonable temperature, apply your stick blender to it & incorporate the rest of the ingredients except for the Lime Zest and Candied Ginger.
Fold in Lime Zest.
Cool overnight.
Fold in Candied Ginger.
Pour mixture into your (running) ice cream machine and let it run until the dasher sticks.
Remove mixture to a suitable vessel & thence into the freezer for at least four hours.

Yes, there are some ambiguities in there. And, yes, we probably could have achieved the same thing by using the tapioca flour sitting in the pantry, rather than using the bubble-tea tapioca pearls … but we didn’t know that when we started. You see, the decision to strain out the tapioca was made after we’d been all the way through the cooking process, at which point we determined that they were … well, just too strange to want to have frozen. So, we pulled them out. It works.


The one difference in the above recipe from what we did is that I incorporated the avocado earlier in the process … and I wouldn’t recommend it, as it makes it really difficult to taste for sweetness & flavor, as hot avocado really is an acquired taste. As it was, we played it safe by holding off on adding more sweetener & more lime until we had a chance to taste it chilled, and we’re glad that we did. Hot avocado throws everything off, so I recommend adding it when your mixture has cooled somewhat. Or not, you know, ’cause it’s your freezer that’ll be full of gnarly green goo, not mine.

Strange Days in the South-land

My friend Susan mentioned her love just the other day for all foods Southern, and the addition of the phrase ‘pimento cheese’ brought my childhood back to mind.

My Mom raised us as vegans a lot of the time… then there were those days when she did not. Born just outside of New Orleans, Mom wasn’t even raised vegetarian herself, so it was a hard transition for her when she moved to San Francisco in the sixties and got into what everyone else was doing – sprouting wheatgrass and whatever other kinds of grass they could get their hands on. Growing up, we had basically schizophrenic dietary habits that veered from full-on vegan to lacto-ovo vegetarianism. I can’t say that I ever suffered from this – I managed to be a tubby little thing regardless – but it did mean that we sampled hundreds of the most …unique recipes imaginable. Sometimes they were awesome. Other times… well, we love ya, Mom, but just about every kid goes through the lamentable phase of straight up tossing their school lunch into the trash… Me, on the argument that not even kids in Africa didn’t wanted soggy mashed tofu on sprouted wheat bread. (That was one of her misses. To her credit, she only made it without lettuce once or twice. The bread holds up a lot better if there’s lettuce protecting it.)

Just finishing a novel set in 1940’s Alabama-Iowa-Georgia and then a present-day cross-country trip to the South, I’ve been steeped in the particular food things that go along with the South… Grits. Black-eyed peas. Pimento Cheese. Susan got me thinking — about what pimento cheese actually IS, to those people who didn’t grow up at my house. I looked up pimento cheese, and understand now what the real stuff is: cheese. And cream cheese. And mustard. And hot sauce and pimentos and roasted pimentos and some people put in nuts. Mom’s pimento cheese was really, really, really good, but it didn’t contain any cheese at all. Mom’s recipe went something like this:

2 C. raw cashews

3-4 T. brewer’s yeast

1 C. water

1 C. oil

1/2 t. salt

1/4 C. lemon juice

2 t. onion and garlic powder

1/2 c. pimentos

2 T. soy “milk” powder (optional)

Basically, all that’s left to do is blend everything up, adding the oil last, and make a kind of cashew mayonnaise. Sometimes Mom added about 5 tbsp. of agar flakes to her pimento cheese. Agar gels, so it created the illusion of a more ‘solid’ spread.

When she used agar, Mom stirred it into boiling water, simmered it for five minutes, stirring frequently, and then when it was cooked, she added it to the other ingredients in the food processor. All ingredients were then blended for about three minutes, then poured it into whatever mold and put it in the fridge overnight.

There are a lot of variations one can do with pimento cheese, too – adding chopped green olives, or toasted sesame seeds or caraway or dill… the list goes on. Sun-dried tomatoes and basil is quite good, or you could add onion flakes…

On the face of things, Mom’s recipe seems pretty good, but since I never do know when to leave well-enough alone, I have a few thoughts I’d like to try. For one thing, doesn’t this sound like something that would taste great with the addition of Vegemite? Why use a powdered yeast when you can use the brown glop in the yellow can? And it seems to me that silken tofu should somehow play into this. ‘Cause doesn’t tofu go with everything?

If nothing else, I’ve enjoyed plumbing the depths of my back-brain, and remembering one of Mom’s more random recipes that worked. If only I could figure out a way to make cashews less than 157 calories an ounce, I’d eat this every week…

Thoughts of Harvest

This morning, in preparation for next weekend’s guests, I made up a batch of dried tomato tapenade. This took up the last of our dried tomatoes except for what I’ve got stashed in the deep-freeze (two, one-gallon freezer bags). I’m feeling like last year’s harvest is finally running out, and that as soon as I make it through the rest of the dried squash, it’ll be time for harvest to begin again! What marvelous timing, and what great time to be exchanging correspondence with Jackie of One Thread Two Thread regarding what to do with all of that excess produce.

Jackie tells me:

With my green tomatoes, I usually make relish. I have an allergy to mustard and so most store bought relishes are inedible by me. I usually don’t have too many green tomatoes. Most of the plants that we grow are short season plants, any where from 48 to 80 days (from transplant) with the average being about 70. I also (much to my husband’s horror) start pinching off any blossoms about the second week of August. It concentrates the plant energy into ripening the already set fruit. At least that is what I have been told.
I would love the recipe for your fruitmince. I am always willing to try something new in the preserves department.

So, by way of sharing, I’ll provide you with the recipe I used as a base, which comes from the Ball Blue Book of Canning and Preserving, and will also point you to my earlier post on mincemeat, and to Cook Almost Anything‘s pretty pictures of dried fruit … which also gives directions for making fruitmince.

Do note that this recipe is merely a starting place for making fruitmince. We’ve done it faithfully all of once, and have since altered it into “whatever’s on hand that sounds good.” We’ve combined it with the recipes for Tomato Apple Chutney, Curried Apple Chutney, and Peach or Pear Chutney. But here’s the starting point:

Brandied Mincemeat

  • 4 chopped Fuji apples (or similar firm variety)
  • 4 cups cranberries
  • 2 pounds raisins
  • 1 pound currants
  • 1 pound figs, chopped
  • 2 ground and seeded oranges and zest
  • 2 ground and seeded lemons and zest
  • 1 cup candied orange peel
  • 1 cup candied lemon peel
  • 2 cups brown sugar
  • 1 Tbsp cinnamon powder
  • 2 Tbsp ginger powder
  • 1 cup candied ginger
  • 2 tsp ground allspice
  • 1 tsp ground cloves
  • 1 quart apple cider vinegar
  • 3/4 cup brandy
  • 1/2 cup dry sherry

Combine all ingredients, except alcohol, in a large nonreactive vessel. Simmer 1 hour, stirring occasionally. Remove from heat; stir in brandy and sherry. Return to heat; simmer 30 minutes. Ladle hot mincemeat into hot jars, leaving 1/2 inch headspace. Remove air bubbles. Adjust two-piece caps. Process 30 minutes in a boiling-water canner.

From there, what we’ve done is to basically add a whole bunch of green tomatoes, increased the spice factor by at least double if not quadruple, added quantities of Pomona’s Universal Pectin (to the cold liqids), and added more vinegar and more alcohol. We’ve also, because we’re unsure of the acidity and because of possible alkaloids present in the green tomatoes, processed these at high temperatures in a pressure canner.

We’ve found that pressure canning things really destroys any pectins; nothing will gel after it’s been up to those temperatures. So, don’t bother with the pectins if you’re going to go for pressure canning these. We’re a bit nervous about the acidity, so we usually go for the pressure option, especially when we’re “just throwing things in.” That said, the liquids added here are either vinegar or citrus or alcohol, and increase the acidity quite a bit. Between those and the sugars, we’re probably quite safe.

What do you do with this when you’re done, you ask? Why, you make pie! Depending upon how firm you want it, you add between 2 and 4 Tablespoons of corn starch to 1 quart of fruitmince, throw that into a pie shell, and bake for about an hour and a half. If you underbake it, it’ll be kind of milky and soft in the center, and that’s just not appetizing. This last year we made over 100 quarts of the fruitmince plus another 10 quarts or so of chutney (basically, add some onions, curry powder & some hot peppers to the fruitmince & you’ve got it). We have about 3 quarts left, and those are in little bitty jars for making tartlets. That’s it. Everything else is either firmly encamped about our middles, or has gone to friends.

I encourage you to experiment, to grow more than you think you can eat, and to preserve things!