Strawberry Raspberry Mirror Cake

This is my first entry into the world of the Daring Bakers’ monthly challenge. This month’s challenge recipe was something called a Strawberry Mirror Cake (but which I did in Raspberry instead). It involves heaps of dairy, and is about as far from anything Vegan as I’ve done in a loooong time. However, the people who consumed it said it was wonderful, so here’s to feel-good food.

The biggest surprise for me in this recipe was the complexity. In reading through it, you end up having to follow footnotes, essentially, to see how to make the components. Once you’re there, though, it’s not really as complicated as it seems, so I’d encourage you to simply step through, and you’ll get there. That said, the assembly involved quite a lot of work, and I found myself thinking that it must have been an “industrial” recipe or something; if you were to scale it up, and make a dozen of them, then you’d have just a bit more work (in terms of laying out cakes, slathering on Bavarian Cream, pouring gelatin), but you’d have a dozen cakes instead of just the one.

This was very much an effort for me, as I’m not particularly inclined to follow instructions on a good day – I tend to treat recipes as a list of ingredients that somebody thought was a good combination, the quantities as rough guides, and the instructions as a not-so-interesting narrative which has caused the ingredient list to be written in too-small of a font to be useful in the kitchen. That said, I tried and tried to follow the instructions, as per The Rules. I balked, however, at the idea of cutting away nearly 1/3 of the cake and simply throwing it away. I read the recipe over, concluded that I wouldn’t be throwing away all that cake, and deviated by using 3 8-inch pie plates to bake the cake in. I apparently should have then thrown away that extra cake, but I just included it in my cake.

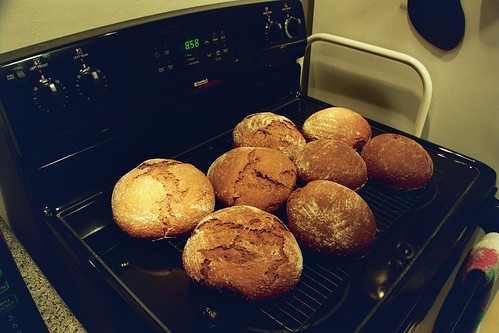
What I ended up with (because I also was unwilling to go buy a bigger springform) was an enormous cake which threatened to escape the pan. I had to basically use my trowel spatula to carve out an area in which to pour the gelatin mirror, and then had to cover up the edges of my little pond of gelatin with cherries (I figured that, since the recipe used cherry liquor, it could benefit from some cherries on top, too).

If I were to make this cake again, I’d probably pipe in the Bavarian Cream, because I ended up with some irregularities around the edges, which detracted from the overall presentation. I’d also invert the bottom of the springform pan, so that it’d be easier to remove the cake (avoiding that annoying little lip). Other than that (and, well, using a larger springform pan), I think that the recipe is fairly straightforward, if labor intensive.

The mirror had bubbles: I slurped them off of the top with a straw … and I poured the mirror with the cake already settled onto a shelf in the fridge. I’m certain that any production kitchen would be horrified at the picture of a long-haired guy squatting in front of an open fridge … slurping away with a straw. But there it is, and was. It was the only possible way I could get the mirror onto the cake!

Just as interesting as the recipe, though, is the nutrition data for the strawberry version of this cake, and for the raspberry version (substitute 20oz frozen raspberries for the strawberries). Notice that I’ve got 24 cherries around this cake? Yep – each cherry is a single serving. So, if you’re like my dad, and you took 3 cherries on your first plate … well, let’s just say that you’ve eaten over half of your daily allowance of saturated fat in that one piece.

Strawberry Mirror Cake

Special Pans: 11 x 17″ Jelly Roll Pan, 10″ Springform Pan, 8 1/4″ Cake Round or Tin (or pattern)

Ingredients/Steps:

A. Strawberry Mirror Cake

  • 3 eggs
  • 3 egg yolks
  • 0.75 cup sugar
  • 1 tsp vanilla extract
  • 3 egg whites
  • 1/8 tsp cream of tartar
  • 2 TBSP sugar
  • 2/3 cup sifted cake flour
  • 0.5 cup water
  • 1/3 cups sugar
  • 2 TBSP kirsch or strawberry liqueur
  1. Preheat oven to 450F. Butter and flour the sides of an 11-by-17 inch jelly roll pan(rimmed baking sheet). Line bottom of pan with a sheet of parchment paper cut to fit bottom pan exactly.
  2. Beat eggs, egg yolks and.75 cup sugar together in a medium bowl until thick and light. Beat in the vanilla.
  3. In a separate bowl, beat the egg whites until foamy, ad cream of tartar and beat until whites begin to form peaks. Add the 2 TBSP sugar and beat until the whites hold stiff, glossy peaks(do not over beat).
  4. Sift flour over the egg yolk mixture and fold in . Stir in one fourth of the whites. Then carefully fold in the remaining whites.
  5. Spread batter evenly in pan. Bake until light brown and springy to touch (7 to 10 minutes).
  6. Cool in pan 5 minutes. Run a knife along edge to loosen. Invert cake tin to cut out 8.25 inch circles of cake. Wrap the cake layers, separated with waxed paper, and set aside. Cake may be frozen at this point.

B. Strawberry Bavarian Cream

  • 2.5 TBSP unflavored gelatin
  • 1.5 cups strained strawberry puree(1.5 baskets)
  • 5 egg yolks
  • 2/3 cup sugar
  • 1.5 cups milk
  • 1 TBSP lemon juice
  • several drops of red food coloring
  • 1.75 cups whipping cream
  1. Sprinkle the gelatin over the strawberry puree in a small bowl and set aside until spongy.
  2. Combine egg yolks and sugar in a bowl’ beat until light. Bring milk to a boil in sauce pan. Pour hot milk into yolk mixture ans stir with a wooden spoon(it doesn’t say so but I would temper the egg mixture first to be safe). Return this mixture to the saucepan and cook over medium heat, stirring constantly, until your finger leaves a clear trail in sauce when drawn across the back of the spoon.(Do not boil or mixture will curdle.) Immediately remove from heat and stir in softened gelatin mixture. Pour into a stainless steel bowl places over a bowl of ice water. Stir in lemon juice and a few drops of red food coloring. Cool over ice water, stirring occasionally, until mixture thickens to the consistency of softly whipped cream.
  3. While gelatin mixture is cooling, whip the whipping cream until it holds soft peaks. When the gelatin mixture resembles softly whipped cream, fold the whipped cream into the gelatin mixture.

Strawberry Mirror

  • 1 tsp lemon juice
  • 1 TBSP kirsch
  • 1 TBSP water
  • 1 TBSP unflavored gelatin
  • Few drops of red food coloring
  1. Prepare strawberry juice.
  2. Place lemon juice, kirsch, and water in a small bowl. Sprinkle gelatin over this mixture; set aside until spongy and soft.
  3. Measure 1.5 cups Strawberry juice into a small saucepan and bring to a simmer; pour over gelatin mixture and stir to dissolve gelatin. Tint to desired color with red food coloring. Place bowl over bowl of ice water and stir occasionally until the mixture is syrupy and just beings to thicken(do not let jell); remove from ice water.
  4. When mixture is syrupy, pour a 1/16-inch layer over the top of cake. Refrigerate until set.

Strawberry Juice

  • 1.5 pints of strawberries(18 oz)
  • .75 cup sugar
  • .75 cup water
  1. Wash and hull strawberries; coarsely chop.
  2. Place strawberries in saucepan; crush to start juices flowing. Place over low heat; add sugar and water; simmer slowly 10 minutes.
  3. Pour juice and pulp through damp jelly bag or cheesecloth-lined colander and drain into a bowl for 15 minutes (Do not press down on fruit).

Pumpernickel 2.0

It was difficult for me, but I held back from adding any truly interesting ingredients to this bread. It’s the first attempt, you see, at trying to duplicate Westphalian Pumpernickel bread. After my first attempt, I did a bit more research, and arrived at the Wiki article, and then realized that what I’d been making was American Pumpernickel. Long article short (for those who don’t want to go there), American Pumpernickel adds a whole bunch of things to duplicate the color of Westphalian Pumpernickel (namely chocolate, molasses, prunes and the like) and also adds Caraway Seeds in an attempt to duplicate the flavor.


So, I held back on the things I’d usually throw into a savory bread, and ended up with a truly basic, sourdough rye. I started it off with 1 cup of my sourdough starter, but everything past that point was rye. I fed it on rye flour, gave it whole, steamed rye berries, and stirred it every couple of hours for two days (except at night, of course, because that would’ve awakened the birds, who would awaken the rest of the house). It was necessary to let it sour to some degree, because rye flour tends to be a bit alkali, so yeast doesn’t work properly unless you let it sour or give it something to acidulate the flour. Next time I won’t let it go quite so long, as it is truly a sour bread.


I was told at the time that I should have let it raise a bit more, but I was concerned about not letting it over-rise. I shouldn’t have worried, and should’ve let it go, because I ended up with quite a dense couple of loaves. That said, though, the incorporation of such a quantity of whole rye berries gives a good, chewy texture, and the aroma is uniquely rye: slightly bitter, slightly floral, somewhat reminiscent of barley, but its own. Baked at 250°F, the crust is essentially nonexistent. As you can see, it slices quite thinly, which isn’t possible with wheat, necessarily. I don’t know if it’s due to the density, or due to the lower gluten content, but it certainly lends itself to those strange little sandwiches one encounters at parties.

Apricot-Orange Scones


I’m going to present two methods to the following recipe: one for those who’ll be using a sourdough starter, and those who’re simply interested in making scones. If you’re not using the starter, you’re still going to be OK, because using a sourdough starter doesn’t add any mass to the party – it simply means that you’re going to let your starter play around in the flour & filtered water for a bit, and then you’re going to remove the same portion as you’d added. So, using a sourdough starter results in zero added liquid or solid to the recipe (we’ll ignore the bacteria and yeast). The sourdough changes the equation very little, except in terms of time, so it’d probably be easier to do this recipe without the sourdough … but, if you’re like me, you’ve got a starter sitting in the fridge, sulking, and you use it every chance you get, because baking bread twice a week is a bit much, but that’s what keeps the starter happy.

Apricot – Orange Scones:

  • Sourdough Starter
  • 5 C Whole Wheat Flour
  • 5 C Whole Oat Flour
  • 1 C Oat Bran
  • 1 tsp Salt
  • 2 Tbsp Baking Powder
  • 1/2 tsp Baking Soda
  • 2 C Filtered Water
  • 1 C Unsweetened Soy Milk
  • 1/2 C Sugar
  • 3 Tbsp Molasses
  • 3 Tbsp Honey
  • 3 Tbsp Maple Syrup (substitute Honey if you don’t use Maple, and vice versa)
  • 2 Tbsp Olive Oil
  • 1 tsp Vanilla Extract
  • 2 tsp Almond Extract
  • Zest of 1 Large Orange, Chopped
  • 1 C Dehydrated Apricots, cut into ribbons
  • 2 Tbsp Ginger Powder
  • 2 Cardamom Pods, seeds only, ground
  • 1 tsp Cloves, ground
  • 1 tsp Cinnamon / Cassia, ground
  • 1/4 tsp Nutmeg, ground
  • 2 Tbsp Fennel Seed, whole – don’t grind

    If you’re using sourdough starter, go through feeding & prepping step:
    Add filtered water to sourdough starter; add wheat flour to hydrate enough so that your starter can “feed” for several hours. After starter has fed, mix in enough wheat flour to bring it to the same consistency it was when you removed it from its home; remove same quantity of starter back to its home.
    Continue, or if you’re not using sourdough starter, simply start here:
    Mix dry ingredients, spices, fruit, and zest in one bowl, reserving some of the flour so that you don’t end up too dry (you can always add it, you can’t ever get it back out). Mix wet together in a separate bowl (sugars count as “wet” in this game). Add the wet to the dry and fold to combine, as you would biscuits. Turn out onto a floured board, knead briefly until the dough just comes together, then roll into a sheet approximately 1 inch thick. Sprinkle tops with sugar. Cut into triangles (I use a pizza cutter, cut into squares, then run through on the diagonal), place onto an oiled baking sheet, and bake at 400°F (205°C) for approximately 12 minutes, being careful not to overbake (you can always toss them back into the oven). Remove to cooling racks … or, you know, to your awaiting plate.


Disclaimer: this recipe was something whipped up today without a “base” recipe, and, thus, quantities listed are rather approximate (except for the baking powder & soda). This works for us because we can feel our way through. I strongly encourage you to reserve quantities of flour out, or to add more flour if needed, because the addition of flour to things in our household involves tipping a 5 pound sack and stopping when it looks to be a goodly amount.

This recipe yielded about 40 scones. They lasted a day – most were given away, but there were casualties. Be warned.

Pumpernickel 1.0

Last night’s experiment was in Pumpernickel Bread. If I’d read the Wikipedia article beforehand, I might have gone out and bought some rye flour and spent another day at it. As it was, though, I believe that, for a first experiment, I’ve ended up with a nice, American-style Rye.


After final knead Divided

I basically started with my regular sourdough starter, fed it & let it run wild all day on the counter, removed out the piece which goes back in the fridge, and started adding crazy things to it. The crazy things were: lots of molasses, cocoa powder, fennel seeds, caraway seeds, and dill seeds. From there, it was a matter of working in more whole wheat flour, a fair amount of oat bran (2 cups, as opposed to my usual 4 cups of fiber), and some white flour, just for good measure. Oh – and some olive oil, because one of the consistent features of all of the recipes I examined on the web was that they included fat of some kind, be it shortening (!), butter, oil, or olive oil.


15 Minutes into the rise 1 Hour into the rise

After an exceedingly long rise (about 1:20), I felt that they’d finally achieved the amount of rise needed to go into the oven. I don’t know what’s up with that long rise time, but I suspect it’s because of the oil, molasses, and chocolate all acting as inhibitors to my yeast’s growth. In any event, in they went, to come out when they were almost 190 degrees F (probe thermometer). I pulled them early, because I figured they’d carry over, and I wanted a more tender bread.


All Done!

I’m told that it’s a milder flavor than other Pumpernickel, which may or may not be a good thing. I think that, next time, I’m going to go for the sourdough Rye thing, and the long bake time which is characteristic of German Pumpernickel. Just, you know, to see what that’s all about. And also because I found it truly difficult to part with all of that cocoa powder. Really really difficult.

What Goes Into Bread


I finally broke down and bought myself an industrial quantity of Oat Bran. I’d bought a 25 pound sack of whole oats, because I could throw most of them in the freezer, and because we have a penchant for steamed oats for breakfast, but this? This is a commitment to baking (although some of us have eaten the stuff as a hot cereal, that’s just not normal).

So, the industrial quantity of bran, because the sourdough starter has just … well, exploded. I don’t know what’s up with it, but I’m having to bake about twice a week now, just because the stuff really wants to escape from its jar. I’m having to stir the stuff at the very least every other day, or else it pressurizes the jar and leaps out when I open it.


Into every batch of bread goes the same quantity of Fiber. Not that many of the batches are the same, or even mostly the same, but that the fiber provides the … anchor for it all. Two cups Flax Seeds (golden, because they’re more attractive in bread) and two cups of Oat Bran. From this, and lots of other stuff, will eventually come four loaves of bread. Could be sourdough (these days even my sweet breads are), or it could be otherwise, but this provides the anchor, and is why people love the stuff, I believe. You see, despite people’s fear of fiber, I think that they really want a hearty, crunchy, hefty bread. Not that this amount of fiber will kill the bread, by any means, but that it’ll give a good … heft to it all.

In today’s case, we’re making a Triple-O bread: Onion, Olive, Oregano. Also in there, playing bit parts, are rosemary, sage, thyme, mustard seeds (brown only, ’cause I’m out of yellow), sourdough starter, whole wheat flour, and a small bottle of Moscato wine. Sometimes I’ll go with Merlot, but lately it’s been Moscato, because of the sweetness, and because the Merlot makes it a bit too dark in color if I’m feeling like making a sourdough which could pass as anything other than whole wheat. The Merlot will make it kind of pink; it will enhance the color of the whole wheat flour, where the Moscato will leave it light in color.


Rather than go for the fancy wooden peel, I’ve been sticking with cardboard rectangles. Notice the little splash of cornmeal visible there underneath the loaves? That’s to make it easier to get onto the stone, which is heating away in the oven, which is set at 505 degrees F. (No – I don’t know why 505 and not just 500; it’s just the way I do it, and it makes me happy.) I discard the cardboard after a few months, or when it starts to suffer from having been sprayed with Olive Oil, which has been the case today. Sometimes it’s flour for the tops, if I’ve been using a white flour, but sometimes it’s just oil to keep the plastic from sticking to the tops while they rise.


So, after the long tortuous wait, it’s off of the stone and onto the cooling racks, where it’ll be covered with towels and will wait overnight, to be sliced up and shared with friends. We’ve found that it’s better to let it settle overnight, so that its moisture content can balance, and so that the glutens can really set up. It’s much easier to slice, and you’re less likely to indulge in that “half-a-loaf by way of sample” trap, which was getting way too common for us.

Everything’s Just Ducky

The weather’s just dandy, ducks!

I still can’t believe that this duck pattern is so simple, but I’m looking at the instructions, and I’ve got the googly eyes, so I guess I’m going to give it a go.

Happy Pesach, Good Friday, Spring & Weekend to Everybody. Now that I am actively trying to…reduce (grump, grump, GRUMP!), I have to be a bit less… er, social, which means no more swanning around from house to house chatting up friends and relatives and indulging in whatever little Cadbury bits people bestow upon me (around this time of year, it’s just as well — I mean, marshmallow PEEPS! UGH! Not that it stopped me from eating them, sadly.). However, I shall still come bearing gifts when I do pop by — and what better time of year than to bring macaroons?

Macaroons are a traditional cookie during Passover for Jewish families because they follow kosher laws – they contain no wheat, rye, barley, oats and spelt that take more than 18 minutes to cook completely (after coming in contact with water), and no leavening. The recipe I found is for almond macaroons, which is traditional, or you can use Mac’s ultra-healthy, chewy coconut/okara macaroons. (Even if you don’t have okara, those are quite tasty!)

ALMOND MACAROONS

2 cups almonds (1 1/2 cups ground)

1 cup xylitol (or sucanat or white sugar)

Zest of 1 large lemon

3 egg whites

Canola oil cooking spray

A blender

A mixer

FIRST, Preheat oven to 275.

NEXT, Line a cookie sheet with heavy duty foil and spray with canola oil.

* In a covered blender, chop up the almonds half at a time until finely ground.

* In a bowl, beat the egg whites with a mixer until they form soft peaks.

* Add the lemon zest.

* Gradually add the Sucanat and beat until the whites are very stiff and shiny but not dry.

* Fold in the ground almonds.

* Take spoonfuls and drop onto the cookie sheet about 1 – 1 1/2 inches apart.

* Bake for 20 – 30 minutes, or until edges are hard, but the middle is still soft and golden.

* After 5 minutes, carefully place the foil with the baked macaroons on a cookie sheet to cool.

These are a bit like sugar cookies – the almonds, when finely ground, look a little like raw, browned sugar. A dip in chocolate, and they’re even better! And speaking of a chocolaty – and still healthyish – macaroon alternative, try:

Chocolate-Coconut Macaroons

* 3 cups unsweetened coconut, lightly packed

* 1/4 cup cocoa

* 1 cup sugar

* 2 tbsp. matzah cake meal or potato starch

* 4 egg whites, room temperature

* 1 teaspoon vanilla extract or orange (or lemon or pineapple) juice

* 1/4 cup honey

FIRST, preheat the oven to 325 F. Place parchment or nonstick baking sheets.

Place coconut, cocoa, sugar, and matzah meal in food processor bowl. Pulse until coconut is finely ground, about 10 seconds. Add egg whites, vanilla and honey. Process until everything is well mixed, about 10 seconds.

Spoon well-rounded teaspoonful of mixture onto baking sheets, leaving 1 inch between cookies. Bake for 12 to 14 minutes, until dull and no beads of moisture show. Using a metal spatula, carefully remove from parchment onto racks to cool. Makes about 32 cookies.

Be sure and have some handy storage for these – they’ll last a couple of weeks in an airtight tin. Cheers!

Week… end. (Please! I beg of you)

Some day/When I’m awf’ly low/ And the world is cold/I will feel a glow just thinking of you…

Yeah, you thought it was the way you looked tonight. Nope. It’s food again. Sorry to all the romantics out there, but by this point in the week, I can’t even see you, much less think of you when everything is going to the pot.

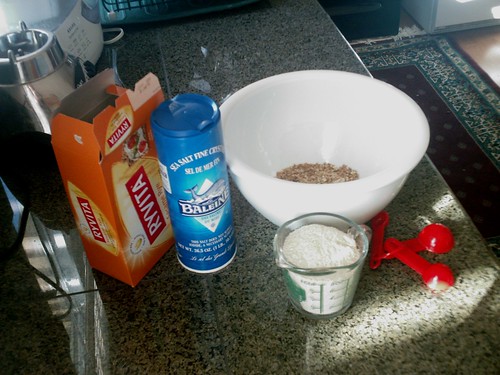
I thought I should blog about Baking Powder Biscuits this last week when I woke up and realized we hadn’t steamed the breakfast grains (sigh!) and so we would either need to wait an additional hour to eat, or I’d have to come up with something quickly. I wish I’d taken pictures of the first biscuits – they were elegant looking and had that effortless perfection that you only really achieve when you’re not setting up a stupid photo shot and trying desperately to get your food to cooperate. At any rate, when the world has all gone to hell, and you’ve had a bad night, or are without options for a quick breakfast, plain old drop biscuits are just very nice. For those playing along in the UK… they’re… um, muffins? Savoury scones? Who knows. We called them tea cakes if a bit of vanilla and sweetener was added and they were neatly rolled, but they’re basically

Whole Wheat Baking Powder Drop Biscuits,

(and this is BASIC recipe:)

* 1 cup whole wheat flour

* 1 cup all-purpose flour

* 1 tablespoon baking powder

* 1 teaspoon salt

* 1/4 cup canola or olive oil

* 3/4 cup unsweetened soy milk

(Perambulation: Now, I’ve said “basic,” which means that there are infinite variations. For instance, instead of the two cups of flour, I substitute four rye crackers, crumpled up, which about equals a cup. Once I added a cup of tortilla crumbs. It depends on how you’ll use them in your meal. I rarely add a full quarter cup of oil, either. I prefer drier biscuits, so I use about two tablespoons. I also use very cold water in place of soy milk, but that’s just me.)

DIRECTIONS

1. Preheat the oven to 450°F (220°C).

2. Stir together the whole wheat flour, all-purpose flour, baking powder, and salt. Combine the oil and soy milk in a measuring cup. Pour into the dry ingredients all at once, and stir just until the dough pulls away from the sides of the bowl. Drop by heaping spoonfuls onto a baking sheet.

3. Bake for 8 to10 minutes in the preheated oven, until the biscuits are browned on the top and bottom.

Further Perambulation: One thing to remember is that less stirring with biscuits is …more. They’re not meant to have a hugely built-up gluten in them, or they will get quite …rocklike. So just put your ingredients in, mix up the drys dry, and then, once you add your liquid, keep your wooden spoon stirring to the bare minimum it takes to get the ingredients all combined.

And don’t be afraid to experiment more. These can be made savory with various onion powders, 1/4 c. of low moisture shredded cheese, or black pepper, or made sweet with various spices and 2 tbsp. of sugar. Find your own bliss!

So, here’s the finished product. I put pretzel salt on a couple of them for the guy who likes to think everything is a big pretzel… and, as I said, these weren’t the prettiest, because I didn’t use unbleached flour, but whole wheat and rye. But they were moist, tasty, and light.

When you feel like everything you touch in the kitchen is turning to sawdust and ashes, you can still make baking powder drop biscuits. use them to top a quick potpie or to accompany soup and salad. Slather them with jam and margarine or top with strawberries for a shortcake type dessert. They’re easy and make you feel like you’re somewhat kitchen-capable again. At least it works for me.

Baking During the Remodel

I managed to bake some bread yesterday, despite the remodeling going on. It wasn’t a matter of having run out of bread (‘though we had), but a matter of seeing the neglected sourdough starter sitting in the fridge, going darker and darker, and of knowing that it would die in another couple of weeks if I didn’t do something with it. So, I pulled it out and let it roam free for a while (about 9 hours), and then turned it into some lovely olive bread.

I didn’t take the time to steam any whole grains to put in this (barley or oat would be choice), but it’s not missing it much. I took my basic sourdough starter, gave it 4 cups of water & enough flour to bring it back to consistency. After it’d been sitting out all day, I added some more flour & then removed a portion to go back into the fridge. To the remainder I added:

  • 2 Cups Oat Bran
  • 2 Cups Golden Flax Seeds
  • 1 Cup Merlot
  • 1/4 Cup Potato Flour
  • 1 Large Onion, chopped
  • 3 Tbsp yeast
  • 1 Tbsp Yellow Mustard Seeds
  • 3 Tbsp Brown Mustard Seeds
  • 1 Tbsp Sage
  • 1.25 Tbsp Salt
  • 8 Sprigs Fresh Rosemary, chopped
  • 16 Oz. “Spicy Pimento Stuffed” Olives
  • 1 Cup Sun-Dried Tomatoes (well, not really: they’re from our garden; we dried them in a dehydrator)

From there, it was a matter of kneading, forming, rising, and sliding onto baking stone in a 500 Degree F. oven which had preheated for a good 25 minutes. Oh – and sprinkling some French sea-salt on top before they went in.

Note the granite tile? Grout’s still not sealed, but that’s going to happen tomorrow … or, rather, that’s what I’ve been told several times now. He’s running out of projects to do other than the ones he says he’s going to do, so I figure he’ll get to it when he’s got nothing better to do. Or, rather, just nothing else to do.

Everyday Brown Bread

For those who’ve heard me talk about baking bread and don’t really want to “wing it,” here’s what I basically end up doing when I bake “sandwich” bread, or non-savory bread. If you want a savory bread, you’re looking for the recipe at Barley Boules, which can also have olives added to it & give you olive bread. The recipe below is for people who shy away from true Whole Wheat bread; if you want (and I do), you can simply swap Whole Wheat for the White flour & you’ll be OK.

Basic Everyday Bread:

  • 4C water
  • 2C whole wheat flour
  • 2C white flour
  • 1C Quinoa flour (optional, but recommended)
  • 2C Flax Seeds (I use golden, but it doesn’t matter except in appearance: dark seeds make mottled looking bread)
  • 1/2C Oat Bran
  • 1/4C Wheat Germ
  • 1C Molasses
  • 1/2C Honey
  • 1 Tbsp sugar
  • 2 Tbsp Yeast (not the rapid-rise junk!)
  • 1 Tbsp salt
  1. Proof yeast in bottled / filtered water (bring water to 105-110 deg. F, add sugar, add yeast, wait 10 min’s for it to “bloom”).
  2. Add whole wheat flour (and Quinoa flour, if you’ve got it) to water & cover with plastic wrap (I put a heating pad on low underneath the bowl if the house is cool). Let this rise until tripled in size.
  3. Add honey and molasses and mix in white flour until you have a very moist dough-ball (don’t add too much!). Let this rise until doubled in size.
  4. Add the dough ball & then set the mixer to knead the dough. Let it knead until you’ve got the consitency of chewing gum – don’t worry, you could go for about 15 minutes and not overknead. I’ve had the Kitchenaid overheat ’cause I let it go so long, and it was just fine.
  5. Add all the seeds, bran, wheat germ, and the salt (don’t forget that, whatever you do, ’cause it controls the yeast growth) to your Kitchenaid’s mixing bowl along with a little bit of white flour, and let it knead at least until all of the seeds have been incorporated. Keep adding little bits of white flour to keep the dough from sticking to the sides, as needed.
  6. Dump out onto a floured surface and let rest for a bit; divide into 4 loaves; shape and place into oiled loaf pans; spray tops with olive oil; cover with plastic and let them rise until they’ve almost doubled in size. (You can tell that they’ve risen enough if, when you poke them gently, the dimple doesn’t really want to spring back)
  7. Place into a 350 deg. F oven & bake until interior temperature (probe thermometer, here) is 190 deg. F. You can go a bit darker or a bit lighter than 190, but not more than 5 degrees lighter or you’ll have raw dough.
  8. Let cool in their pans for about 10 minutes, so they “sweat” and release from the pans.
  9. Cool on racks, covered with a tea-towel, overnight & they’ll be easier to slice.

Lemon Death

This one’s something to make about once a year, and to have lots of friends around to help you eat, because it’s all about being special. I picked this one up from a coffee shop I worked for when I was in college. They’ve since gone out of business – probably due to killing their customers off with such rich food as this:

Artery-Coating Lemon Cake:

  • 5 Lemons
  • 2 Cups Granulated Sugar
  • 1¼ Cups Buttermilk
  • 4 Eggs
  • 3 Cups White Flour
  • 1¾ tsp Baking Powder
  • 1 tsp Baking Soda
  • ¼ tsp Salt
  • ¾ Cup Unsalted Butter, melted
  1. Mix Butter and Sugar until smooth. Add eggs one at a time, while mixing with a hand mixer. Set mixture aside
  2. Process Lemon Peels in food processor until the pieces are smaller than grains of rice – they should almost seem like a coarse flour.
  3. Mix Lemon Peels with remaining dry ingredients.
  4. Mix one third of the dry mixture into the creamed, then mix in one half of the buttermilk, then one third or the dry mixture again, then the remaining buttermilk followed by the remaining dry mixture.
  5. Pour into 2 greased 9″x5″ pyrex loaf pans. Bake at 325°F for 50 to 55 minutes. Allow to cool in the pans before removing to a platter, not to a cooling rack.
  6. Juice some of the lemons and mix juice with some sugar. Glaze cooled, sliced cakes with this mixture to taste.

Warning: Failure to follow the steps will result in utter failure! This is a suspension cake – which means that it won’t ordinarily come together to make a cake, but will result in something far from anything edible! It is important that each grain of sugar be coated in butter and then egg, and that each granule of lemon is coated with flour. In this manner, the particles are suspended. Over-mixing will destroy this suspension, as will trying to rush the thing together. Just follow the directions!