The Tofeta Experiment – 1

This post is the first post in what we’re going to call The Tofeta Experiment. Basically, we’re trying to create our own Tofu Cheese, and we’ve decided to start with Feta. Why Feta? Well, because 1) it’s crumbly, and not melty, so we should be able to get the texture a bit more easily, 2) it’s funky, so we figure that we can do a takeoff of tempeh (see How To Make Tempeh) with maybe an extra-long fermentation / mycelium growth period. So, our first task, then, is to get ahold of some tempeh culture, and then some soybeans.

The plan is to go through the steps of making tofu, but to take the okara and inoculate it with tempeh culture. We’ll, of course, do something else with the soymilk, like make tofu from it, but the okara will become our first homemade tofu cheese. Wish us luck.

Thoughts of Harvest

This morning, in preparation for next weekend’s guests, I made up a batch of dried tomato tapenade. This took up the last of our dried tomatoes except for what I’ve got stashed in the deep-freeze (two, one-gallon freezer bags). I’m feeling like last year’s harvest is finally running out, and that as soon as I make it through the rest of the dried squash, it’ll be time for harvest to begin again! What marvelous timing, and what great time to be exchanging correspondence with Jackie of One Thread Two Thread regarding what to do with all of that excess produce.

Jackie tells me:

With my green tomatoes, I usually make relish. I have an allergy to mustard and so most store bought relishes are inedible by me. I usually don’t have too many green tomatoes. Most of the plants that we grow are short season plants, any where from 48 to 80 days (from transplant) with the average being about 70. I also (much to my husband’s horror) start pinching off any blossoms about the second week of August. It concentrates the plant energy into ripening the already set fruit. At least that is what I have been told.
I would love the recipe for your fruitmince. I am always willing to try something new in the preserves department.

So, by way of sharing, I’ll provide you with the recipe I used as a base, which comes from the Ball Blue Book of Canning and Preserving, and will also point you to my earlier post on mincemeat, and to Cook Almost Anything‘s pretty pictures of dried fruit … which also gives directions for making fruitmince.

Do note that this recipe is merely a starting place for making fruitmince. We’ve done it faithfully all of once, and have since altered it into “whatever’s on hand that sounds good.” We’ve combined it with the recipes for Tomato Apple Chutney, Curried Apple Chutney, and Peach or Pear Chutney. But here’s the starting point:

Brandied Mincemeat

  • 4 chopped Fuji apples (or similar firm variety)
  • 4 cups cranberries
  • 2 pounds raisins
  • 1 pound currants
  • 1 pound figs, chopped
  • 2 ground and seeded oranges and zest
  • 2 ground and seeded lemons and zest
  • 1 cup candied orange peel
  • 1 cup candied lemon peel
  • 2 cups brown sugar
  • 1 Tbsp cinnamon powder
  • 2 Tbsp ginger powder
  • 1 cup candied ginger
  • 2 tsp ground allspice
  • 1 tsp ground cloves
  • 1 quart apple cider vinegar
  • 3/4 cup brandy
  • 1/2 cup dry sherry

Combine all ingredients, except alcohol, in a large nonreactive vessel. Simmer 1 hour, stirring occasionally. Remove from heat; stir in brandy and sherry. Return to heat; simmer 30 minutes. Ladle hot mincemeat into hot jars, leaving 1/2 inch headspace. Remove air bubbles. Adjust two-piece caps. Process 30 minutes in a boiling-water canner.

From there, what we’ve done is to basically add a whole bunch of green tomatoes, increased the spice factor by at least double if not quadruple, added quantities of Pomona’s Universal Pectin (to the cold liqids), and added more vinegar and more alcohol. We’ve also, because we’re unsure of the acidity and because of possible alkaloids present in the green tomatoes, processed these at high temperatures in a pressure canner.

We’ve found that pressure canning things really destroys any pectins; nothing will gel after it’s been up to those temperatures. So, don’t bother with the pectins if you’re going to go for pressure canning these. We’re a bit nervous about the acidity, so we usually go for the pressure option, especially when we’re “just throwing things in.” That said, the liquids added here are either vinegar or citrus or alcohol, and increase the acidity quite a bit. Between those and the sugars, we’re probably quite safe.

What do you do with this when you’re done, you ask? Why, you make pie! Depending upon how firm you want it, you add between 2 and 4 Tablespoons of corn starch to 1 quart of fruitmince, throw that into a pie shell, and bake for about an hour and a half. If you underbake it, it’ll be kind of milky and soft in the center, and that’s just not appetizing. This last year we made over 100 quarts of the fruitmince plus another 10 quarts or so of chutney (basically, add some onions, curry powder & some hot peppers to the fruitmince & you’ve got it). We have about 3 quarts left, and those are in little bitty jars for making tartlets. That’s it. Everything else is either firmly encamped about our middles, or has gone to friends.

I encourage you to experiment, to grow more than you think you can eat, and to preserve things!

Everything’s Just Ducky

The weather’s just dandy, ducks!

I still can’t believe that this duck pattern is so simple, but I’m looking at the instructions, and I’ve got the googly eyes, so I guess I’m going to give it a go.

Happy Pesach, Good Friday, Spring & Weekend to Everybody. Now that I am actively trying to…reduce (grump, grump, GRUMP!), I have to be a bit less… er, social, which means no more swanning around from house to house chatting up friends and relatives and indulging in whatever little Cadbury bits people bestow upon me (around this time of year, it’s just as well — I mean, marshmallow PEEPS! UGH! Not that it stopped me from eating them, sadly.). However, I shall still come bearing gifts when I do pop by — and what better time of year than to bring macaroons?

Macaroons are a traditional cookie during Passover for Jewish families because they follow kosher laws – they contain no wheat, rye, barley, oats and spelt that take more than 18 minutes to cook completely (after coming in contact with water), and no leavening. The recipe I found is for almond macaroons, which is traditional, or you can use Mac’s ultra-healthy, chewy coconut/okara macaroons. (Even if you don’t have okara, those are quite tasty!)

ALMOND MACAROONS

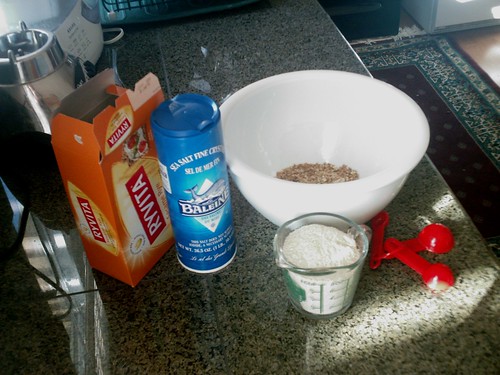
2 cups almonds (1 1/2 cups ground)

1 cup xylitol (or sucanat or white sugar)

Zest of 1 large lemon

3 egg whites

Canola oil cooking spray

A blender

A mixer

FIRST, Preheat oven to 275.

NEXT, Line a cookie sheet with heavy duty foil and spray with canola oil.

* In a covered blender, chop up the almonds half at a time until finely ground.

* In a bowl, beat the egg whites with a mixer until they form soft peaks.

* Add the lemon zest.

* Gradually add the Sucanat and beat until the whites are very stiff and shiny but not dry.

* Fold in the ground almonds.

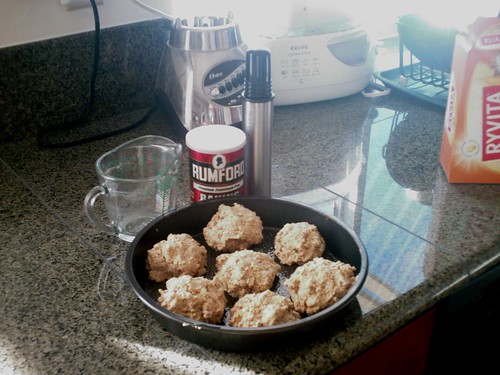
* Take spoonfuls and drop onto the cookie sheet about 1 – 1 1/2 inches apart.

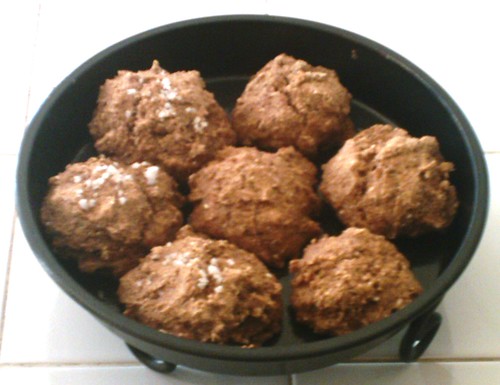
* Bake for 20 – 30 minutes, or until edges are hard, but the middle is still soft and golden.

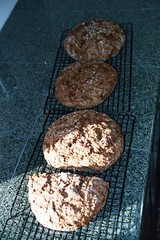
* After 5 minutes, carefully place the foil with the baked macaroons on a cookie sheet to cool.

These are a bit like sugar cookies – the almonds, when finely ground, look a little like raw, browned sugar. A dip in chocolate, and they’re even better! And speaking of a chocolaty – and still healthyish – macaroon alternative, try:

Chocolate-Coconut Macaroons

* 3 cups unsweetened coconut, lightly packed

* 1/4 cup cocoa

* 1 cup sugar

* 2 tbsp. matzah cake meal or potato starch

* 4 egg whites, room temperature

* 1 teaspoon vanilla extract or orange (or lemon or pineapple) juice

* 1/4 cup honey

FIRST, preheat the oven to 325 F. Place parchment or nonstick baking sheets.

Place coconut, cocoa, sugar, and matzah meal in food processor bowl. Pulse until coconut is finely ground, about 10 seconds. Add egg whites, vanilla and honey. Process until everything is well mixed, about 10 seconds.

Spoon well-rounded teaspoonful of mixture onto baking sheets, leaving 1 inch between cookies. Bake for 12 to 14 minutes, until dull and no beads of moisture show. Using a metal spatula, carefully remove from parchment onto racks to cool. Makes about 32 cookies.

Be sure and have some handy storage for these – they’ll last a couple of weeks in an airtight tin. Cheers!

Week… end. (Please! I beg of you)

Some day/When I’m awf’ly low/ And the world is cold/I will feel a glow just thinking of you…

Yeah, you thought it was the way you looked tonight. Nope. It’s food again. Sorry to all the romantics out there, but by this point in the week, I can’t even see you, much less think of you when everything is going to the pot.

I thought I should blog about Baking Powder Biscuits this last week when I woke up and realized we hadn’t steamed the breakfast grains (sigh!) and so we would either need to wait an additional hour to eat, or I’d have to come up with something quickly. I wish I’d taken pictures of the first biscuits – they were elegant looking and had that effortless perfection that you only really achieve when you’re not setting up a stupid photo shot and trying desperately to get your food to cooperate. At any rate, when the world has all gone to hell, and you’ve had a bad night, or are without options for a quick breakfast, plain old drop biscuits are just very nice. For those playing along in the UK… they’re… um, muffins? Savoury scones? Who knows. We called them tea cakes if a bit of vanilla and sweetener was added and they were neatly rolled, but they’re basically

Whole Wheat Baking Powder Drop Biscuits,

(and this is BASIC recipe:)

* 1 cup whole wheat flour

* 1 cup all-purpose flour

* 1 tablespoon baking powder

* 1 teaspoon salt

* 1/4 cup canola or olive oil

* 3/4 cup unsweetened soy milk

(Perambulation: Now, I’ve said “basic,” which means that there are infinite variations. For instance, instead of the two cups of flour, I substitute four rye crackers, crumpled up, which about equals a cup. Once I added a cup of tortilla crumbs. It depends on how you’ll use them in your meal. I rarely add a full quarter cup of oil, either. I prefer drier biscuits, so I use about two tablespoons. I also use very cold water in place of soy milk, but that’s just me.)

DIRECTIONS

1. Preheat the oven to 450°F (220°C).

2. Stir together the whole wheat flour, all-purpose flour, baking powder, and salt. Combine the oil and soy milk in a measuring cup. Pour into the dry ingredients all at once, and stir just until the dough pulls away from the sides of the bowl. Drop by heaping spoonfuls onto a baking sheet.

3. Bake for 8 to10 minutes in the preheated oven, until the biscuits are browned on the top and bottom.

Further Perambulation: One thing to remember is that less stirring with biscuits is …more. They’re not meant to have a hugely built-up gluten in them, or they will get quite …rocklike. So just put your ingredients in, mix up the drys dry, and then, once you add your liquid, keep your wooden spoon stirring to the bare minimum it takes to get the ingredients all combined.

And don’t be afraid to experiment more. These can be made savory with various onion powders, 1/4 c. of low moisture shredded cheese, or black pepper, or made sweet with various spices and 2 tbsp. of sugar. Find your own bliss!

So, here’s the finished product. I put pretzel salt on a couple of them for the guy who likes to think everything is a big pretzel… and, as I said, these weren’t the prettiest, because I didn’t use unbleached flour, but whole wheat and rye. But they were moist, tasty, and light.

When you feel like everything you touch in the kitchen is turning to sawdust and ashes, you can still make baking powder drop biscuits. use them to top a quick potpie or to accompany soup and salad. Slather them with jam and margarine or top with strawberries for a shortcake type dessert. They’re easy and make you feel like you’re somewhat kitchen-capable again. At least it works for me.

Opinionated Foodie

Periodically, I find something so truly cringe-worthy that it’s funny. Here is a screed from one of my favorite Sarcastic Chefs, Anthony Bourdain. I used to really dislike Anthony Bourdain. I thought, How can that guy even taste anything as much as he smokes? Who is he to set himself up as a foodie?!

Well, the trick is, he’s not a foodie, he’s a guy that … eats. And reads. And speaks. And thus, has every right to his opinionated, wide-mouthed, long-legged, slouching toward sarcastic-land self. Yes, okay! He kind of grows on you. Like moss. Or mold. Anyway, he guest-blogged awhile back at the site of food writer Michael Ruhlman, and went OFF on the Food Network. Hilarious results, one of which was:

Her ear-shattering tones louder and louder. We KNOW she can’t cook. She shrewdly tells us so. So…what is she selling us? Really? She’s selling us satisfaction, the smug reassurance that mediocrity is quite enough. She’s a friendly, familiar face who appears regularly on our screens to tell us that “Even your dumb, lazy ass can cook this!” Wallowing in your own crapulence on your Cheeto-littered couch you watch her and think, “Hell…I could do that. I ain’t gonna…but I could–if I wanted! Now where’s my damn jug a Diet Pepsi?” Where the saintly Julia Child sought to raise expectations, to enlighten us, make us better–teach us–and in fact, did, Rachael uses her strange and terrible powers to narcotize her public with her hypnotic mantra of Yummo and Evoo and Sammys. “You’re doing just fine. You don’t even have to chop an onion–you can buy it already chopped. Aspire to nothing…Just sit there. Have another Triscuit…Sleep….sleep….”

Another person who believes in St. Julia!!! Bourdain’s blogging garnered almost 600 comments, one of which was a snarky reply from the Food Network itself. Read at your own risk!!!

Actually, I was just thinking about that… do other nations have FoodTV? Okay, I’ve heard there’s one with the BBC, and surely the French or Italians have some shrine to all that is organ meats and unpronounceable. But are ANY of those channels round-the-clock? Surely someone else has a channel dedicated to 24-hour food programming? No? Just the country with the heaviest people…? The points made about mediocrity and trying for the lowest common denominator really resonate with me – why go to Farmer’s Market when you can buy something in a can? Why shop for fresh veg in the market, even, when you can buy it prefab? This, dear ones, is from whence the whole spinach-equals-salmonella thing comes… when we find ourselves too busy to even wash and cut our own vegetables.

When your CSA gives you carrots… and carrots… and carrots… You become creative really fast. Having less than half a kitchen has meant that we’ve needed to rely on our crock pot and single electric burner on the really bad days when the stove was unplugged in the middle of the floor. In trying desperately to keep up with the flood of cold weather foods, we’ve started just cooking the carrots, pureéing them, and using them as soup base. This is a fabulous example of one of our favorite soups:

Carrot Ginger Soup with Coconut Milk
i n g r e d i e n t s

  • 3/4 cup scallion (green onion) chopped fine
  • 1 small onion, cut in 4 pieces
  • 1 1/2 pounds carrots cut in 1″ pieces
  • 1 tablespoon fresh ginger root, peeled, grated (or used dried, if you have it)
  • 2 teaspoon curry powder (or to taste)
  • 1 14-ounce can lower salt/fat vegetable broth
  • 1 13.5-ounce can unsweetened coconut milk + extra for garnish
  • 1 tablespoon fresh lime juice (approximate 1/2 small lime – lemon works too)
  • fresh chives for garnish (or use French’s dehydrated onions, or fried scallions)

d i r e c t i o n s
Place scallions, onion pieces and carrots in a food processor. Process turning on and off rapidly until the vegetables are coarse chopped. If you’re starting this in the morning, this step can be simplified by doing a rough chop of the veg and shoving them in the crock pot for about two hours.)

Combine chopped vegetables, grated ginger root, curry powder and chicken broth in a large saucepan. Bring to a boil and simmer for about 20 minutues until the vegetables are very soft.

Strain vegetables and reserve the liquid. Add vegetables to food processor in two batches and process until smooth. (If you trust the seal on your food processor, you can do this with the liquid still warm – for the rest of us, wait until things cool a bit, or use a stick blender in the pot as the safest method for not splattering yourself with hot carrot mush.)

This is basically the base of your soup… from the carrot base, you can go a variety of directions. We add a half can of coconut milk and about a package (14 oz.) medium firm tofu in chunks and simmer it. I also take about a quarter tsp. of coriander pods, heat them in a dry saucepan to revive their oils, and then mortar and pestle grind them and add them while the soup simmers. Tropical soups tend to be both sweet, sour and creamy, so I also add about four tablespoons of mae ploy sauce, to give it both heat and sweet, and I have been known to add Thai lime leaves, mushrooms, and more. My friend Rachel adds chickpeas.

Baking During the Remodel

I managed to bake some bread yesterday, despite the remodeling going on. It wasn’t a matter of having run out of bread (‘though we had), but a matter of seeing the neglected sourdough starter sitting in the fridge, going darker and darker, and of knowing that it would die in another couple of weeks if I didn’t do something with it. So, I pulled it out and let it roam free for a while (about 9 hours), and then turned it into some lovely olive bread.

I didn’t take the time to steam any whole grains to put in this (barley or oat would be choice), but it’s not missing it much. I took my basic sourdough starter, gave it 4 cups of water & enough flour to bring it back to consistency. After it’d been sitting out all day, I added some more flour & then removed a portion to go back into the fridge. To the remainder I added:

  • 2 Cups Oat Bran
  • 2 Cups Golden Flax Seeds
  • 1 Cup Merlot
  • 1/4 Cup Potato Flour
  • 1 Large Onion, chopped
  • 3 Tbsp yeast
  • 1 Tbsp Yellow Mustard Seeds
  • 3 Tbsp Brown Mustard Seeds
  • 1 Tbsp Sage
  • 1.25 Tbsp Salt
  • 8 Sprigs Fresh Rosemary, chopped
  • 16 Oz. “Spicy Pimento Stuffed” Olives
  • 1 Cup Sun-Dried Tomatoes (well, not really: they’re from our garden; we dried them in a dehydrator)

From there, it was a matter of kneading, forming, rising, and sliding onto baking stone in a 500 Degree F. oven which had preheated for a good 25 minutes. Oh – and sprinkling some French sea-salt on top before they went in.

Note the granite tile? Grout’s still not sealed, but that’s going to happen tomorrow … or, rather, that’s what I’ve been told several times now. He’s running out of projects to do other than the ones he says he’s going to do, so I figure he’ll get to it when he’s got nothing better to do. Or, rather, just nothing else to do.

Everyday Brown Bread

For those who’ve heard me talk about baking bread and don’t really want to “wing it,” here’s what I basically end up doing when I bake “sandwich” bread, or non-savory bread. If you want a savory bread, you’re looking for the recipe at Barley Boules, which can also have olives added to it & give you olive bread. The recipe below is for people who shy away from true Whole Wheat bread; if you want (and I do), you can simply swap Whole Wheat for the White flour & you’ll be OK.

Basic Everyday Bread:

  • 4C water
  • 2C whole wheat flour
  • 2C white flour
  • 1C Quinoa flour (optional, but recommended)
  • 2C Flax Seeds (I use golden, but it doesn’t matter except in appearance: dark seeds make mottled looking bread)
  • 1/2C Oat Bran
  • 1/4C Wheat Germ
  • 1C Molasses
  • 1/2C Honey
  • 1 Tbsp sugar
  • 2 Tbsp Yeast (not the rapid-rise junk!)
  • 1 Tbsp salt
  1. Proof yeast in bottled / filtered water (bring water to 105-110 deg. F, add sugar, add yeast, wait 10 min’s for it to “bloom”).
  2. Add whole wheat flour (and Quinoa flour, if you’ve got it) to water & cover with plastic wrap (I put a heating pad on low underneath the bowl if the house is cool). Let this rise until tripled in size.
  3. Add honey and molasses and mix in white flour until you have a very moist dough-ball (don’t add too much!). Let this rise until doubled in size.
  4. Add the dough ball & then set the mixer to knead the dough. Let it knead until you’ve got the consitency of chewing gum – don’t worry, you could go for about 15 minutes and not overknead. I’ve had the Kitchenaid overheat ’cause I let it go so long, and it was just fine.
  5. Add all the seeds, bran, wheat germ, and the salt (don’t forget that, whatever you do, ’cause it controls the yeast growth) to your Kitchenaid’s mixing bowl along with a little bit of white flour, and let it knead at least until all of the seeds have been incorporated. Keep adding little bits of white flour to keep the dough from sticking to the sides, as needed.
  6. Dump out onto a floured surface and let rest for a bit; divide into 4 loaves; shape and place into oiled loaf pans; spray tops with olive oil; cover with plastic and let them rise until they’ve almost doubled in size. (You can tell that they’ve risen enough if, when you poke them gently, the dimple doesn’t really want to spring back)
  7. Place into a 350 deg. F oven & bake until interior temperature (probe thermometer, here) is 190 deg. F. You can go a bit darker or a bit lighter than 190, but not more than 5 degrees lighter or you’ll have raw dough.
  8. Let cool in their pans for about 10 minutes, so they “sweat” and release from the pans.
  9. Cool on racks, covered with a tea-towel, overnight & they’ll be easier to slice.

Spiced Chocolates

More for today’s avoidance of work (by posting recipes), here’s one which everyone should try, because it’s so easy and so good. The exotic ingredient in this recipe is “coconut cream” or “coconut powder” which can be obtained at your local Asian market. If you can’t find it, you can simply go with powdered sugar, but … well, coconut cream doesn’t add any sweetness to the mix, so I think it’s better:

Fudge Truffle Centers (if you can wait that long):

  • 4 oz unsweetened chocolate
  • 1 can sweetened condensed milk
  • 1 cup sugar
  • 1 Tbsp vanilla
  • 1/8 tsp freshly cracked black pepper (fine)
  • 1/8 tsp freshly grated nutmeg
  • 1/8 tsp chipotle or cayenne powder
  • 1 teensy pinch of ground cloves
  • powdered coconut cream
  • powdered ginger

Boil chocolate, sweetened condensed milk, sugar, & spices until you feel as if it’s about to burn (about 3 minutes), stirring constantly. Remove from heat, add vanilla & stir until incorporated. Pour immediately into a pan & let cool. Cut into equal portions & roll into balls & then roll in coconut cream / ginger mixture. Let sit at least 12 hours before serving, as the coconut cream will draw moisture & form a shell. The longer you wait to eat them, the better they end up tasting! If you’re going to incorporate them as centers to truffles, you’ll want to dip them first, so that they don’t make your finishing coat all dusty with the coconut cream powder.

Lemon Death

This one’s something to make about once a year, and to have lots of friends around to help you eat, because it’s all about being special. I picked this one up from a coffee shop I worked for when I was in college. They’ve since gone out of business – probably due to killing their customers off with such rich food as this:

Artery-Coating Lemon Cake:

  • 5 Lemons
  • 2 Cups Granulated Sugar
  • 1¼ Cups Buttermilk
  • 4 Eggs
  • 3 Cups White Flour
  • 1¾ tsp Baking Powder
  • 1 tsp Baking Soda
  • ¼ tsp Salt
  • ¾ Cup Unsalted Butter, melted
  1. Mix Butter and Sugar until smooth. Add eggs one at a time, while mixing with a hand mixer. Set mixture aside
  2. Process Lemon Peels in food processor until the pieces are smaller than grains of rice – they should almost seem like a coarse flour.
  3. Mix Lemon Peels with remaining dry ingredients.
  4. Mix one third of the dry mixture into the creamed, then mix in one half of the buttermilk, then one third or the dry mixture again, then the remaining buttermilk followed by the remaining dry mixture.
  5. Pour into 2 greased 9″x5″ pyrex loaf pans. Bake at 325°F for 50 to 55 minutes. Allow to cool in the pans before removing to a platter, not to a cooling rack.
  6. Juice some of the lemons and mix juice with some sugar. Glaze cooled, sliced cakes with this mixture to taste.

Warning: Failure to follow the steps will result in utter failure! This is a suspension cake – which means that it won’t ordinarily come together to make a cake, but will result in something far from anything edible! It is important that each grain of sugar be coated in butter and then egg, and that each granule of lemon is coated with flour. In this manner, the particles are suspended. Over-mixing will destroy this suspension, as will trying to rush the thing together. Just follow the directions!

Fiber Bombs

We started these off with a basic carrot cake recipe, and it’s morphed to the point where we don’t believe they’re the same thing whatsoever. We call them Fiber Bombs because there’s so much danged fiber in them, and because they really have an effect upon your system, especially if you’re one who’s a stranger to fiber. To us, they’re just snacks, but to my coworkers? Well, let’s just say “colon health,” shall we?

Fiber Bombs:

  • 1/2 cup pecans or walnuts, toasted and coarsely chopped
  • 2 cups grated raw carrot (about 2-3 carrots)
  • 1 large apple, grated
  • Some Raisins (to preference – maybe a cup or two)
  • 2 cups (280 grams) all-purpose flour (or White Whole Wheat)
  • 3/4 cup golden flax seeds
  • 1/4 cup wheat germ
  • 1/4 cup oat bran
  • 1/4 cup sugar
  • 1/2 cup honey
  • 1/2 cup molasses
  • 3/4 teaspoon baking soda
  • 1 1/2 teaspoons baking powder
  • 1/2 teaspoon salt
  • 1 1/2 teaspoons ground cinnamon
  • 1 cup coconut (unsweetened. if using sweetened, omit the sugar)
  • 1 cup water
  • 1/2 cup flax seeds, ground
  • 3 tbsp olive oil
  • 1 1/2 teaspoons pure vanilla extract
  1. Preheat oven to 350 degrees F (180 degrees C) and place rack in center of oven. Place paper liners in 18 muffin cups.
  2. Toast the pecans or walnuts for about 8 minutes or until lightly browned and fragrant. Let cool and then chop coarsely.
  3. Finely grate the carrots and apple (an Asian Mandoline works fabulously for this). Set aside.
  4. In a large bowl whisk together the flour, sugar, baking soda, baking powder, salt, and ground cinnamon. Stir in the nuts and coconut. Set aside.
  5. In a separate bowl whisk together the ground flax seed, water, oil, and vanilla extract. Fold the wet ingredients, along with the grated carrot and apple, into the flour mixture, stirring just until moistened. Evenly divide the batter between the prepared muffin cups and bake for 20 – 25 minutes or until a toothpick inserted in the center comes out clean.
  6. Remove from oven and let cool on a wire rack. After about 10 minutes remove the muffins from the pans and cool completely on a wire rack.