Taste & See: Miyoko’s Creamery

Did you get the memo?

The words “artisan” and “vegan” go together. Well, they’re being seen together a lot more lately, anyway. Honestly, it was only a matter of time before vegans figured out the cheese thing, since it’s the excuse most of us use to stay not-vegan. We love our cheese. For those who desire to switch to a solely plant-based diet, the siren-call of cheese can be really, seriously, awfully HARD to resist, so vegans have for a long time been motivated. Of course, there have been, and there remain, myriad vile concoctions as a result of that motivation, horrific things which masquerade as cheese. Probably everyone has their story of struggling through plastic-y sandwich additions, crunchily textured things made out of rice milk (WHY?) and bright orange “chezie” sauce on pasta (sometimes this can be really good – T’s baby sister makes an amazing mac-and-cheez. But, not everyone has the knack.), but this isn’t a story about someone’s putting out a substandard product. This is a story of a product cheeses which was welcomed by vegans, vegetarians and omnivores alike. It was kind of shocking.

Miyoko Schinner is a longtime Bay Area vegan who wrote several cookbooks, including one in 2012, detailing her at-home success in making cultured vegan nut products. But, though many people bought the book, they were too timid to try cooking with unusual ingredients such as carrageenan powder, xanthan gum, tapioca flour, and agar powder. Not only that, but people had to come to grips with stuff like rejuvelac (what?) and the idea that culturing anything – dairy or non-dairy – is a process that is open to the vagaries of chance, as well as time-consuming. Laziness won out again, and after a lot of whining from friends and family, Miyoko opened Miyoko’s Creamery… which now ships to all fifty states, has a contract with the Whole Foods Markets and is still expanding as we speak.

Vegan Cheese Tasting 6

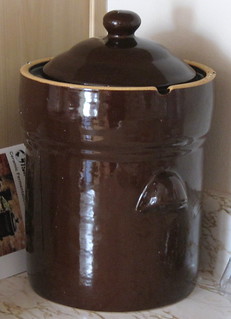
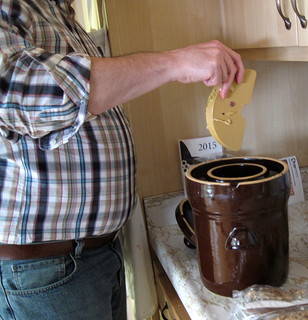
We sat down for our family “Wine & Cheese” Tasting last week with a chilled bottle of Draper Valley Riesling grape juice – from an absolutely fabulous company which produces only unsulphured bottled grape juices, which means everyone can partake – and four of Miyoko’s Creamery cheeses (and, we’re just going to say “cheeses,” because “cultured nut products” makes us want to belt someone, and we refuse to type that umpteen million times). The cheeses are plastic-wrapped and then boxed for freshness, and before tasting, T. set them out for about forty-five minutes, to make sure we lost none of the flavors due to cold. (We don’t advise more than ten minutes in the summertime, however! The Double Cream got very soft.) There are ten “root” varieties of cheese, and then there are seasonal variations. We chose the Aged English Farmhouse cheese, the High Sierra Rustic Alpine, the Fresh Loire Valley in a Fig Leaf, and the Classic Double-Cream Chive. In the interest of taking good first impressions and comparing and contrasting, we ate the cheese on thin crispy, crackers containing no spices, passing the plate along the table and comparing flavor and texture, smell and noting anything else which caught our attention.

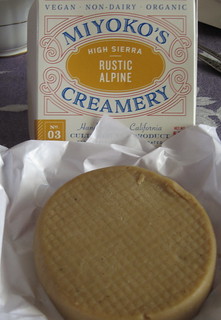
We began with the High Sierra Rustic Alpine cheese, which had a thick, creamy texture that was almost not spreadable – a paté consistency. It could be described as “semi-hard.” In color, it is a light tan all the way through. Its ingredients list Organic Cashews, Filtered Water, Organic Coconut Oil, Organic Chickpea Miso (Organic Chickpeas, Organic Rice Koji, Sea Salt, Water, Koji Spores), Sea Salt, Nutritional Yeast, and Cultures. We notice that nowhere on the list is listed liquid smoke, but… there’s… something slightly – very slightly – smoky about this cheese. This comes, perhaps, from the combination of nutritional yeast and miso? Anyway, the smooth and mild spread left a nicely savory finish on the tongue, and was …tasty. It wasn’t T’s favorite, but T’s mother thought it was wonderful and went back to it again and again. (Of course, this became her pattern with ALL of the cheeses throughout the night. But, more on that later.)

Vegan Cheese Tasting 5

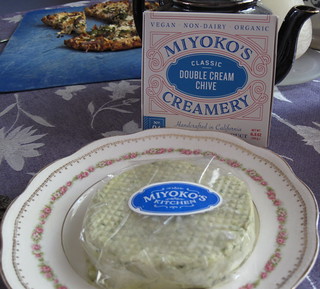
Interestingly, the ingredient list for the second cheese we tried is identical to the first, and yet, could two cheeses be any more diverse? The Classic Double Cream Chive was very nearly T’s favorite, with its creamy, mild, buttery flavor and the lovely hint of chive. In color, it is a creamy white, with bits of green which are the chives. This was enthusiastically received, and T. imagined it on baked potatoes, immediately. And then on toast. And then on peppered water crackers… Despite the miso and nutritional yeast still present in this cheese, the overwhelming flavor is mildly herb-y and buttery — like a nice Gournay cheese like Boursin. T’s mother returned to this cheese as well, as it’s very creamy and moreish, as our Scots friends would say. Another plus? It a cheese that is definitely easy to get kids to eat. Our youngest taster, Elf, is eight, and informed us that it is indeed a very good cheese, and he’s quite the omnivore and picky as all heck. An excellent result!

Not surprisingly, because T. loved it so much, D. just… shrugged. “It’s fine, it’s tasty enough,” is no ringing endorsement, so we will just ignore him, and move on. AHEM.

Vegan Cheese Tasting 4

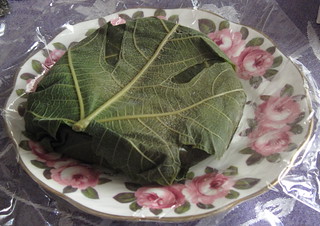
The next cheese T. wasn’t too sure about at all – because she’s not that fond of fruit in cheese, and not always at all fond of certain varietals of figs. Fortunately, she needn’t have worried; the ingredient list remained the same with this cheese, which meant the fig leaf – wine-cured – was only on the outside, and had nothing to do with the product INSIDE. The manufacturer has made a note that the shelf-life of this particular cheese is sixty days. As none of our other cheeses had this note, we figured it was there because of the leaves, which introduces another biological element into something cultured and aged.

While T. wasn’t sure she’d be wild about this cheese, this one D. managed to hoard and keep right in front of him on the table. Its sharpness and decidedly tangy, savory flavor may have been the reason for this. In color, this product is creamy white and the leaf only discolors the surface a very little bit. The manufacturer advises that this cheese grows more sharp as it ages. Of all the cheeses we tried T. liked this one least, and D. liked this one best. Elf was indifferent and T’s mother tried it once or twice, and remained enthused.

Vegan Cheese Tasting 1

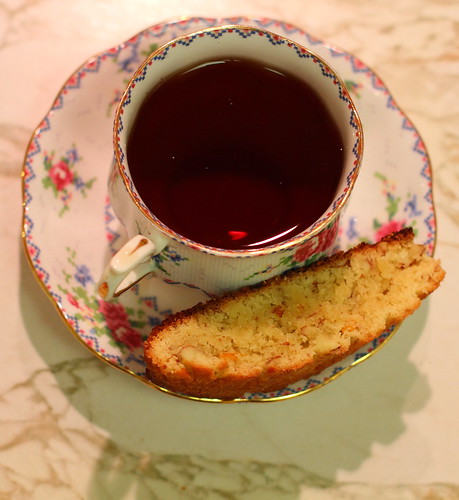
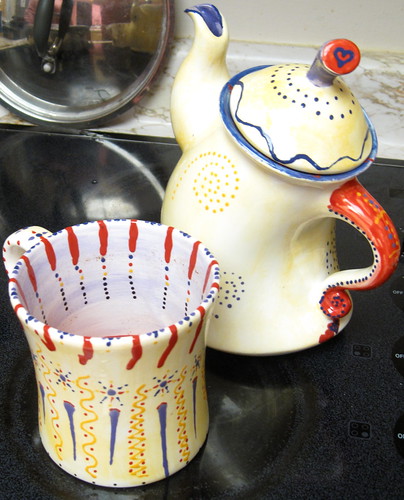
(The photographer must apologize for not unwrapping a couple of the cheeses; social occasions with a lot of giggling and genial insults and cheese-snatching across the table are not the best times to remember to properly photograph the food on one’s plate. Look! You can just admire the wonderfully sweet tea roses or the quirky cross-stitch pattern on the plates! There. All better.)

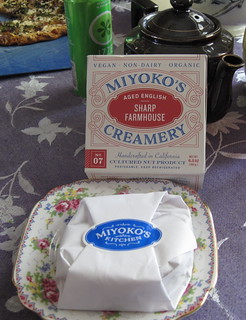
The final cheese was a second choice; we’d intended to sample the Smoked English Sharp Farmhouse, but it is apparently wildly popular and goes quickly out of stock from week to week. We settled instead for the Aged English Sharp Farmhouse, and were nonetheless thrilled. It is a firm, light tan cheese with a tangy flavor reminiscent of cheddar, and would have paired nicely with a Draper Valley verjus, the tangy, tart vintner’s brew made of unripened grapes. We all immediately imagined this melted – and it does melt – into a pasta sauce. This was Elf’s hands-down …tied favorite. Flea’s hands-down main favorite, T’s mother’s favorite, just because they all were, D’s second favorite, and T’s favorite. While we tried to remind ourselves that we were just TASTING, this cheese barely made it to be wrapped up and sent out the door to T’s parent’s house. Given time, it would have been completely snarfed down. The ingredients for this farmhouse were the same as with all of the other cheeses, yet this astonishingly tasted nothing like them. At all.

…which is really not so surprising. ALL cheeses in the dairy section are, at their root, made of … milk, salt, and enzymes, added with time. What gives cheese its flavor differentiation? The culturing process. The time. Owing to that simplicity, you might having a niggling interest in buying that cookbook and seeing how hard it would be to produce your own cultured nut products (!) at home. Or, if you’re not as time-rich as that, you could pop over to the website and see what else you’ve missed. The Country Style Herbes de Provence? The Double Cream Sundried Tomato & Garlic? The French Winter Truffle, or the Mt. Vesuvius Black Ash?

We bought these cheeses to share a social experience with vegans who don’t often get to have wine & cheese parties (okay, not gonna lie; people who don’t drink also don’t have wine and cheese parties, but we’ll ignore that), and came away sort of gobsmacked and perfectly willing to buy and consume these products our own non-vegan selves. There are still plenty of vegan “pitfalls” out there in terms of faux cheese products — but this carefully handcrafted, artisan “cultured nut product?” Is not one of them.

{feats of fermentation*}

If you could change your life by what you ate… you would, wouldn’t you?”

“You Are What You Eat!” was dinned into our wee brains throughout childhood (right along with “If you can’t say something nice, don’t say anything,” but you see how well that went), and we all figured it was true, as far as that went, though most of us imagined our classmates as gigantic chickens or something. (Or, maybe that was only T. Whatever.) But recently the National Institute of Health put out a really surprising report on how what we eat can literally change our mental state. The piece is titled, “Fermented foods, neuroticism, and social anxiety: An interaction model,” and the tl;DR quote you need is:

“A recent study in humans has shown that consumption of a fermented milk product containing a combination of probiotics (Bifidobacterium animalis, Streptococcus thermophiles, Lactobacillus bulgaricus, and Lactococcus lactis) can modulate brain activity (Tillisch et al., 2013). After four weeks of consuming the fermented milk product, there was a reduction in brain activity in a network of areas, including sensory, prefrontal, and limbic regions, while processing negative emotional faces. Importantly, a control group that ingested a non-fermented milk product showed no such changes in brain activity, suggesting that the probiotics in the fermented milk were responsible for the modulation in brain activity. This study demonstrates that fermented foods containing probiotics can alter how the human brain processes negative social stimuli.”

Fermented Cabbage 4

If you’re vegan, you may be shrugging and thinking, “Well, that’s all very nice for the sanity of the omnivores, but…” Nope, think again: probiotics exist in fermented foods of all kinds, even those which have no milk products. An easy one to enjoy? Kimchi. By fermenting vegetables in a salty broth to suppress the whole decay factor of vegetables sitting in water for weeks at a time, lactic acid bacteria takes over the process, creating the magical healthy probiotics that we need.

T’s family had many Korean friends, and growing up, T. ate some really amazing kimchi. T. has a vague memory of her mother attempting to make her own kimchi in a Mason jar… and the Mason jar exploding… so when D. wanted to make kimchi, T. was… not really on board. So, she stalled. This worked for a few weeks until D. found a fermentation crock, and then the whole kimchi thing was on like Donkey Kong, and there was nothing she could do about it. She wasn’t sure what to put in it – some traditional recipes call for shrimp – ugh, imagine that decomposed – and there’s the traditional red pepper powder called gochugaru — kimchi aficionados say it can’t be replaced with just plain cayenne pepper. Nevertheless D. had a new toy, and in went the Baechu (napa) cabbage, red peppers, onions, scallions, garlic, chopped carrots, and crushed roasted seaweed, to add a bit of meaty umami flavoring – the “rocks” to hold down the veg, the water and the salt.

Fermented Cabbage 2

Adding salt to our fermented cabbage this time was …tricky. The first recipe we used added it by weight, and we made the mistake of looking for a “vegetarian-friendly” recipe instead of looking for a KOREAN recipe. Rookie mistake, we are covered in shame. There’s a method to making this properly, and the first is to brine the cabbage – and then rinse it. This is necessary to kill off nasties, but rinsing also helps keep the level of salt down. We had to back up and do this step after we had a delicious but ultimately waaaay tooo salty dish. The second trick is to mix your seasonings into a paste and add it to the cabbage only after it’s all together. That way you can get delicious ginger and garlic and peppery goodness in every bite.

We admit to impatience, and only fermented our cabbgae for three days. It was tasty, but it wasn’t “right,” and we’re going back to the drawing board. Next time we’re looking forward to adding radishes — maybe from our own wee garden! — to the mix, doing the soaking properly, and experimenting with a freer hand with the gochugaru. There are many kinds of kimchi and we have many tasty days ahead of us. Meanwhile, if you’re a fan of sauerkraut, this is a fermented cabbage that kicks it up a notch. (And if you’re not a fan of sauerkraut, rejoice; this is nothing like it, really.)

But, we can sense that some of you remain unconvinced. It’s not enough that the probiotics in fermented foods can increase your mental well-being. You’ve seen real kimchi. It’s red and weird and pungent and even snuggled up next to perfectly steamed rice, you can’t imagine putting such foreignness into your mouth. Uh-huh. Well, consider this:

Fermented Cabbage 3

The 2003 outbreak of SARS in Asia virtually left Korea untouched – possibly because kimchi has been shown to boost immunity. Korean chickens infected with the H5N1 (avian flu) virus recovered after eating food containing the same probiotics found in kimchi. The Journal of Nutrition in 2001 reported that kimchi produces beneficial short chain fatty acids which are reported to inhibit the development of invasive colon cancers. Research reported in 2008 revealed kimchi probiotics fighting ulcer-causing Helicobacter pylori bacteria. The Journal of Medicinal Foods abstract adds, “Health functionality of kimchi, based upon our research and that of other, includes anticancer, antiobesity, anticonstipation, colorectal health promotion, probiotic properties, cholesterol reduction, fibrolytic effect, antioxidative and antiaging properties, brain health promotion, immune promotion, and skin health.”

From various studies, kimchi aids in digestion, lowers total cholesterol, is an antioxident, reduces inflamation in skin breakouts, lowers BMI, beefs up the immune system, reduces oxidative stress in blood cells, inhibits the growth of cancer cells, increases glucose tolerance, especially when eaten with a low fat food; inhibits gastric ulcers, combats nutrient depletion, builds stamina and helps prevent yeast infections. Are we at least a little more on-board with this? Hope so. Tune in ’til the next Feat of Fermentation.


*Yes, yes, we know we’re bizarre. Normal people are talking about their home microbrewing when they discuss fermentation. Haven’t you figured out by now that we’re never Those People? Get with the program, folks; even when we’re swanning around in the sky we don’t do “normal” here.

Avid Baker’s Challenge: Crackle Cookies

Crackle Cookies 2

This month’s Avid Baker’s Challenge was to make Crackle Cookies. I think that this is definitely a good recipe, although it’s quite a small recipe – I doubled it and still only ended up with a couple dozen cookies, which won’t make my coworkers very happy with me (or, at least, it won’t make very many of them very happy).

Crackle Cookies 3

I’m a bit reluctant to fiddle with it beyond doubling, as there’s a risk that something will get slightly out of the right balance – industrial recipes are by weight for this reason. So, I suppose a small batch will have to be made more frequently, if I’m to share this. I think, though, that the Fudgy Brownies are something I’m more likely to make again, as those were so much easier than these!

-D

Faster Feasts: Blender Pancakes

Right now, blender pancakes are a thing, probably because they’re used as advertising for companies with really high powered, monster blenders that crush ice and compact cars and the like. The hip move is doing a sort of museli-overnight-and-blend thing with whole grains like oats, which T. will tell you is NOT new, as her very smart mama made these for her when she was but a tiny child, but whatever. Blended or no, we sadly don’t eat pancakes or waffle much around these parts anymore because a.) we’re gluttons and b.) it’s too hard to have just one, and c.) there’s actually little point in making a whole bowl of pancake batter for just one pancake each. We missed pancakes, though, for serious — so we’ve been doing a little experimenting, as usual, and we’ve adapted a little this and a little that to make something surprising. This recipe is based on the one from All Day I Dream of Food, and of course we tweak it to our personal tastes.

We were just discussing chia seeds with someone the other day, and while we tend to grind them into things for extra fiber, we’re just not the Chia Pudding or the Chia Cereal or the Chia Jam people — we tried one of those once, but never got into it for some reason (there’s still time, however!). Still, we were glad to find other uses outside of smoothies for chia, because the little seeds are pretty health-supporting. As stated, this is a base recipe — trust us when we say we’ve tweaked it and will continue to tweak it for savory or sweet or spicier &tc.

Base Blender Pancakes

6 large eggs
1 cup milk (we used unsweetened almond)
1/3 cup coconut flour
3 tbsp chia seeds
1 tbsp sweetener (optionally, add 3 tbsp. and don’t use syrup)
1/2 tsp baking powder
1/2 tsp vanilla extract
1/4 tsp salt
Nonstick spray

Low Carb Blender Pancakes 1

This is a base recipe; we of course added spices like cinnamon and nutmeg which smelled and tasted lovely! If you don’t want to do anything but butter these and eat them with a bit of fruit, you can always sweeten them; we enjoyed strawberries and maple syrup on them equally. Even D., who isn’t much for experimentation when it comes to traditional comfort foods really liked these, which was fair shocking. ☺

Directions: Dump ingredients in blender. Blend. If you don’t have a heavy-duty blender, you may want to grind the chia before you put it in, but we just dumped it all in, and it was ground up with everything else.

With your burner set to just below medium, pour batter onto your oiled pan, in 3-4 inch circles. Each side will need about 2-3 minutes. Fry, flip, and plate as you normally would. NB: It is REALLY easy to cook these too quickly – they taste fine, but they look very brown. Go for medium or a hair lower, you’ll be happier with how they look. Secondly, batter will thicken upon sitting so you might need a spatula to spread the last one onto the pan.


One of the challenges of low carb pancakes using coconut flour and the like is that they can be really thick and heavy – these are very close to being crepes. (Stay tuned, we’re going to fiddle with them and see if we can’t make them MORE like crepes…) We’re thinking they’d pour better out of one of those pancake bottles (or, more realistically, a washed out and recycled plastic ketchup bottle). We actually found that these keep in the fridge for a day or two before drying out, which is fairly amazing for a coconut flour recipe.

This recipe makes approximately 12 pancakes; a serving of 2 pancakes is 149 kcal, if you count calories, but 6.73 g of carbohydrate and 4.89 g of fiber… If you count net carbs, they’re 1.84 grams per serving. (There’s that permission to be a glutton you were looking for…)

If you’re still in the camp of feeling chia has a disturbing resemblance to frog eggs, you might find this blender waffle recipe more to your liking. We’ll be trying this recipe this weekend and haven’t yet fiddled with it – but it’s based on Everyday Grain-Free Baking, and is said to produce a light, crisp waffle as well.

Almond Flour Blender Waffles

1/3 c. milk (rich non-dairy options include cashew and coconut)
2 Tbsp. melted butter (or coconut oil)
1 Tbsp. maple syrup (also honey or agave)
2 tsp vanilla extract
1/4 tsp apple cider vinegar
1 1/4 c. blanched almond flour
1 tsp. salt
1/2 tsp. cinnamon, nutmeg (or cardamom and ginger…)
3 large eggs, room temperature
Nonstick spray for your waffle iron (or melted coconut oil)

NB: There’s a method to this, so read before you begin. First, heat your waffle iron. Next chuck all wet ingredients EXCEPT for the eggs in the bottom of the blender, and all dry ingredients on top. Blend this incredibly thick batter for 10-15 seconds. Then, add the eggs and blend on low for 15-20 seconds. Increase your blender speed to high for 20-30 seconds, then stop. You don’t want them to be rubbery. These brown up golden in 3-4 minutes, based on your waffle iron.

Fudgy Brownies

OK, folks, this is a recipe you’ll want to take note of, and use frequently. This first batch I made, I followed the recipe. Next time I think I’m going to go with an alternative sweetener (Swerve / erythritol) so that this can be lower-carb as well as gluten-free. I did add in about 1/2 tsp cinnamon and 1/8 tsp each of allspice and cloves. Maybe next time I’ll add in some cayenne pepper as well, just to take these to that next level of awesome-gooey-awesomeness. Really, people: I don’t like chocolate and I like these.

T. tells me I need to talk more about the baking, and about the chocolate (Guittard Akoma Extra Semisweet chocolate chips). Ordinary chocolate chips or chunks contain about half as much cocoa solids (16% to the Guittard’s 33%). The Guittard also has a much better temper, meaning the chips melt more slowly when baking (or when you pop one into your mouth – to test, of course). This is one case when the dish is all about the chocolate, and it pays to get the good stuff.

As always, there are others baking this same thing this month. You can find them over at Avid Bakers Challenge. The recipe can be found at Scientifically Sweet, or below.

Fudge Brownies 2

Fudgy No-Butter Brownies (gluten-free)
Makes 16 brownies

  • 2 cups (300 g) icing/confectioner’s sugar
  • 2/3 cup (56 g) unsweetened natural cocoa powder
  • 200 g (about 2 cups) ground almonds/almond meal
  • 1/2 tsp salt
  • 2 large eggs, at room temperature
  • 1 large egg white
  • 2 tbsp water
  • 1 tsp pure vanilla extract
  • 5 oz (about 2/3 cup) best quality dark chocolate chips or chopped bittersweet chocolate, plus extra for topping
  1. Preheat your oven to 350 degrees F. Line the bottom and sides of an 8×8-inch pan with parchment paper, letting it hang over the edges of pan.
  2. Sift icing sugar and cocoa into a large mixing bowl. Add almond meal and salt and stir to combine. Add whole eggs, egg white, water and vanilla extract and stir until smooth. The batter will be thick. Stir through bittersweet chocolate.
  3. Scrape batter into your prepared pan, smooth the top and scatter extra chocolate over top. Bake until a shiny crust forms and a skewer inserted into the center comes out with a few moist sticky bits, about 25-30 minutes.
  4. Transfer pan to a wire rack and let cool slightly. For neat slices, let cool completely before slicing.

One thing the recipe doesn’t point out is that this batter won’t smooth out on its own – if it goes into the oven with irregularities on top, that’s how it will come out of the oven. So, I’d say to use an oiled spatula or maybe some oiled non-stick wrap to smooth things out before baking.

-D

Anything You Can Do (I Can Do Better)

Low-carb Biscotti 1

Okay, maybe not ANYTHING, but…

SOME baking can readily be reframed as either vegan or low-carb/gluten free. Not both, usually, but we do what we can, and anything wheat can do, almond can do… with a little help from its good friends Egg and Xantham gum.

February’s Avid Baker’s Challenge was a lovely orange-zested biscotti, and it was obvious that the crisp cookie would lend itself well to almond flour with no real fuss – no doubt tons of people have already tried it. Using the basic recipe that we used for ABC, we did a little tweaking and came up with something new:

Almond Flour Biscotti

3 Tbsp Butter, softened
2/3 cup granular sweetener
2 tsp Vanilla extract
2 large Eggs
2 cups Blanched Almond Flour
1 Tbsp Coconut Flour
1 tsp Baking Powder
1/4 tsp Salt
1/2 finely chopped almonds
1 Tbsp. orange zest
Low-carb Biscotti 3Preheat your oven to 350°F/180°C/ gas mark 4. Lightly grease an 18” x 13” baking sheet (or line with parchment).

Cream together butter and sweetener. Add vanilla and beat in the eggs. Next add flours, baking soda and salt, and stir in the nuts and orange zest. The original ABC recipe called for chopped dates; an optional add-in 1/3 c. chopped dried cranberries. This will be the STICKIEST biscotti dough you’ve ever encountered so wet your hands before forming it into the first bake loaf, mounded slightly higher in the center. Do make sure you mound it somewhat (more than you see in the picture there), because it will spread a bit – possibly more than you expect – and you want it to have that traditional biscotti appearance. Following Hanaâ’s lead, we scored the top of our loaves and baked for 30 minutes.

It’s advisable to cool the pan entirely after the first bake – at least twenty minutes – and lower your oven temp to 300°F/150³C/ gas mark 2. NB: Almond flour baked goods are really fragile unless cooled, so a word to the wise! Once cooled, THEN remove the cookie loaf from the pan, slice it, and lay your slices down for the second bake. Bake for 20-25 minutes, depending on how golden-brown you’d like them. After another long cooling period, you can dip or drizzle them with chocolate, which matches really well with that bitter orange zest, or enjoy them as is, with a cuppa. They’re also good with only ONE bake, if left out, as almond flour cookies will continue to crisp if left to cool in open air.

The biscotti pictured below never made it *cough* to that second bake… ah, well.

Low-carb Biscotti 5

Hat tip to Pille, who reminded us we hadn’t yet posted the recipe on these!

Swirled Rye

Skyway Drive 276

It is officially Spring next week, but weirdly high temps last weekend – and the inevitable long run of allergies – have had us already convinced that winter’s thrown up its hands and given up for weeks now. Once the time changed, and we recovered from that (and ask, along with a cranky nation, “HOW IS TIME CHANGE STILL A THING????”) we begin to notice the inevitable return of energy and interest in the outside world. The asparagus are fronding happily, the strawberries are blooming – in March, no less – and while the blueberry bush is sullenly not producing leaves or any sign it has noticed that it’s supposed to be alive, the wildflowers which escaped the confines of their boxes last autumn are creeping all over. Oh, and the roses are all red leaves and ambitiously fat buds.

The drought rolls on, unfortunately, though we’re still holding out for late Spring rains. The State is relegating us to two days of lawn-watering per week, and while we would happily let the lawn die or rip it out, we’re still renters, so… The plants in our tiny garden plot will have WaterSorb added to their soil as always, and we’re limiting ourselves to just a few things, and looking to see where we can reuse gray water to irrigate. Meanwhile, the chores which were safely put off over the winter – dealing with the streaky windows and wind-driven leaves in the garage – could be put off no more, and last Sunday was a day of chores, chore, and then, more chores. Fortunately, some of the chores were relaxing, like the usual every-other-Sunday baking to replenish the bread supply, but the baker, being Himself, must always Keep Things Interesting, and so he decided to make marbled rye bread.

Spiral Rye 2

Spiral Rye 3

BiRye, as certain people have coined it to annoy the baker, is something we usually see in fancy hotel restaurants, and we’ve always wondered at its …point. There’s not really much difference between the flavors, so apparently it’s just a two-colored thing because Pretty? We used King Arthur Pumpernickel, made from coarsely-ground whole rye berries and “regular” dark rye flour, which is a finer grade. Neither flours have much in terms of gluten, so the usual failsafes were put into place; a long, slow rise, specifically controlled liquid, and a little help. We used the King Arthur Rye Improver, which includes acetic and lactic acids, diastatic malt, vital wheat gluten and potato flour. Additionally, the traditional caraway seeds were added to the light side. While most of the time people turn up their noses at the strong flavorings in rye (and we didn’t really appreciate the added souring, as we prefer plain pumpernickel), we were making a real attempt to have a very different pairing of flavors melded into one bread. On the dark side, the traditional cocoa was used to darken and enrich the flour.

We used a narrow, tall pan – a refugee from the defunct Wonder Bread factory in Oakland, given new life in a non-commercial kitchen (thrifting and garage sales, man. Gotta love ’em.). Pans that are taller, narrower at base and deeper are great for low-gluten or gluten-free yeasted loaves, as the sides help to support the heaviness of the sticky dough and encourage a actual bread shape. We raised the bread in a warm oven for an hour and baked at around 350°F for 45 minutes and — wow. We could hardly wait to slice it. The patterns on the bread vary from slice to slice, and it is really, really pretty.

Spiral Rye 6 Spiral Rye 8

…better still, it’s delicious.

D. made three loaves – one full pumpernickel, one light rye, one marbled. Next time, he will just do one loaf in the big pan, and call it done, which will give the slices more height and heft. T. was pretty taken with the whole cocoa thing because …chocolate, okay? With a deep strawberry jam, the plain cocoa-pumpernickel would be amazing pain de chocolate toast. The light caraway-flecked side lends itself to pickles and mustard and mild, creamy cheeses. You mightn’t think that the two would come together, but… somehow, they do, to produce a balanced and tasty toast, and a really sandwich-worthy bread. It is not just decent – it is surprisingly good.

This is, of course, nothing like the fancy-looking but ultimately bland-tasting store-bought marble-swirl loaves (which use caramel color, rather than cocoa, and way more wheat flour than we do). Our recipe goes something like this:

  1. Combine 4 cups cool, filtered water, 4 cups whole wheat flour, and 1 tsp yeast.
  2. Let the mixture sit, covered, on the counter, for 24 hours (stir it a couple of times).
  3. Mix this with an additional 2 tsp yeast, 1 Tbsp salt, and enough pumpernickel flour to make a very sticky dough.
  4. Shape into loaves and let rise until more than doubled in size.
  5. Bake in a 350°F oven for 35-45 minutes, or until the temperature as taken with a probe thermometer exceeds 190°F.
  6. Let the bread cool, covered with a tea towel, until it’s completely cool.
  7. Slice and refrigerate.

Now, obviously, D. divided the dough and added cocoa and molasses to one half and dough improver and caraway seeds to the other half. Feel free to do so, or go your own way with it. We think you’d enjoy the swirled loaf, though, if only because it’s wonderful to be able to say that you made it yourself!

-D & T

March Avid Baker’s Challenge

Lemoniest Little Lemon Loaf 2

For this month’s Avid Baker’s Challenge, we’re doing a Lemoniest Little Lemon Loaf recipe. This recipe was quite easy to follow, and came together very easily. I would say that I think the writer went a wee bit overboard with cautious instructions, and that things could probably have been treated a bit more roughly than it sounds, as the batter is very thick and seems quite forgiving.

For ours, because the recipe was for a “little” cake, I tripled the recipe (which left me with leftover egg whites, which got turned into wee almond cookies, but that’s a recipe for another day). I probably should have quadrupled the recipe, given that I put it into a 16″ x 16″ pan … but, it turned out nicely, and there should be enough for some of the ravening horde of my coworkers to get some.

I also deviated from the recipe by increasing the amount of lemon zest (because lemon zest, you know?), and icing the thoroughly cooled cake with a lemon juice / powdered sugar glaze. You’ll thank me for suggesting it, as there’s nothing worse than a lemon-ish cake, n’est-ce pas? Besides, the cake itself seems a bit dry, so perhaps I overbaked – not sure.

We’ll have to wait ’til tomorrow for photos of the cut cake, as I want to allow the glaze to set overnight.

Lemoniest Little Lemon Loaf 3

EDITED TO ADD: It seems that the edges were the driest; the pieces of glazed cake in the middle turned out to be quite moist, so the texture may have had something to do with the way our oven bakes (unevenly). Everyone at work was very enthusiastic, and the whole cake vanished well before half-past eleven (mid-week, people must not eat breakfast before work!).

Also the question of the dryness of our cornmeal came up – when we lived in Scotland, kiln-dried flour vs. warm air dried flour meant that we needed to add more moisture to basic wheat bread. Our cornmeal wasn’t organic or polenta-related – it was a box of plain yellow cornmeal, finely ground and stored in a box above the stove… heat rising may have dried it further. It’s almost impossible to account for everything which could have caused a texture variation – the baker can only do the best that they can!

There are likely other, more successful takes on this cake. Do swing by and check out the other participants in this month’s Avid Baker’s Challenge.

-D

February Avid Baker’s Challenge

A few years back (OK, more like, way back in 2008) D. had been participating in this thing called the Daring Bakers. They’d put out a recipe each month, and everybody would make that recipe, share how it went, etc. Well, the PhD intruded, plus we really couldn’t find anybody who was willing to eat so many baked goods, and we let things lapse.

Fast forward 7 years and D. has decided to start baking again, but not with the Daring Bakers (who have grown into an immense horde of folk, none of whom we know any longer). Nope – there’s a wee group called the Avid Baker’s Challenge who seem like a good bunch, so D. will be baking along with them.

This month’s baking was to bake orange, date, and almond biscotti. This recipe is super easy, came together with no trouble whatsoever, and was quite tasty even before the second bake (hey – there were ends, which … wouldn’t have baked right). I think I’d want to add some cardamon next time, just to give things a bit more spice. I also think I’d bake at a lower temperature, as the bottoms of the biscotti came out a tiny bit dark. All in all, though, I’m certain that my coworkers will enjoy these.

Biscotti 3

Do visit Avid Baker’s Challenge to see the other participants’ biscotti.

-D

Ambling into Autumn

Skyway Drive 256

Unsettled weather, cooler nights, random thunderstorms and finally coaxing a few flowers out of the bedraggled looking nasturtiums in the backyard: this is how we know it’s autumn. Oh, and the calendar says so. Otherwise, it’s still bright, warm and sunny as ever. The leaves are coloring up and falling, and we see this as a hopeful sign.

Oh, and the turkeys are still wandering … this isn’t really a sign of autumn so much as a sign of them finding ripe olives, seed pods, and other things they can dig up, scratch out, leap up for, and otherwise desecrate everyone’s yards over. It’s a hard job, but someone has to be the high-pitched barking, early morning wandering, “threatening” car-chasing, feather-ruffling and intimidating neighborhood watch.

We’ve been quiet these last few weeks, but things are rolling along. D’s been THRILLED TO BITS to have secured a contract for Thing 1 at his company. This is a classic example of how we get our friends in Scotland to visit us: we get them contract work here so that they can fly out to their “overseas office” from time to time. (Regardless of the paintings the Cube Dwellers leave on their cubicle walls, they don’t program video games at D’s office. They’re just kind of …addicted to Mario. And Pokémon, apparently. And doodlings with Dry Erase markers when they should be working. This may have been the morning after they got the new espresso machine…) D will be glad with the legal paperwork is all figured out (grrr) and Thing 1 is looking forward to popping in when the weather is at its worst in Glasgow. We’re hoping to have some rain to offer him in California, but …well, it’ll be warmer rain, whatever the case.

Vacaville 86

As you know T has been trying to beat a deadline all summer (she lost – the baby came early, so her editor went on maternity leave unexpectedly). She’s also been attempting to organize a conference on diversity in children’s literature, and has spent the last month twitching under increasingly rising levels of anxiety. She walks around muttering comments like “how do I get roped into these things?” and “I will NEVER do this again.” She harasses sub-committees and micro-manages, she has accumulated boxes upon boxes of swag from publishers in the entryway, she worries over gift baskets, keynote speakers and generally makes a pest of herself to all involved, but everyone WILL have a good conference, or someone will bleed. Fortunately, for all, the angst ends the second week of October, as T’s desk is metaphorically cleared again. For however long that lasts. (Until the January deadline for the next novel. Eek.)

Vacaville 87

D., meanwhile, is a third of the way through teaching his class this semester, and he’s fortunately remarkably calm this time around (not team-teaching will do that for you). He coaxed T. out to paint some pottery in the relaxing quiet (once the hen party finished up) of a Benicia art center, and we’re now enjoying our little coffee pot and ginormous mug. Many more will come to join that one – there’s nothing like a full liter of tea all at once! He’s enjoying all the cookbooks and kitchen paraphernalia received for his birthday (and the lovely herb planter full of growing things), and the cooling temperatures are at last tempting us back into the kitchen.

Which leads to one of our most recent purchases (aside from the necessary purchase of The Fridge of Fabulousness which replaces the 1990’s second-hand fridge we had that gave up the ghost in a puddle of sticky oil and water last month): a doughnut pan.

(Point of interest: To us, doughnuts are the proper spelling, and donuts are …some self-stable, powdered sugar abomination on a grocery shelf. No one else says so, and it’s ridiculous, but why else are there two spellings except to allow us to mock one? That’s our story, and we’re sticking to it.) The doughnut pan purchase is, like so many things, our friend Jac’s fault. She got a couple of pans last year, and we watched with interest as she tried vegan and non-vegan recipes in them, with varying success. And then, she went mad and pointed out a TON of recipes all over the web. And T. kept saying, “We do NOT need a doughnut pan. If we had one, then we’d eat doughnuts.

This observation seems to have some merit.

Baked Cinnamon Doughnuts

    Skyway Drive 251

  • 1¼ cups almond flour
  • ¼ teaspoon salt
  • ¼ teaspoon baking soda
  • ½ teaspoon ground nutmeg
  • 1 teaspoon ground cinnamon
  • 3 eggs
  • ¼ cup butter, melted
  • 2 tablespoons honey
  • ½ teaspoon pure vanilla extract
  • ¼ cup butter, melted
  • ¼ cup granulated sugar
  • 1 tablespoon ground cinnamon

Directions: Preheat oven to 350 degrees Fahrenheit. Grease a doughnut pan (6 regular sized donuts) with cooking spray. In a food processor, pulse together almond flour, salt, baking soda, nutmeg, cinnamon, eggs, ¼ cup of melted butter, honey, and vanilla extract. You want all ingredients to be smoothly blended together – and prepare for them to be super, SUPER sticky. Divide batter into prepared doughnut pan (and smooth them out with wet fingers). Bake for 12 minutes. Remove from oven and let doughnuts cool in pan for 10 minutes. Run a knife around edges and then remove gently from pan.

Skyway Drive 258

NB: OBVIOUSLY, we diverted from this plan at the last minute because who would we be without totally skiving off and deciding to do our own thing? First, we used Truvia sweetener – and somehow T. only used a couple of tablespoons, thinking that it might be too sweet. It…wasn’t. Also, the recipe calls for honey for a reason. Two sugars help to keep a pastry moist and chewy because science. Next time, perhaps some of us might follow the recipe here. (*cough*)

Next deviation: we sliced a peeled apple into rings, filled each of the doughnut spaces halfway, pressed in an apple ring, and then filled in the rest of the batter. If you’re going to have cinnamon, you may as well have apples, no? Gala, Granny Smith, Fuji, and Pink Lady bake up nicely.

For the topping, pour melted butter butter into a flat bottomed bowl. Combine sugar and cinnamon in another flat-bottomed bowl. Dip your warm donuts in butter then in cinnamon/sugar mixture.

As you can see, we didn’t bother with the cinnamon-sugaring, either. Because we feared the thick batter would make a crumbly, dry doughnut, we whipped up a quick creamed-cheese-cinnamon frosting. The apple actually came to the rescue — adding sweetness, moisture, and overall tastiness to an experimental treat. A lot of baked doughnuts rely on the frosting – and neither T. nor D. are huge frosting people – so this was a gamble that paid off well with a mildly sweet, you-could-eat-it-for-breakfast doughnut. Further Fiddling (veganizing as well) with the basic recipe to follow!

Skyway Drive 259

Happy October.