Jam Tomorrow & Jam Yesterday

Jam Tarts 1

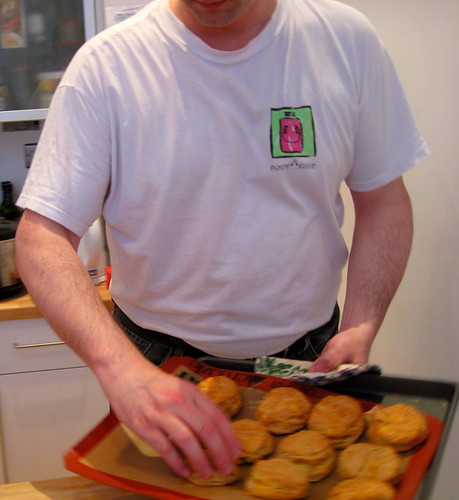
D. hardly can go in to work now without some kind of goody in hand. He’s run through his repertoire of cakes and pies and after fulfilling a scones-like-my-nan’s request, has received another query. “How about a strawberry tart?” someone suggested.

The problem with a strawberry tart is that in two weeks it’s November and we’re well away from the season where strawberries will come up from the earth. There are no berries in the store that anyone would want to eat, and cranberries are, sadly, a New World food. After considering frozen strawberries (ugh) and pondering some other kind of fruit (meh), we decided to try to make jam tarts.

Jam tarts are kind of a British thing anyway. Most of the time, they’re seen in miniature – as cookies that look like they’ve been thumbprinted with jam, or ramekin-sized goodies that are split in fourths. In order to truly make a jam tart, one needs a tart pan; not having one of those, we settled for eight ceramic ramekins and one spring-formed pan, and whipped up a thick, sweet crust.

Jam Tarts 3

  • 1 1/2 cups (210 grams) all-purpose flour
  • 1/2 cup (70 grams) stone-ground cornmeal or polenta
  • 2 teaspoons baking powder
  • 1/2 teaspoon salt
  • 9 tablespoons (4 1/2 ounces or 130 grams) unsalted butter, at room temperature
  • 1/2 cup (100 grams) granulated sugar
  • 1/4 c. grated lemon rind
  • 2 large eggs, whole
  • 1 large egg, separated
  • 1/8 teaspoon almond extract
  • 1 1/3 to 1 3/4 cups (450 grams) jam (see Note above; I used the smaller amount) or marmalade
  • 2 tablespoons (30 grams) coarse-crystal or granulated sugar

Mix your dry ingredients – the flour, cornmeal, lemon rind, baking powder and salt – together in a bowl. Using an electric mixer cream together your butter and 1/2 cup or sugar until smooth. Add the eggs and almond extract and beat until combined. Gradually sift in the flour and mix until the dough comes together like crumbs.

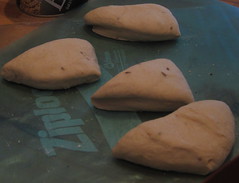
Take about half of the dough, wrap it securely in plastic, and refrigerate for minimum one hour, or you could go Smitten Kitchen’s route and freeze it for half an hour. Whatever works.

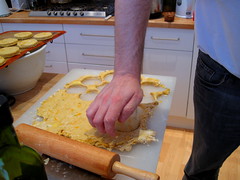
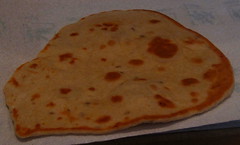
We’re not quite sure what happened with the crust. When Smitten Kitchen made this, it came through together easily enough. We, thinking we knew best, made a few changes: first, we added two eggs, instead of a single egg plus a yolk, as the recipe called for. We grated the cold butter as we usually do for crusts and pastries, though the recipe calls for room temperature butter. We ended up with a sandy, sticky dough, and T. was disappointed, because she’s been jonesing for farm-looking autumn stuff, and wanted to use her new rooster cookie cutter, or, barring that, her selection of leaves. Or, probably both, knowing her. The crust was just too …something for that. Heavy, sandy, sticky… you name it. We should have chilled it for more than fifteen minutes, but …um… we didn’t. We won’t say who’s fault that was. We went with Option B. and patted the crust down into our pan and figured we’d worry about tart top later.

Jam Tarts 6

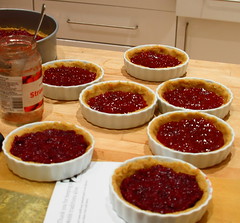
The good thing about jam tarts is that it doesn’t really matter what kind of jam you use, but a word to those not wanting to flail about in a diabetic coma: use a tart jam or halve the amount of sugar in the crust! We had a jar of store-bought strawberry left over from the pirate cake a thousand years ago, unopened in a cabinet because we couldn’t bear to eat it ourselves. (One great thing work people are for: to eat food you wouldn’t otherwise know how to consume.) Our other choice was our lovely tart homemade blackberry jelly. We decided to use the less sweet jam in larger quantities, having some mercy on the health and well-being of D.’s coworkers. (As it turns out, he needn’t have bothered!).

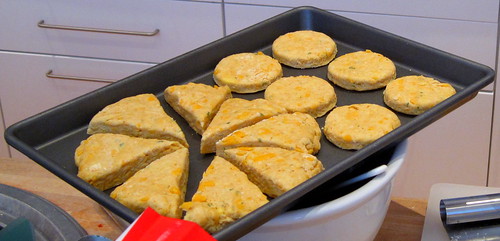
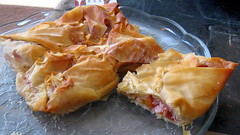
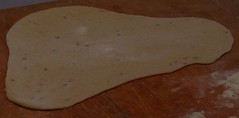
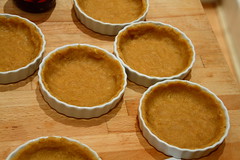
After spreading the jam evenly on the bottom of each of the tart crusts, we rolled out a large piece of crust, and turned it over the pan. Some of it cracked a bit, but we knew it would melt together, and were not really concerned. We perhaps should have been! We had some small pieces left, and decorated the strawberry mini tarts with them, so eaters could tell the jams apart. We topped the crusts with the 2 tbsp. of sugar, and baked the tarts for twenty minutes in the oven.

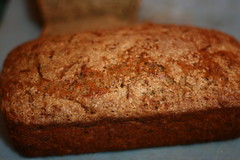
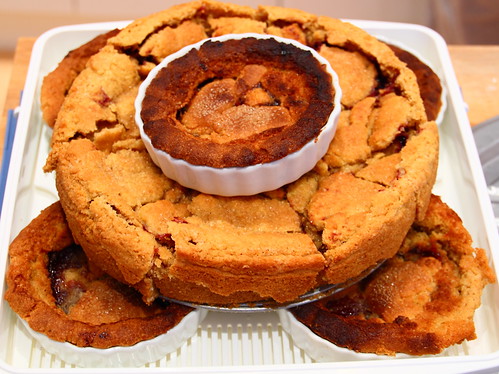
They were gorgeous, and depanned pretty well. If you don’t plan to depan immediately, USE LINER PAPER ON YOUR PANS. Once the crust cools, it’s really not easy to get out, although it came out of the springform just fine (only the bottom stuck a little). We were surprised by how cookie-like and how unlike pastry the tart crust turned out to be. D. wasn’t fond of it at all, but T. tasted it, and said it reminded her of chewy sugar cookies. However, T. worried again that the strawberry tarts were simply too sweet, but they were among the first to go at D’s office, and the large bramble tart was consumed down to the last bite.

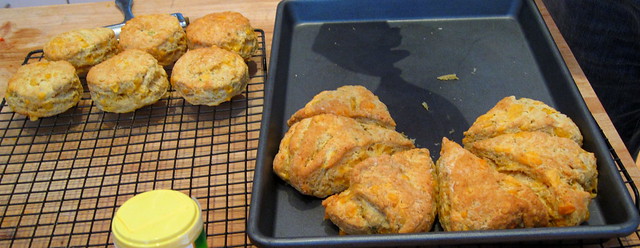
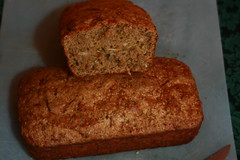
As you can see, the tarts are stacked in the carrier, and ready to ride in the cab. The large tart has been pre-sliced — and it sort of looks cracked, exactly like a cookie. It’s … maybe it’s the flour? We just expected the crust to be not quite so cookiesque. Weird.

Not bad for a first run, but we’ve got a bit of work to do on this one…

A Scone is Not A Biscuit, And Other Friday Observations

You know you’ve made it in the world of volunteer culinary when you start getting requests.

He says, “Wouldja make me some of those cheese scones? Like m’grandmother used to make?”

Cheese Scones 1

While it’s all very well to be asked to make something, no one in the world is ever going to measure up to a grandmother’s baking. Anyone’s grandmother’s baking. (Except maybe T’s; she begs her family to remember the red velvet cake. ::shudder::)

D. put off the scones with a box of Kahlúa brownies, which were an excuse for T. to decorate them with little gold balls and make the individual pieces look like dominoes (no pictures of those, sadly – they vanished), but after a cranky complaint from a dieting coworker, D. woke up Friday morning with the idea of a savory treat in his head – one the coworker didn’t like, and wouldn’t eat.

Cheese scones it was.

The recipe was somewhat of a surprise. D. did a bit of research, starting with the redoubtable Cynthia’s blog, Tastes Like Home, visiting the BBC Food page and passing by The Fresh Loaf for more inspiration. He did a lot of muttering. “What? Eggs?” he exclaimed. “Who puts eggs in biscuits?” We quickly learned that a scone is not a biscuit, no matter how similar they might appear to be. After a bit of poking around, we finally settled on a little input from each recipe blog, and roughed out a recipe that went something like this:

Sharp Cheese Scones

Cheese Scones 4

  • 1 1/2 cups flour
  • 1/2 tbsp of baking powder plus 1/2 tsp. baking soda
  • 1/2 stick butter
  • 1 large egg
  • 2 tbsp whole milk
  • 1 cup strong cheddar, grated plus 1/3 c. finely grated Parmesan
  • 1/3 tsp salt
  • 2 tsp mustard
  • 1 tbsp. dried chives, optional
  • Pinch of Cayenne pepper, optional
  1. Combine dry ingredients – flour, salt and pepper.
  2. With a fork, cut in the butter and when thoroughly combined, mix in the grated cheese.
  3. In a separate bowl, beat the egg. Add in the milk; add mixture to the dry ingredients to create a soft, elastic dough.
  4. Roll out the mixture on a lightly floured surface. Cut into round shapes and place on a well greased tray.
  5. Bake in a pre-heated oven in the center rack at 350° for fifteen minutes, or until golden brown.

We differed briefly on the method of cutting the scones. T. is a drop-biscuit kind of gal, and D’s mother always cut them out, so he does, too. For the scones, T. wanted to have the wedge-shaped type, which are simply cut with a wet knife, and D. wasn’t having it. Compromise was reached by having a little of both.

Cheese Scones 8

Though the dough was somewhat obstreperous – from the butter being dug out from the freezer and grated – the scones were almost as easy as biscuits, and smelled scrumptious when they were baking. They looked lovely, but after a taste test, T. was only “meh” about them. “They’re …buttery,” she said, and made a face. (T. does not like the buttery. Does not like the short. Does not like shortening bread, shortbread cookies, or pie crust. We know. We deal with her as we do all the insane: we speak gently to her and let her gnaw on celery like she wants.) D. was “meh” about them because he felt they should be spicier. We loaded the scones up to take them to our British Tasting Audience. Several Irishmen, a bunch of Scots men and women and a few gents from the Commonwealth countries of India and Africa were to be our victims subjects. What would they say?

Reactions were gratifying. Most of the British Tasting Audience (BTA) were excited to find the scones still warm. Several made gleeful remarks about their grandmothers, and moved to surround the plate where they lay. (Not the grandmothers. The scones. Stay with us, here.)

The original requester of the scones described them as “perfect,” which was a happy event – apparently D. is every bit as good a baker as his grandmother in at least one thing. And then, some of the BTA found the scones “spicy.” We can assure you that no more than a quarter teaspoon of Cayenne was added, so the word “spicy” in this context made T., who douses her food with Cholula at every opportunity, lie down on the floor and weep. However! The highest compliment was paid by D’s boss, who is a grinch-hearted grump before ten a.m. when the “trolley” comes by with sandwiches, bagels, and scones for elevenses. D. can rarely speak to his boss before that hour, and today — today his boss skipped the trolley and ate two scones. A happy, reasonable man prior to ten a.m.! (Well, a happy man, anyway. Let’s not push things.)

We’re still not sure if it was our recipe or the way we made the scones or what, but while this wasn’t a favorite for either one of us, they were passably good (and go well under beans, as if one was having beans on toast). D. is excited to have found a lemon rosemary scone recipe, while T. is pretty sure that scones are just made to be eaten with jam. Lots and lots of jam… and she saw a recipe that has the jam baked in on top. Experiments will follow!

The BTA is actually pleased to know that D. takes requests, and is plotting something else for him to make. Meanwhile, D. is not resting on his laurels, but is instead wondering how to make pierógi…

Cheese Scones 6

Zucchini Bread / Spice Cake

This is what happens when you’re used to buying at the store, where you can actually see the quantity you’re buying, yet give in to the convenience of shopping for groceries online: you end up with 10, large zucchini / courgettes. So, what to do? Well, some of them will be used later, of course, but today’s baking adventure was to double up the recipe below to make 4 loaves of zucchini bread!

Garam Masala Zucchini Bread 1.2
Garam Masala Zucchini Bread 1.1
  • 6 Tbsp ground flax seeds whisked into 1/2 Cup + 1 Tbsp warm water
  • 1/2 cup oil
  • 2 cups sugar
  • 1 Tbsp vanilla extract
  • 2.5 cups grated zucchini
  • 3 cups AP flour
  • 1 tsp salt
  • 1 Tbsp baking powder
  • 1 tsp baking soda
  • 1.5 Tbsp of your favorite spice blend
  1. Grease 2 loaf pans
  2. Preheat oven to 350°F / 180°C
  3. Blend flax, oil, sugar, and vanilla
  4. Add zucchini and mix
  5. Sift dry ingredients
  6. Add dry to wet and mix just to combine
  7. Divide between prepped pans
  8. Bake for 45-50 minutes (a toothpick should come out clean)

Delicious stuff, and a great excuse to both use up any excess zucchini you have around, and to use up those coarser bits of your spice blend.

-D & T

Note: the pictures above are from another batch, 2 years ago.

Savory Spice Blend

Now, this isn’t a recipe, per se, but merely a list of things that we like to throw together, to make what we call Popcorn Salt (although it contains no salt). It should more properly be called Tofu Rub, because that’s where it finds its most common application in our kitchen, although we’ve also been known to throw it into a savory cornbread (you know: veggie sausages in the batter, some nice chili on the bottom).

Lynedoch Crescent D 442

  • Rosemary
  • Cumin
  • White Peppercorn
  • Sichuan Peppercorn
  • Celery Seed
  • Yellow Mustard Seed
  • Brown Mustard Seed
  • Allspice
  • Dill Seed
  • Sage
  • Thyme
  • Oregano
  • Caraway Seed
  • Onion Powder
  • Garlic Powder
  • Nutritional Yeast
  • Chipotle Powder

In the past, we’d made enough to fit into a little spice jar, but grew tired of having to always make new. That’s why you’ll see the many layers of the same ingredient: D. knows the ratios pretty well for doing a single batch, but this was at least a triple batch. So, he had to go through the spices twice.

Not pictured here are the onion and garlic powders, the chipotle powder, and the nutritional yeast. The yeast gets blended, but separately and mixed in. The onion and garlic powders are just added and mixed in, as is the chipotle powder.

This stuff will really spice up just about anything – make your own mix up, balancing out the spices as you think you’d like them, and give it a try!

-D & T

Sunday Sweets

Peach Parcel

These days we find ourselves often looking out the kitchen window toward our friend Bridgette’s house. She, her husband, and her four very blond children (Scando Kids) defected in June — okay, well, she graduated from Uni with her law degree, and has moved to San Francisco to pursue the rest of her happiness.

The day we said goodbye, we met in the middle of the street in a flurry of hugs and well wishes. It occurred to both of us, then, that we had neither one been inside the other’s home, though we’d met last Spring.

Here’s the thing about everyday life: if you let it, it will make you into a terrible, terrible friend. You get busy. You get mired in routine. You get hung up on your own little grumpies and insecurities. You stay home. You never go downstairs, cross the street, and buzz the neighbor to come over for tea.

Granted: Bridgette and D. are students. Bridgette’s four kids are students. Bridgette’s husband and T. are very busy with their own business and interests, and all of our paths have diverged in nineteen different directions. Still…

Missing Bridgette waving from the window across the street is a little pinch — well, really, a little kick in the behind — that reminds us to be better friends to the people we have around us.

Vegan Oreos 04
Vegan Oreos 03
Vegan Oreos 05
Vegan Oreos 08
Vegan Oreos 07
Vegan Oreos 10
Vegan Oreos 11
Vegan Oreos 13
Vegan Oreos 12
Vegan Oreos 14
Vegan Oreos 15
Vegan Oreos 16
Vegan Oreos 17
Vegan Oreos 18
Vegan Oreos 20
Vegan Oreos 21
Vegan Oreos 23

We finally had our friend C. over, and had our delayed Christmas-in-July dinner, and in honor of that, we made homemade sandwich cookies. Now, The Gluttonous Vegan calls them No-Reos, and Smitten Kitchen just called them handmade Oreos. To us, they’re just too sweet to be that classic cookie, and they’re also far too soft — but they’re yummy, and they look a lot like the cookies on which you see Cookie Monster chowing down on Sesame Street. Next time we make them, we’ll cut the oil required in half — we want a dryer, crisper cookie — and cut the sugar another third to give a greater contrast between the filling and the cookie itself. Also, we’ll make up the filling and add a drop more mint than we think we need, because the flavor seems to evaporate in the face of the sugar.

Here is the recipe, as it stands — we hope you fiddle with it and share your variations

Mini Monster Sammich Cookies

  • 1 1/4 cup plain/all purpose flour
  • 1/2 cup Dutch process cocoa
  • 1 tsp baking soda
  • 1/4 tsp baking powder
  • scant 1/4 tsp salt
  • 1 cup sugar (Seriously? You can get away with 3/4 c.)
  • 1 cup butter or margarine, softened (Seriously: you can get away with less.)
  • 1 tsp vanilla extract
  • 2 tsp. milk

Sift together your dry ingredients, except for the sugar. In a small bowl cream sugar with your margarine, vanilla and milk, then add dry ingredients, a little at a time, until you have a dark, fragrant and smooth blend. This may give your hand mixer a run for its money; it’s quite a sticky dough.

We rolled out our dough between two layers of plastic wrap, then scored them so that we had four rows of nine squares. With moistened hands, we took each small square and rolled it, placing it about an inch and a half apart on the Silpat. (Parchment paper or a plain pan will do, too.) When our pan was filled with little balls of cookie dough, we lay a plastic wrap over the lot of them, and flattened them with a bench scraper. (If you want to flatten your cookies to an individual thickness, a guide like a pair of chopsticks comes in handy. We used these for the large cookies.)

Because Oreos are stamped (actually they’re probably baked in a pan with concave lettering so it stands out on the cookie when it’s baked) with words, we thought we’d make our own cookies specific and Christmas related. From T’s box of rubber stamps we located (and thoroughly washed) a star stamp, and used it to mark each cookie. The stamp must be one with a simple pattern and a lot of deep grooves to work.

We baked these cookies at 350°F/175°C for nine minutes per batch.

The filling of the cookies is easy enough — but we cheated. We had leftover cream cheese frosting from D’s workplace going-away-party cinnamon buns, so we added icing sugar to that and a bit of mint extract. For a from-scratch cookie filling, we’d suggest

      2/3 c. of butter,
      about a cup and a half of powdered or icing sugar,
      a scant teaspoon of mint, orange, or almond extract. Or a high quality vanilla, if you must.

Cream the butter and add the sugar a little at a time, on a low speed, until you have a fluffy frosting.

We used a parchment paper bag and piped a half-inch circular schmear of frosting on a single cookie, and twisting on the cookie caps. We ended up with far more frosting than we needed, and tried to open the cookies and add more — be careful! The cookies want to stay together, once the frosting is set. A gentle twisting motion will reopen them as necessary, but it’s better to err on the side of adding too much filling instead of too little. Too much will at least squish out!

You needn’t wait to have friends over to make these. Heck, you can make these, shove them in a box, and just take them across the street, ring the bell, — and run away. Or, take them to work, and worry your coworkers with why you’re being so nice. Or, leave a box in the mailbox for the postman, or feed them to your kids with a glass of ice cold almond milk. We took a load of ours to friends with a new baby – and hope they enjoy eating them as much as we enjoyed making them.

Look up from your routine – and see the people around you. The sweet possibilities for friendship are endless.

Vegan Oreos 22

Thai Curry

Okay, so, this stuff went so fast that there were no pictures whatsoever. That, and the big camera’s in the shop, and I just didn’t think to record anything about it until we’d scarfed it down.

Thai Curry:

  • 2 blocks firm tofu (not silken), cut into 3/4″ cubes
  • 1 yellow onion, roughly diced
  • 2 Tbsp olive oil
  • 2 large carrots, cut into chunks (you know the way Yan, of Yan Can Cook does it? That way.)
  • 2 Tbsp Red, Thai curry paste
  • 2 Tbsp sugar
  • 1 Tbsp garlic paste
  • 1 Tbsp lemon grass paste
  • Juice of 1 lime (preferably the wee Key lime)
  • 1/4 tsp cayenne pepper (not optional)
  • 100g Coconut Cream (it’s just coconut milk, solidified, so you could substitute a can of coconut milk, but decrease the water if you do)
  • 4 tomatoes, deseeded and cubed
  • 20 or so basil leaves
  • 1 Tbsp cornstarch / cornflour, dissolved in 2 Tbsp cold water
  • About 1 liter of water
  • 1 cup rice
  • 1.25 cups water, to cook the rice
  1. Wash all the gunk off of your rice, and start it going on low heat, lid on, in a separate pan. It should be done by the time the main dish is done.
  2. In a very large pan, sauté tofu in olive oil until it’s got a few sides which are nicely crispy.
  3. Toss in your onions and sauté a bit more.
  4. Add your water to the pan (back away from the steam) and toss in all of your other ingredients except for the tomatoes, basil, and cornstarch.
  5. Scrape the bottom, to make sure everything’s come unstuck, and to dissolve all of your seasonings.
  6. When things have reduced a bit (call it 5 minutes), add in your cornstarch, reduce the heat to very low, and cover the pot.
  7. When your rice is done (take off the lid, tip it sideways, and no water is left), turn off the heat on everything.
  8. Throw in your tomatoes and basil, and serve immediately.

Makes 4 servings if you’re fans of rice, makes about 3 if you want to cut down on the carbohydrates by limiting the rice and going for more tofu.

This stuff is the stuff of happy food dances and good health. We’ll ignore that the coconut is just a ball of saturated fat, and think happy thoughts about all of the other good things in here. Feel free to toss in some broccoli, if you’re of a mind to, as well.

-D

Homemade Naan? Sure, You Can!

This past visit to D’s Professor’s house, we brought cake — but knowing that Professor himself was cooking a vegetable curry for us, we brought freshly baked naan.

Naan is one of those things that’s either addictive and habit-forming, or it makes you sick. Store-bought naan… makes us sick. Cushy soft, oily white bread might taste good, but pretty soon, our bodies complain about the oil content and the preservatives. Naan from a South Asian restaurant generally digests just fine… the problem there is that you could eat your body weight in the stuff, if someone is willing to bring it hot to your table.

We knew we were flirting with disaster making our own — it really is very good — but what’s curry night without naan? And it’s ridiculously easy, too.

A Basic Naan
modified from Bake My Day

  • 4 C white whole wheat bread flour, plus extra for dusting
  • 1-1/2 tsp salt
  • 1 Tbsp olive oil, plus extra for frying
  • instant or dry yeast – about 1-3/4 tsp active dry yeast
  • 2 cups water
  • 1 teaspoon caraway seeds plus 1 tsp. cumin seeds, whole
  1. First, mix the flour, salt, oil, yeast, and water into a bowl and mix together for 5 minutes to allow the yeast to act. Tip out onto a lightly floured counter and knead for 5 minutes, or until the dough is soft and pliable. Let rise for a half hour.
  2. On a plastic covered cutting board or a Silpat, divide your dough into eight even pieces, then leave to rest for 1 hour.
  3. At the end of the hour, place the dough on a lightly floured counter and, with a rolling pin, roll out each piece into a rough circle. Your dough should be about a half inch thick. The original recipe suggests letting the dough rest again, but we’ll be honest — we didn’t. We were working under a deadline!
  4. We used a stainless steel skillet, spritzed it with olive oil, and flopped a single rolled out piece of dough on it, over medium flame. As we watched, the dough bubbled, and after about a minute, we flipped it over to bake on the other side. The first naan was very golden-brown, but seemed unnecessarily greasy. Since the dough contains oil, we simply used a dry pan and bake/fried the bread, watched it bubble, turned it with our fingertips (it doesn’t stick) and watched them stack up!

We like our naan pretty thin, and while we enjoy it plain, it’s easy enough to add chunks of garlic or onions, raisins and curry powder, or any of a number of other treats that make it habit forming and hard to stop eating. One thing we know for sure, though: no more store-bought naan. It’s just not EVER going to be as good as what we make ourselves.

Quick Curry

OK, people: curry. Quick, easy, yummy. Thanks to The Gluttonous Vegan for the inspiration:

Curry:

  • a sweet potato, peeled and cubed
  • tofu, cubed into small cubes
  • a carrot, cut into wedges*
  • 3 green onions, thinly sliced
  • 2 white onions, roughly chopped
  • 6 large mushrooms, cut into 1/8ths
  • 3 cloves of garlic, minced
  • 1 sachet (50g) coconut cream
  • 2 Tbsp green Thai curry paste
  • 1 Tbsp ginger paste
  • 2 tsp pepper flakes (to taste)
  • vegetable stock
  • basil leaves, shredded
  1. Sauté your white onion and mushrooms until tender.
  2. Add curry paste and let it heat through a bit.
  3. Add stock plus everything else except the green onion and basil leaves.
  4. Let simmer for about 20 minutes, until the sweet potatoes are nearly done.
  5. Remove from heat.
  6. Add green onions.
  7. Prepare some rice.
  8. Serve over rice, garnished with basil leaves.

*Note: Ever since having seen Yan (of Yan Can Cook) prepare carrots this way, I’ve done so as well. Basically, you’re cutting across the carrot on a 45° angle, and rotating the carrot 1/4 of a turn after each slice. This results in chunks of carrot which are wedge-shaped, irregular, and interesting to encounter.

Vegetable Stew for a Chilly Day

Woodlands Road 52

It’s chilly, here in Glasgow. Autumn has truly hit, to the point where even the wee trees know The End Is Nigh, and are turning colors. Most of the leaves don’t even make it to red, but just fall off, yellow, to be scooped up by the whistling street-sweeper, at some unheard of hour of the morning.

Life’s busy – we’re both working hard on getting our tasks finished before the arbitrary deadlines imposed by … all manner of people. Some day we’ll emerge from our cocoon, here, but for now, it’s all about food which is easy to make. Thus, Vegetable Stew.

Vegetable Stew

  • 1 red onion, diced
  • 1 white onion, diced
  • 2 shallots, diced
  • 8 cloves garlic, minced
  • 2 Tbsp vegetable boullion
  • 1 tsp extra hot chile flakes
  • 1 large jalapeño, minced
  • 1 bay leaf
  • 20 gratings of nutmeg with your microplane grater
  • 1 cup vegetarian mince
  • 1 cup frozen sweet-corn
  • 1 cup frozen soybeans
  • 2 cups potatoes, matchsticked
  • 12-oz crushed tomatoes
  • Water (as needed)
  1. Sweat onions, shallots, garlic, bay leaf, and vegetarian mince until onions are tender (and the mince has absorbed some of the onion flavor).
  2. Remove the bay leaf, and add everything else.
  3. Cover everything with water – not too much, but enough to let it really go for awhile.
  4. Let cook until the potatoes are just done.
  5. Serve (with an optional dollop of cottage cheese).

O, Great Pumpkins

Thai Noodles

“Eat food.
Not too much.
Mostly plants.”
~ Michael Pollan

We had BIG PLANS to participate in the Vegan Month of Food challenge. We planned on making coconut milk caramel to go with our harvest apples. We were going to experiment with making black-eyed pea fritters, marshmallows from a new recipe we’d found that uses xantham gum, and a tribute remake of a lovely Clementine Pie we saw this summer. We had all manner of nifty things we were going to bake and cook and post about.

Instead, on the very first day of the month, I got sick with the Days of Incandescence; five horrible days of fever over 101°F/39°C and aching joints, and spent two miserable weeks with a cough and aches and weakness that wouldn’t go away. I believe I was visited by the dreaded Bacon Lung, close cousin to the Swine ‘Flu. Seeing as I’m a vegetarian, it plagued me only briefly, then had to go away…

In all seriousness, though, I was bummed to be getting sick so early in the season — and so seriously sick. I had to sleep with ice packs at one point, because doses of echinacea, olive leaf extract, Sambuccol/black elderberry extract, Tylenol/Paracetemol and other non-aspirin fever reducers weren’t working. (And, as you can see, we tried everything.) Every time I get sick, I wonder if it’s something I’m doing wrong. Am I eating too much sugar? Am I not drinking enough? Is it because I don’t do yoga? Should I not color my hair? So, instead of it being a month of fun food, it’s been a month of obsessing. And driving D. crazy.

Luckily for you, though, I’m almost done.

Pumpkin 1


D. brought home a pumpkin the other week, much to my glee. Like most New World foods, pumpkins are sold here, but we usually see the wee-tiny decorative gourds or big massive things that are meant to be cut up for jack-o-lanterns. Though it’s really more a matter of seed variety, I suspect that the big pumpkins don’t expend all their energy on flavor, so it was nice that our grocer down the way had small ones.

We halved the pumpkin and baked it face down on the tray. D. scraped the cooked flesh from the rind, and we had enough to freeze, and enough to make two loaves of pumpkin bread. Using your own pumpkin purée is not the same as using canned pumpkin; the canned is a.) often not solely pumpkin and b.) packed in and of consistent water content. This first pumpkin was drier than expected, so the batter turned out a little thicker than usual (this is what I get for “winging it”), making for a slightly heavier loaf. However, I only used half the purée for this first batch, and will do a little adjusting of liquids for the second batch, which should be prettier.

Great Pumpkin Bread

  • 3 tbs freshly ground flaxseed *you can buy it pre-ground, but it goes rancid quickly. We just keep seeds on hand and use the coffee grinder.
  • 1/2 cup boiling water
  • 3/4 cups sugar
  • 1/4 cup agave nectar *or sub maple syrup or honey; 2 sugars keep it moist
  • 1/2 cup applesauce
  • 1/3 cup canola oil
  • 2 cups fresh pumpkin puree
  • 3 cups whole wheat flour
  • 1 tsp each of the “usual” freshly ground spices: cinnamon, nutmeg and powdered ginger
  • 1 tsp baking soda
  • 1/2 tsp baking powder
  • 3/4 tsp salt
  • 1 cup chopped candied ginger

Preheat the oven to approx 350°F/177C°.
In a big bowl, stir to combine the flaxseed and water. Let it sit for two minutes, until it thickens. Add your sugars, applesauce, oil, and pumpkin.
In a separate bowl, stir together the flour, spices, baking soda, baking powder, and salt.

Pumpkin Bread

A little at a time, stir the dry ingredients into the wet, at the last, fold in the chunks of candied ginger. Divide your batter into two regular lightly oiled loaf pans — or you can use four tiny loaf pans, and make gift-sized loaves. Sometimes we sprinkle a bit of raw sugar on the top just before baking, but post-sick, I’m sticking with a bit of wheat germ. (Yeah, that’ll pass.) Bake for 55 minutes until golden-brown. Allow the bread to cool in the pans for about fifteen minutes before attempting to remove it, as it will be quite moist and apt to break if you try earlier.