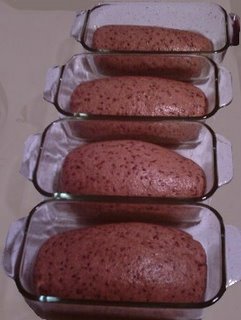
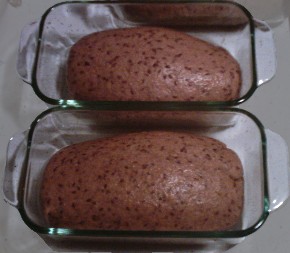
Fiber Bombs

We started these off with a basic carrot cake recipe, and it’s morphed to the point where we don’t believe they’re the same thing whatsoever. We call them Fiber Bombs because there’s so much danged fiber in them, and because they really have an effect upon your system, especially if you’re one who’s a stranger to fiber. To us, they’re just snacks, but to my coworkers? Well, let’s just say “colon health,” shall we?

Fiber Bombs:

  • 1/2 cup pecans or walnuts, toasted and coarsely chopped
  • 2 cups grated raw carrot (about 2-3 carrots)
  • 1 large apple, grated
  • Some Raisins (to preference – maybe a cup or two)
  • 2 cups (280 grams) all-purpose flour (or White Whole Wheat)
  • 3/4 cup golden flax seeds
  • 1/4 cup wheat germ
  • 1/4 cup oat bran
  • 1/4 cup sugar
  • 1/2 cup honey
  • 1/2 cup molasses
  • 3/4 teaspoon baking soda
  • 1 1/2 teaspoons baking powder
  • 1/2 teaspoon salt
  • 1 1/2 teaspoons ground cinnamon
  • 1 cup coconut (unsweetened. if using sweetened, omit the sugar)
  • 1 cup water
  • 1/2 cup flax seeds, ground
  • 3 tbsp olive oil
  • 1 1/2 teaspoons pure vanilla extract
  1. Preheat oven to 350 degrees F (180 degrees C) and place rack in center of oven. Place paper liners in 18 muffin cups.
  2. Toast the pecans or walnuts for about 8 minutes or until lightly browned and fragrant. Let cool and then chop coarsely.
  3. Finely grate the carrots and apple (an Asian Mandoline works fabulously for this). Set aside.
  4. In a large bowl whisk together the flour, sugar, baking soda, baking powder, salt, and ground cinnamon. Stir in the nuts and coconut. Set aside.
  5. In a separate bowl whisk together the ground flax seed, water, oil, and vanilla extract. Fold the wet ingredients, along with the grated carrot and apple, into the flour mixture, stirring just until moistened. Evenly divide the batter between the prepared muffin cups and bake for 20 – 25 minutes or until a toothpick inserted in the center comes out clean.
  6. Remove from oven and let cool on a wire rack. After about 10 minutes remove the muffins from the pans and cool completely on a wire rack.

Cranberry Muffins

I thought it appropriate that, for post number 99, I should throw a recipe out there. After all, this site’s about not being able to bake things as often as we’d like, at least in part. So, without further ado, and for Writegrrrl because of the loss of her email:

Cranberry Muffins:

  • 1C Xylitol
  • 2C Sugar
  • 6C White Whole Wheat Flour (King Arthur), Sifted
  • 2/3C Flaxseed, Ground
  • 3C Water
  • 1 Orange’s Zest, finely chopped
  • 1 Orange’s Juice
  • 1 Tbsp Vanilla
  • 2 Packages Cranberries
  • 1C Candied Ginger, Chopped
  • 5 Cloves
  • 1 Inch Cinnamon Stick
  • 1 “Arm” of Star Anise
  • 8 Allspice Berries
  • 2 Tbsp Baking Powder
  • 1/2 Tbsp Salt

Grind spices along with Flaxseed and add to the water, orange, vanilla, sugars. Mix in everything else until you have a smooth batter – you could go “muffin method” here, or could mix until it’s as smooth as cake batter. Either way, it works. After all that, add in the cranberries, drop into muffin tins and/or cake pans, and bake at 350 until a toothpick comes out cleanly.

Soy Heresy

So, the heresy here is that we only make tofu when we run low on okara. Don’t get me wrong: we enjoy homemade tofu quite a bit, but we can buy high quality tofu in the grocery store and truly can’t tell much of a difference. Yes, the homemade tastes a bit better when you eat it by itself … but who does that? Okara, now, that’s the stuff which can’t be obtained anyplace that I’ve been able to find, and it adds so much to quickbreads and cookies that I don’t think I’ll ever be without it again.

We get about 3 times the volume of okara as we do tofu, by the way, so in a typical batch we’ll end up with probably 3 cups of tofu, but easily 8 or 9 cups of okara. We take that and dry it out either in the oven or in our dehydrator, depending on how lazy we’re feeling (the dehydrator lives down in the garage, and requires carrying trays of steaming Okara down the outside stairs). After it’s dry, we put it into an airtight bin and it keeps just fine for months (see, if you cook cookies and quickbreads, you eat cookies and quickbreads … hence the shelf-life here).

Coconut Macaroons aren’t the only things you can make with okara, but they’re the only thing I’ve found which absolutely requires okara. Everything else you can swap in some oat bran, some extra flax seeds, whatever, but the Coconut Macaroons require that you take the time to make okara, primarily because the okara’s texture matches better with the coconut, and the okara doesn’t add any more gelatinousness as flax seeds would. They’re worth making, and the extra protein & fiber are a great addition to anything else you might want to make.

Besides, you get the added bonus of people thinking you’re strange and cool for making your own tofu, and you get recipes that most other people have no hope of duplicating.

Coconut Macaroons

Coconut Macaroons

  • 4 C Shredded Coconut (unsweetened)
  • 1 C Okara
  • 1/4 C Xylitol
  • 3/4 C Sugar
  • 6 Tbsp Flour
  • 2 Tbsp Coconut Cream Powder
  • 3 C Boiling Water
  • 1 C Shredded Marshmallow Root
  • 1/4 C Candied Ginger, chopped
  • 3 Tbsp Flax Seeds
  • 1 Tbsp Baking Powder
  • 1/4 tsp Salt
  • 1/4 tsp Almond Extract
  • 1 tsp Vanilla Extract

Add marshmallow root to boiling water and boil for 5 minutes, stirring constantly. Strain out the resulting green goo and discard fibrous remains. Grind flax seeds and add them to the green goo, along with the remainder of the wet ingredients plus the coconut cream powder. Add sugars if you haven’t already, followed by the remainder of the ingredients. Order isn’t important so much as getting in the baking powder towards the end. There’s no gluten formation here, so don’t worry about overmixing.

Form into spoon-shaped cookies using spoons. Forming is important, as these won’t melt or smooth out at all, but will retain their shape, just puffed up a bit.

Bake at 425°F for 20 minutes on a silicone baking sheet, until very slightly browned.

If you don’t have Okara … well, modify. For those of you who don’t know, Okara is the fiber-filled left-overs from making tofu, and is fabulous stuff. We wrote it up Here, but Makiko is where you’ll get the real info on the process.

Despite having no fat and being completely vegan, these cookies are tender and chewy, largely due to the marshmallow root, we think. They take a bit of chewing, due to all of the fiber, but as you chew you get more and more of the marshmallow flavor. They’re truly unique.

Now, this recipe is our own, so go ahead and make it but … well, understand that our feelings of proprietary greed have been at war with our desire to share, and the spirit of the season has caused this lapse, so don’t abuse it.

White Whole Wheat?

Just a quick note to say that “White” Whole Wheat (King Arthur) is truly odd, and caused me a strange couple of hours waiting for it to rise. I don’t know what the deal is with it, but I used a mixture of about 1/2 regular whole wheat and half “white,” both from King Arthur, and followed my standard, can make it without thinking recipe … and it wouldn’t rise. Just plain wouldn’t.

Finally I took it out of the oven, where I had it stashed with the light on to keep it a bit warmer than the 68ºF of the room, and added a whopping 2 Tablespoons of commercial yeast & sent it for another knead. This added another 1/2 Cup of warm water, and which I soaked up with more of the white stuff. Back into the oven and an HOUR later it’d risen enough to bake.

Nothing different about the water, the yeast, the sourness of the starter. Nothing different in the amounts of fiber, the size of the batch, nor the added yeast. I even shorted the salt, as I usually do. Just the flour was different.

I will continue to try this flour, but something about it just doesn’t seem right, in the acidity or something. It felt more like working with Rye or Spelt than Wheat. Strange.

In any event, it turned out nicely, with a perfect balance between sourdough and sweet dough (honey and molasses), so it can go either way. I’m quite pleased with the consistency, although it truly is a dense loaf. We’re down half a loaf by way of tasting … so it’s up early in the morning to slice up the remaining three and carry them off to friends, lest we eat them ourselves.

Weekend Baking, etc.

Sourdough Starters will take over your life, if you let them.

So, I was looking through Sourdough Home about the proper care and maintenance of sourdough starters, because I’ve been wondering about mine. I’ve been keeping them rather stiff – more like a dough than a slurry – and was wondering, ’cause they seem to work quite well like that. I’d seen somebody on one of Julia Child’s shows do that and call it a levain, so it seemed right to me to maintain them like that (one white, the other whole wheat, as Alton suggests). Well, Sourdough Home agrees that it’s OK to do that, but gave me some new information about the refreshing process, so that you get the proper rise out of them.

Long and short, we ended up taking my starters from their jars & radically growing them, so that they wouldn’t smell sour any more, and so that they’d be a bit healthier. Out of all this? 16 pizza crusts, pre-baked & dropped in the deep-freeze, and 4 loaves of broccoli-cheese-onion bread. Oh – and a couple of very happy starters.

Other than the starters, this weekend involved making and canning 9 quarts of mincemeat (mango / pineapple / ginger) and 14 half-pints of chutney (mango / onion / chocolate habañero). We haven’t given any away yet … and it’s going to be a hard, hard decision as to who gets the chutney! Last year’s chutney we weren’t too hot on, ’cause it really wasn’t a finished sauce so much as it was a marinade. This year’s is definitely a finished sauce, and has just the right balance of hot / sweet because of the chocolate habañero (yes – just one single pepper for the whole bunch). I believe that we may be saving these things up for the next Brunch (you know who you are, people) … but there’s been some who have made other plans during this holiday season.

To get your tastebuds appropriately interested in Chutney, I’ve been told to include a recipe which might get you salivating enough to participate in social events (and, maybe, if you’re lucky, receive some chutney):

Flaxseed Falafel with Tzatziki

16 pieces/serves 8

Flaxseed, ground for the batter, and left whole for the coating, give this adaptation of a recipe from Johnson & Wales University in Charlotte, N.C., distinct flavor and texture.

The tzatziki:

  • 1 cup cucumber, peeled, seeded, diced into ¼-inch cubes
  • 1½ teaspoons kosher salt
  • 1 cup low-fat plain yogurt
  • 1 cup regular or reduced-fat sour cream
  • ½ teaspoon sugar
  • 2 cloves garlic, minced
  • 1-1½ tablespoons chopped fresh dill

The falafel:

  • 2 cans garbanzos, drained, liquid reserved
  • 1 clove garlic, crushed
  • 1/2 cup ground flaxseed
  • 1/2 cup chopped parsley
  • 1/4 cup fresh-squeezed lemon juice
  • 1/2-3/4 teaspoon salt + more to taste
  • 1/2 teaspoon ground coriander seed
  • 1/2 teaspoon cayenne pepper
  • 3/4 cup dry bread crumbs
  • 3 tablespoons whole flaxseed
  • 1 egg white
  • 2 tablespoons water
  • Cooking spray as needed
  • 2 tablespoons olive oil

To prepare the tzatziki: Mix diced cucumber with salt, place in a colander set over a bowl; cover with plastic wrap and refrigerate for one hour. Rinse off the salt, drain well and dry cucumber on several thicknesses of paper towels. In a bowl, combine cucumber with yogurt, sour cream, sugar, garlic and dill. Cover and chill at least 30 minutes and up to four hours.

To prepare the falafel: Place garbanzos, garlic and 2 tablespoons reserved garbanzo liquid in a processor and pulse about 5 times, until coarsely chopped. Add ground flax seed, parsley, lemon juice, salt, coriander and pepper and pulse just until mixture is combined. It should retain some texture. Divide into 16 portions and shape into patties about 1½ inches in diameter. Combine bread crumbs and whole flax seed in a shallow dish.

In another shallow dish, combine egg white and water. Dip each patty in the egg white, then lightly dredge in crumb mixture. Set on a rack over a baking sheet to dry for half an hour. Heat a large nonstick skillet over medium-high heat and add oil. Brown falafel well on both sides, turning once.

Serve with tzatziki.

Per serving: 300 calories, 11 g protein, 33 g carbohydrate, 15 g fat (5 g saturated), 15 mg cholesterol, 497 mg sodium, 11 g fiber.

Instead of the tzatziki, it could go with chutney easily!

Early Baking

So, this morning rolled around … at about 4:00 am. Don’t know why, but I was wide awake, so … bread. 9 loaves. 4 loaves of whole wheat (well, my version, anyway, with flax seeds, oat bran, quinoa flour, etc.), and 5 loaves of sourdough olive.

And, of course, after getting everything set up, getting the first batch into pans to rise, and getting the sourdough out and fed and back into the fridge … I realize that I don’t have enough flour. And that the stupid store doesn’t open until 6:00.

However, we are a household of experimental foods, and it’s not like we don’t have other flour, so the olive loaves ended up being at about a ratio of:

  • 1x King Arthur Whole Wheat
  • 2x King Arthur All Purpose Wheat
  • 2x Quinoa Flour
  • 2x Potato Flour
  • 2x Oat Bran
  • 0.25x Vital Wheat Gluten

Of course, that’s just the flour; the wet was 2 cups sourdough starter, 2 cups warm water (to get the starter happy), and one mini-bottle of wine (don’t remember what varietal, but it was red, from Sutter, Napa Valley). Oh, and of course about a pound of black olives. And commercial yeast, and a teaspoon of salt.

All in all a successful experiment. The sourdough loaves ended up wonderfully crusty, and you can really tast the potato flour when you add butter. There’s still the bitter of the olives, of course, but it’s somewhat mitigated by the potato flour. I’m sure that it’ll mature a bit more (after all, we ate it straight from the oven, at 6:45 am), but the cell walls were well developed, so there was enough gluten present, and the crust was thick enough to give crunch but not too thick to cut, and everything was quite tender inside.

Now, to a day of work. And then, perhaps, this evening to bed early to make up for it.

Olive Bread 2.0

It’s been a busy, busy, BUSY week… Between Mac starting the new consulting gig for the fabulous company that doesn’t care if he works in the office or not (Oh, we need so many more jobs like this, please and thank you, God!), me substitute teaching for the first time in aeons while trying to read 47 (at last count!!!) books for the Cybils, and concurrently for that elusive 50,000 words in the National Novel Writing Month competition… and spending every spare weekend moment visiting the Little Sib in the hospital after her major surgery — well, you’d think we’d have no time for baking. And… you’d be kind of right.

As a matter of fact, I’ve actually managed to LOSE a few visibly noticable pounds because not only hasn’t there been time for baking… there just hasn’t been a lot of time for eating, which is actually funny. But, never fear, we who Wish We Were Baking will always find a way… and a means… and a little bit of dough…

So thus is born Olive Brode 2.0. The first loaf was lovely, tender, chewy and tasty… and about three grains of salt short, which we thought would be made up by the ultra-salty olives. Nope. The olives were Italian and rather green, instead of the lovely dark “black” kalamatas, which we are using this time. Also, the good old KitchenAid tends to be really, really hard on olives; we could barely find them after we added them early in the baking process. We’re hoping this time that, by adding them later, we’ll end up with bigger pieces!

Barley Boules

So, I feel like for the first time I’ve gotten it right with the sourdough thing. Don’t get me wrong – the other loaves have been beautiful, some have been sour, some have been boules … but I’ve not done any truly SOUR boules up until these. These babies … well, first off, they don’t have any sweet things in them whatsoever – nothing for the yeast to eat, even, except for the flour. (They were kick-started with commercial yeast, but that’s just by way of insurance.)

I’m going to give an ingredient list, just because I want to be able to come back to it and I’m told that I need to start writing these things down. Yes, I suppose I might want to … but then again, I should really start measuring out the flour – by weight – so that I’ll really know how to re-create these things.

Ingredients:

  • 3 Cups of the sour (1.5 of whole wheat sour culture, 1.5 of white sour culture – yes, they’re different in flavor, and it’s worth maintaining two)
  • 1 Cup of water (110°F)
  • 2 Tbsp Active Dry Yeast (insurance, you know)
  • 1 Cup Barley (with the hull still, please), steamed for 1.5 hours in 1.25 Cups water
  • 2.5 Cups Oat Bran
  • Whole Wheat Flour
  • White Flour
  • 1 Tbsp Brown Mustard Seeds
  • 1 Tsp Caraway Seeds
  • 1/4 Tsp Cumin Seeds

Go for a single, short rise, ’cause it seems to work better with sourdough than going for multiples – or, at least, it’s worked better for me. Of course, it could be said that I actually go for multiple rises, ’cause I give the sour & the yeast & the first dose of flour (whole wheat) some time to get acquainted in the mixing bowl … so I guess I’m saying to not give them three rises like I ordinarily would with something to which I’ve added honey & molasses. I know what I mean. If you need to know … well, let me know and I’ll explain more.

For tonite, I’m just glad that the pictures of these lovelies turned out so well, and that I’ll be making more tomorrow evening … ’cause there’s only about 1/2 a loaf left.

I must say that they make you mindful … of how you eat, because the barley hanging out on the crust? Way hard. I only steamed it for 1 hour in these loaves … so I’m saying 1.5 hours, above, so that you’ll have some dental happiness if you use the recipe.

Great Grains & "Locavore" Living

There’s a good reason some of us “wish we were baking.” It’s because some of us shouldn’t be trusted in the kitchen to COOK!!!

You know you have just a few too many grains in the house when you go to make a lovely mushroom barley soup on a foggy autumn evening, and you realize that you’re… just not sure which one the barley IS. You peer at it. You call your SO into the room to peer at it. Your SO peers at it, nibbles at a piece, frowns and mumbles and confirms for you which one is which, then leaves to go back to her hours of staring glassily into the television screen, watching bad Doris Day films while waiting for the bread to bake.

You STILL somehow manage to mislabel the grain.

However, you find out that mushroom RYE soup is downright tasty, too. It’s a quick and easy soup that goes really well with… um… well, bread. Whole wheat rolls, in fact. Or foccacia bread, topped with savories. (Sorry, I haven’t yet figured out what doesn’t go with bread.) Anyway, rye in soup is great, because, unlike barley, it doesn’t suck up all the liquid in the universe. The soup isn’t as velvety, but that’s just fine too.

To begin with, soak 2 c. dried mushrooms in 1 c. hot water for 20 minutes. (Save the water! It adds great flavor!) Porcini, chanterelle, or shiitake all work equally well for this, use your preference, and use a lot.

Into a heavy-bottomed saucepan, place:

  • 2 tbsp. olive oil
  • 1/2 to one whole chopped white onion, (Or add two. Live a little!)
  • Add 1/3 clove of crushed garlic,
  • A sprig of rosemary, fresh (And ‘sprig’ is a size measurement of your preference, too!)
  • 3/4 c. of rye berries… or, if you must, barley.
  • 1/2 c. of white wine
  • 2 c. vegetable stock

After your mushrooms have softened, rough chop and add them. Strain the water for particles of whatever, and dump it in as well.

We simmered ours for an hour and a half on low, turning it up to medium for the last ten minutes, and the rye was soft but still chewable. Some people add bay leaf, but I find that bay goes better if I’m going to add potatoes and carrots. A squirt of lime juice brightened the flavor just before serving. This was a simple and light soup; flavorful and filling, and a great new use of rye!

Having a sourdough starter in the fridge means that you have to feed it. Feeding starter takes a cup of flour and a cup of water everytime you use it. We are going through an awful lot of flour. Not that it’s a big deal — flour is fairly inexpensive, after all, but we currently seeking sources that are closer to home. After participating quietly in the locavore challenge introduced to us by Tea, we found a personal commitment to eat locally first, and organically second, to support sustainable agriculture. To that end, we’re looking for Northern California items. Those who participated in the locavore movement found local salt, quinoa and amaranth flour, and flour — from Full Belly Farm. So, there are options out there.