Savory Bites of Cracker

Oh, yum.

When we made these crackers/cookies last fall, we couldn’t follow the recipe exactly because we had no measuring implements. This time, we measured well but fiddled with the ingredients, added a few new seeds and spices, and treated the dough differently… and lo que la diferencia! This produces an almost flaky, flavorful, tender cracker which can accompany a soft white cheese, or be eaten alone, by the handful.

Let’s start with Sumita’s original recipe, which is basically as follows:

  • 1C seeded whole wheat flour
  • 1C whole wheat flour
  • 1/2C wheat bran
  • 2 Tbsp cumin seeds, roasted & broken
  • 1 Tbsp capsicum / pepper flakes
  • 1/2 tsp bicarbonate of soda
  • 1/2 tsp salt
  • 1/2 tsp sugar
  • 1 Tbsp oil
  • 1/2 c of milk


Because we wanted to add another layer of flavor, we used our Sadie (who is, of course, our sourdough starter) to jump start this dough — a cup and a half of the sour flour, yeast and water mix was added to the two cups of flour. Because Sadie provided moisture, we subtracted the milk. We also measured the salt this time (!) and dusted about a eighth of a teaspoon over the whole batch before baking.


Brown and yellow mustard seeds, celery seed, and eight caraway seeds were added to our spices, and ground along with the dry-fried cumin. (Dry frying seed spices can really allow the essential oils to more thoroughly suffuse, and really makes the flavor and fragrance of spices more intense.) The biggest difference in the crackers, though, is how we treated the dough. We rolled it out, spritzed it with olive oil, and folded it as if we were making pastry.

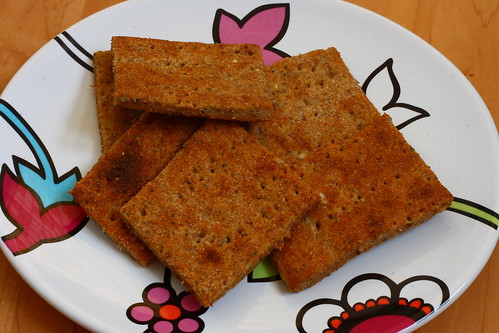
After docking, slicing, and baking, this folding method showed itself to be really successful. The texture of the crackers was at first dense and chewy, then lightened into crispy on the outside and slightly chewy inside, as they cooled. The pepper and cumin came together perfectly,and created a really flavorful, tender cracker that we had a hard time not snacking on for the rest of the afternoon. If you prefer black pepper to capsicum or cayenne, it’s an easy switch to do a coarse grind and add it to the mix. Because these crackers were originally described as cookies, we will one day experiment with using dried and fresh ground ginger and black pepper with a bit of sugar sprinkled on top to create a different kind of pfefferkuchen, or pepper cookie. The possibilities are endless…

No matter how much we might like the light crunch of a saltine, the taste is bland as chewing white paper compared to the seasoned and spicy punch of cumin crackers. You can use them as flat bread, and or use a biscuit cutter and make them in large rounds, or other shapes. Whatever you choose, you’ve got to try these!

Oh, My Darling…Clementine Marmalade

Last weekend we amused ourselves once again by making another dish in tandem with Haalo in Australia! She made a gorgeous Blood Orange Marmalade, and we made marmalade with clementines. We decided to post ours a little later because we wanted to fiddle with the ingredients. A week later, and we’re still not quite satisfied with the recipe, so we’ll just talk about it in general terms.

Marmalades are, in essence, only made of three things: fruit. Sugar. Water. Most recipes call for the about five cups of juice and five cups of sugar. If you can’t get that from the clementines you have, make sure you have some on hand, because clementines are not the most strongly flavored of the citrus fruits — their flavor is gently sweet, and the bitter punch is in the rind.

We thought of adding cranberries to ours; Ming Tsai has a master recipe wherein he adds julienned ginger and Thai bird chilies … mmmmm! However, those options we decided are for our next batch. This time, we were doing enough of an experiment with our marmalade — instead of using the full amount of sugar to guarantee it gelling, we wanted to experiment with agar.

Agar has many names, and you most likely first encountered it in high school biology, in the form of a petri dish. It’s a seaweed derived gelatin substitute, and can make a fully non-animal product jello-type of dish. It can also make rubber balls! It’s easy to use too much agar and have a food product turn inedible and disgustingly chewy, thus the experimental nature of our marmalade!


Using Haalo’s handy guide to removing citrus sections from pith, we set aside the plump orange sections to be added at the very end. We started small, with about two tablespoons of agar for our 3/4 c. of juice and 1/4 c. of lemon juice with a half cup of sugar. (Please note, this is NOT the equal ratio of sugar and juice which you would need to make traditional marmalade! If you try it like this without a gelling agent like pectin, it won’t set, but you’ll have a lovely syrup.) It turned out that it was too little agar; boiling produced a gorgeous, clear orange slurry which would not set. We ended up returning our saucepan to the heat and using a half-cup of agar powder, all told, and had a moment of sheer panic when it stiffened up. We needn’t have feared — agar works hot, and our marmalade’s consistency changed only a very little when it was cool.

Because traditional marmalade isn’t that stiff — it’s not jam, after all — we left it in a soft set. The flavor of the clementines was slightly overwhelmed by the more robust lemon juice — which was a bummer, next time we’ll use orange, maybe? — but the lovely julienned rinds provided the traditionally bitter marmalade flavor. Because we added the agar, we didn’t cook the mixture as long, and it is a much brighter, lighter color that other marmalades we have made.

The texture of this marmalade is …really interesting — It has a silky, chunky, jelly-like mouth feel, yet it will not go runny — when heated, and it retains its color and chunkiness. We imagine that biting into a fruit-filled pastry using this marmalade will be a very different experience, and we look forward to using it in baking.

Cardomom Pear Cake


We’re starting to enjoy the last summer pears, while fellow baker, Haalo, is coming to the middle of winter pears, but recently cake was on both our minds. A mildly sweetened batter atop thick slices of ripe pears baked up into a light, moist cake. It’s a quick recipe that’s essentially a half step away… from cornbread.

Cardamom Pear Cake

  • 1/2 c. fine cornmeal
  • 1/2 c. white flour
  • 1/2 c. whole meal flour
  • 1/2 c. almonds, ground
  • 1/2 c. white sugar
  • 1/2 c. + 2 tbsp. brown sugar
  • 5 whole cardamom pods
  • 1 tsp. cinnamon
  • 2 Tbsp. baking powder
  • 2 Tbsp. ground flax seeds
  • 1/4 c. oil
  • 1/3 tsp. vanilla
  • 1/2 c. milk
  • 50 ml Tallinn Vana liquor
  • 5 ripe pears

  1. Preheat oven to about 350° degrees.
  2. First, wash and slice pears to a desired thickness. Lay them in the bottom of a non-stick, springform pan.
  3. Assemble the dry ingredients, leaving aside 2 Tbsp. brown sugar. Thoroughly combine dry ingredients, as once you add your liquids, your stirring should be limited.
  4. Add your liquid ingredients, including liquor. Tallinn Vana is a sweet rum-esque liquor. Stir sparingly, but thoroughly incorporate the dry ingredients with the liquid.
  5. Sprinkle the remaining 2 Tbsp. brown sugar on top of pears, then smooth cake batter over sugared fruit.

Bake for forty-five to fifty minutes, until cake pulls slightly away from pan edges, and a toothpick test comes out clean. Let the cake sit for ten minutes before flipping it onto a platter. Be sure and remove the cake while it is still hot, or the pears will weld themselves to the pan.


This is a very soft cake, and if your pears are perfectly ripe, they will break down to pearsauce. Not to worry! Though the cake will always be quite moist, it will regain a bit of solidity as it cools. A vanilla-bean ice cream is the perfect compliment to this cake when warm, or a nice cup of Almond Sunset tea is a flavorful accompaniment as well.

Coconut Almond Macaroons

This is just a quick “throw together” recipe, for when you’re in the mood for some coconut goodness, but don’t really want to go to a whole lot of effort. If we’d been wanting to go to a bit more effort, we would have used marshmallow-root water instead of soy milk, but weren’t in the mood to boil the root and let it cool before making the cookies. Next time….

Coconut Almond Macaroons:

  • 2 cups unsweetened, shredded coconut
  • 1 cup almonds, ground
  • 3 Tbsp flaxseeds (linseeds), powdered
  • 1 cup strong flour
  • 2 tsp baking powder
  • pinch salt
  • soy milk, to hydrate (maybe 1 cup, maybe 2)
  1. Mix dry ingredients together thoroughly
  2. Add soymilk and stir until just combined
  3. Spread on an oiled baking sheet
  4. Divide into cookies using a spatula or bench scraper
  5. Press an almond onto each cookie
  6. Bake until dry
  7. Remove to cooling rack
  8. (Optional: toast in toaster oven the next day!)

Tasty Tamarind

It’s one of those curious ingredients we keep playing with — sticky, sweet, sour tamarind paste. Growing up with Hispanic neighbors, we often had tamarind candy, which was tamarind fruit deseeded (sometimes) and dusted with sugar and chili powder. Another way our Mexican friends used it was to drink it like lemonade; agua de tamarindo is a popular regional drink in some areas of Mexico. Neither of these treatments really utilize tamarind as more than a single ingredient, so we’ve tried to incorporate it elsewhere. Because it’s already sticky/pulpy, it’s packaged semi-dried in stores, and can easily cook up into a jam, to be used in thumbprint cookies (your favorite sugar cookie recipe plus a puckerish-sweet jam.). Its stickiness means it’s also makes a great sauce — found this recipe for an orange and tamarind glaze, and haven’t been able to stop imagining how good it will taste.

There’s still got to be more to do with tamarind than this. Maybe tamarind bars, kind of like fig newtons, only sour-sweet?? A tamarind based salad dressing, instead of using vinegar for the puckery notes, tamarind and something else? Would coconut or chocolate pair with tamarind? The mind boggles…

When in doubt, we usually think: beans. Since beans are so, so good and good for us, we try and eat all kinds, and though I hated lentils growing up, I’ve found they’re flavorfully flexible, and that if you’re creative, with them, they won’t get boring. Lentils can absorb many flavors, so the sweet/sour/tangy tamarind added to spicy lentils can be pretty darned tasty. If you don’t like sour/tangy flavors, don’t be afraid that you’ll be overwhelmed by the tamarind — you won’t. Either way, experiment with the amount of tamarind you add. As ever, none of our recipes are written in stone; they’re all a work in progress, but this is a basic plan, based on a recipe found in Veganomicon. Enjoy.

Curried Tamarind Lentils

  • 2 small onions (or one huge one), finely minced
  • 2 carrots, scrubbed or peeled and diced
  • 4 medium sized tomatoes, deseeded (if you like) and roughly chopped
  • 1 tsp. garam masala – store bought, or your own recipe
  • 1/4 tsp. curry powder, or wet curry paste
  • 1/2 tsp. toasted ground cumin seeds (if I don’t have garam masala, I add coriander, too
  • chipotle powder — to taste
  • 1 c. dried lentils, soaked in cool water for 20 min.(
  • 1 c. tomato juice and 1 c. unsalted vegetable broth or water
  • 2 tsp. tamarind paste

Before you do anything else, prep your tamarind. We buy ours “wet,” which is in a sort of dried fruit brick, which contains seeds and peels. We break off a chunk and place it in a bowl, pouring boiling hot water over it. After it sits for about three minutes, we work it with our fingers until the seeds are fully separate from the pulp, press it through a sieve, and discard the skin and seeds. Next:

  1. In a dry saucepan, toast your cumin seeds. Just let them heat up, swirling the pan repeatedly so they won’t burn. Dump them into a mortar bowl, grind them, and set them aside. This will take just a minute, and adds so much flavor. (some people say to let them cool before grinding – play with it)
  2. Now add oil to your pan, and sauté your onions, carrots, and chopped tomatoes. Okay, this isn’t really sautéing, just getting them used to the idea of being in your dish.
  3. Next, add your cumin, coriander, garam masala, etc. This is the point during which you’ll need to turn on your exhaust fan. Careful with the chipotle (or cayenne, if you don’t have any)! If you’re using curry paste, this is the time for it. (The amount is a guideline; sometimes I put a whole tsp. of curry paste),
  4. Your saucepan mixture will be a bit juicy, so it’s time to add your soaked lentils and one cup of water or unsalted broth. The lentils are presoaked because it cuts their cooking time tremendously, and allows them to absorb flavor faster. The broth is unsalted, because one should never, never, never, NEVER salt beans until they’re off of heat, or the skin will toughen.
  5. Your beans, spices and veggies are bubbling now over a medium flame for about twenty minutes. From time to time, stir them – depending on the juiciness of your tomatoes, they may seem too thick. It’s okay to add a tiny bit of water, but don’t forget about your tomato juice!
  6. Finally, combine your tamarind paste and tomato sauce in a small cup or bowl. If you choose to add salt to your beans, and you’re using brown lentils (or other lentils with skin, not the red dahl lentils) I’d still hold off on the salt. Add the tomato and tamarind blend to the lentils, and allow it to bubble for another five minutes, then whisk it off of the heat, and serve over hot rice.

These lentils are savory and tasty, and the various spices aren’t tasted individually, rather as a lingering flavor in the back of the mouth (and a lingering spice in the throat from the chipotle and the ginger in the garam marsala). Some people add a teaspoon of sugar with the tamarind in the end, but I’ve never felt a need. According to the food encyclopedia, tamarind pulp has a high vitamin C, Vitamin B and calcium content it’s said to “improve digestion and relieve gas.” Temple of Thai says it will soothe a sore throat, act as a mild laxative and can even be used as an effective antiseptic for eye baths. I’m not going that far, but I will say it’s a tasty ingredient, and in this dish will definitely replace common, everyday lentils.


In the category of weekend recipes that make me want to drop by for lunch are Cynthia’s coconuty corn and breakfast bread, Holler’s blueberry (but could be raisin) scones with the built-in jam, and Dad, Baker & Chef’s Mocha Biscuit Pudding. Oh, yum. I need dessert…

Broccoli Romanesco Soup

Gorgeous, isn’t it?

As the on-again off-again Glasgow Summer had decided to give us a few days of showers and a good bit of a chill, we have had the good fortune to get hold of one of these strange vegetables. It’s a relative of broccoli … but is far more geometric and interesting to look at, and has a far more timid taste for being part of the brassica bunch. We’ve had Romanesco before, and everybody either says to oven-roast them and then add a cream sauce, or to steam them and add a cheese sauce. We concluded from this that what they lack is flavor and fat, so we figured that makes them a good candidate for a soup.

Into the pot went an onion, chopped, some olive oil, and some smoked torula yeast. While the onions were browning, we chopped up two small potatoes and the romanesco. Into the pot they went with a cube of bouillon, some garlic powder, and some water. And that’s it, really. The whole thing boiled for about half an hour, and then met up with the immersion blender.

To finish, we crumbled in a bit of sharp cheddar, and with a few crackers to the side we had a complete meal. If we’d had any on hand (this was one of those “between grocery trips” dishes), we would have added julienned fresh herbs, maybe a bit of sour cream or yogurt, or a few slivered chives, for visual interest. The finished soup was very light, and fairly low-fat, but definitely satisfying, with a smooth, creamy mouth-feel, which gave us the idea that we’d had something richer. It filled the bill for one of those “five a day” requirements veggies and some of our fiber requirement as well (particularly when eaten with Ryvita crackers).

A dietitian once told us that a person needs two pounds of food to feel full — so the heavy liquids of soups and stews are a DOUBLY welcome addition to chilly days.

No-boil Vegetable Lasagne

We’re trying to get a bit back into the practice of cooking dishes with more than just a single-meal in mind, so that we can keep our time a bit better in hand. Cooking is something that we enjoy … but we both now have writing deadlines (I for my Master’s dissertation, and T. for her a latest work-in-progress), so we’re trying to cut down on the time in the kitchen.

What we’re not going to fall into is the prepared-food trap, nor into the restaurant trap: we’ve been there, and neither one saves time nor money. (Honestly, think about the time you spend getting to and from a restaurant, and the time you spend waiting, and you might just as well have stayed home!) Plus … we’re better cooks than that, really. So, with that in mind, we return to the tried-and-true, no-boil vegetable lasagne

This recipe is more of an assembly than a true recipe. The trick is to get enough moisture from things like the sauce, the tofu, the raw tomatoes, mushrooms, and the zucchini (courgette), so that you don’t have to boil the noodles, and can just put it into the oven and walk away for an hour or so. The mushrooms and zucchini really do have enough moisture to cook the noodles, and things will look a bit wet for the first half-hour or so: don’t worry, this is how it’s supposed to be. This time we used:

  • lasagne noodles
  • pasta sauce
  • zucchini / courgette
  • mushrooms
  • onion
  • tomato
  • basil leaves
  • silken tofu
  • smoked torula yeast
  • garlic powder
  • port salut cheese
  • sharp cheddar cheese
  • quorn burger

Just … layer it all in, in no particular order (except that you need a bit of sauce on the bottom, and on the top). Each layer can be different, and will be happier (and thinner) that way. You can also add thinly sliced onions, freshly chopped herbs, etc.

We’ve baked this dish both covered and uncovered, and don’t find that it makes that much of a difference to the end product. If you do feel that you need to cover it, though, be aware that tomato sauce acids + aluminum foil = nasty dissolved aluminum foil on your lasagne. It’s just not pretty, so make a bechamel cream sauce for the top layer if you’re going to go with a foil covering, or tent the foil so that it doesn’t touch.

Awhile back, Elle posted about unlovely looking foods that taste good. This is one of those! Many people put a ton of cheese atop their lasagne and that covers a multitude of sins, as it were, but sometimes overwhelms the balance of flavors with an onslaught of cheese. A little less fat, a little more flavor and a little less than lovely? Who cares, bring it on.

Enjoy!

Matthew’s vs Sea Woo


Matthew’s, meet Sea Woo. They are your competition, and they have Everything Asian, including a selection of Polish food. Yes, I know, you weren’t aware that Poland was an Asian country. Well, the checkout baggers would differ with you on that – and really, I wouldn’t argue with them, because they look like they lift small cars in their spare time.


Sea Woo has been on our list of places to go for quite some time, mainly because every time we’d mention having gone to Matthew’s, whoever we were talking to would ask whether we’d been there. We can see why they asked, as Sea Woo seems to have everything: from dried cuttlefish to mock cuttlefish; fresh, frozen, dried, and paste … of durien. If it’s Asian, they have it, and all arranged so you can do things like compare Indian curry paste to Thai curry paste, as all of their curry pastes are in the same cabinet. (Thai won, this trip)

If you go, take a cab, as 1) you’ll be carrying a lot home with you on the bus or on foot, and 2) it’s not exactly in the best area of Glasgow. It’s not bad – we’d walk it during daylight … but we wouldn’t be happy about it, and wouldn’t enjoy carrying the groceries through it, either.

We came home with 5 bags of groceries, and have had a cultural experience as well: note to anyone, Grape Juice with Sac … has peeled grapes in it. In the can. Try not to gag when you encounter them. And Roasted Coconut Drink has chunks of … Roasted Coconut in it.

All of the photos were taking “off the hip”, with my camera hung ’round my neck. I didn’t want to worry the staff, nor get kicked out. It was a close thing, as they kept looking at us – I think they could tell we were taking pictures, but wouldn’t come right out and ask us to stop.

Winging it

A few weeks ago the Daring Bakers had us making a Danish Braid. Well, it’s stuck with us (on our waistlines as well as in our sweet-teeth, I’m sure). Rather than follow the exacting recipe over at KellyPea’s blog, I just … well, kinda winged it.

To begin with, this is a sourdough thing, because when you have a sourdough starter, you use it. So, Sadie came out of the fridge in the morning, to spend some time getting warmed up and having some cheap food (we’ve ended up switching her to white flour, due to having run out of whole wheat a few batches ago). When she was good and warm and bubbly, I mixed her up with some plain flour & separated a bit out to go back into the fridge. I then added some 8-grain flour from the Flour Bin and gave everything a good kneading.

With everything well on its way to being bread (sans salt and yeast), I let the dough rest for a bit. Meanwhile, I’d been boiling some whole oats in non-chlorinated water. I drained off 1 cup of the water, strained out the oats (about 2 cups, cooked), and let these cool for a bit. When the oat water was cooled down to only quite warm I added it to the dough, along with 1 Tbsp yeast and 1.5 tsp salt. I then brought the whole volume of dough back to a dough consistency by kneading and adding more of the 8-grain flour.

At this point, the dough was just pretty much basic dough. So, I separated out about 1/3 of the dough, to become the Danish. To the rest I added my whole oats, along with an extra 1/2 tsp of salt (it should have been probably a whole tsp, tasting it later). The oat-loaves got kneaded until they felt right, thrown into two loaf pans to rise, and eventually made it into the oven.

To the 1/3 which had been saved from the oats, I added 1 tsp Garam Masala, the guts of a vanilla bean, and about 1/2 Cup granulated sugar. I then rolled it out flat, put some Benecol spread upon 2/3 of it, folded it over, and repeated the spread and the folding once more. (Note that there was no waiting in there, nor any refrigeration of the dough. Note, also, that it was just straight spread, no worrying with mixing it with flour or anything.) I then rolled it out to about the right size, placed it on a baking sheet, filled it with far more par-cooked apples than I would have thought it could handle, and did the whole braiding thing with it.

The four leftover corners each got a square of dark chocolate and became miniature Danish. The lot of them got to sit out on the stovetop while the loaves were baking.

So, what’s the verdict, on doing this without following any of the rules?

  • I think that the chilling of the dough might have made this flakier … but we’re not worried with it, because we’re not really into all that flakiness.
  • The amount of “butter” was reduced enough as well, so that we can eat this and not feel as if we’re eating a really high-calorie dish.
  • I think that the biggest improvement to the whole thing would have been to have added a bit more cinnamon and ginger to the apples (ingredients: apples, cinnamon, ginger, nutmeg), and perhaps a bit of sugar.
  • If I’d added some of the vanilla bean to the apples, as well as to the dough, it might have been an improvement, simply in terms of marrying the flavors together, but that’s just a bit of fine-tuning.
  • The rising of the dough might have been better if I’d let things rise before adding the filling, as I feel that the bottom didn’t rise enough, so was a bit too dense.
  • The payoff to this method is largely that the refrigerator simply has no role in this method, nor does waiting for hours for the dough to chill.

Perhaps next time we’ll try things a bit differently. We’ll see – but at least this version we feel that we can eat!

Good Foodies

Apple Peels — something not to waste. Why? Because apparently a recent study says that they might help prevent cancer. I’m all for that. Just the idea of wasting something annoys me anyway, so after we peeled all of our windfall apples for sauce last season, we decided on what to do with the rest — cores and peels.

You can make a juice diffusion from the cores — but that’s a bit of work and something that would be better in a kitchen twice the size of ours, since the cores must soak in boiling water for six to eight hours. It does make a fabulously clear and good juice, and can be repeated at least once with the same peels.

Many people candy the apple peels and mix them with candied ginger for a snack. Some people fry and sugar them, and use them as dessert garnish. The deepest concentration of apple pectins, however, are beneath the peel, so I thought I should make a kind of marmalade. I mean, why not?


We were relieved when we arrived in the UK to find quinoa. Because it grows in South American and is another of those ‘new world foods,’ we were afraid it would be hugely expensive and hard to find. Not so! This supergrain that is a complete protein (which means that it has all nine essential amino acids), is quite widely available. We’re always in the market to find new ways to eat it. It was suggested that we cook it in white wine, to enhance its nutty sweetness. Now that we have an abundance of dried mushrooms, we’re hoping to use it in some pilaf-y dishes as well. How do you like it? Or do you like it? For some, quinoa seems to be an acquired taste, like couscous. I imagine if it’s paired with brown lentils, it could be quite tasty, and nutritionally complete…


Summer usually means salads, but with the chill in the air that we’ve experienced, it’s not easy to get down that iceberg lettuce. Instead of diving back into soups, we’ve been experimenting with warm salads. A pasta salad with chunks of cucumber, Greek olives, red onions, chopped tomatoes, feta cheese and cilantro was tasty-tasty, and could have been a contender for the July No Croutons Required challenge, but alas, we forgot to take pictures. We’ve experimented with warm black beans, chopped tomatoes, shredded lettuce and, corn, cheese, crumpled chips and salsa in a version of a traditional 7-layer salad, and that’s been just as good. Our salads, we’ve noticed, are getting bigger and bigger and certainly are no longer accompaniments to the main course — garnished with pumpkin and sunflower seeds, slivered almonds and cranberries, they are the main course. That’s one of the joys of summer eating — salads with everything in them but the kitchen sink.


Our order from The Flour Bin with our gluten powder has arrived at last. We will embark on a second, less time-intensive version of “wheat meat” very soon. It’s been a busy week, catching up for work with both of us, but we’re happy to report that unpacking is continuing apace, on this our first free weekend at home in what seems like ages, and our guest room will soon be somewhat inhabitable (if one doesn’t mind stepping over huge overstuffed pillows and sharing the bed with the PG Tips chimp) and actual knitting and looming might occur! Also, we’re thinking a bit of dirt digging might also happen. Mind you, we have no actual garden space by any means, but we have tons of windowsills and hope to bring a few fresh herbs into a windowsill garden soon.

Just a little kitchen update on a blustery Sunday.