Mad Maize

The cupboards are growing bare. This is a GOOD thing. Moving – and planning to live off only what you have in your cabinets (like many people try and knit off of their “stash”) has been an exercise in creativity. We are not big warehouse-market people (which is why living in the UK might be easier for us than some), but we do tend to have a lot of “staples” around – the usual things that settlers carried in wagons going West: flour, oats, and beans. We also had an unprecedented amount of cornmeal.


I’d say I don’t know how that happened, but that would be a falsehood most dire. It happened because Himself is …er, shall we say Observationally Challenged, and tends to buy things he needs for a recipe, regardless of whether or not said recipe item is already present in the pantry. If a recipe calls for cornmeal? We have polenta, finely ground white cornmeal, grits, and regular yellow cornmeal. AND corn tortilla “breadcrumbs.” I have been endeavoring to use these odds and ends, together with fresh stuff from the farmer’s market, to create enticing meals. The success rate thus far has been …mixed.

Sure, sure, I can make polenta. I can use the cornmeal to thicken soups, etc. I can use the tortilla crumbs to bread tofu. But I said ‘enticing’ meals, right? We are SO BORED not being able to have the full range of our kitchen available to us. We are also SO TIRED at the end of packing, cleaning, selling and other ‘-ings,’ so we really need healthy comfort-food.


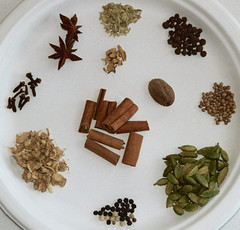
Years ago when we lived in the North Bay Area (Yay, Santa Rosa!), our market had a large Indian section, and I learned the joy that is chana-battered onions, baked. (We had them served deep fried at an Indian restaurant, onion bhajji, and they are evilly addictive — so, baked it is.) Now, this flour you may know by other names but chickpea flour = besan (flour) = gram flour = cici flour = chana dal or dal flour = garbanzo bean flour – (it’s all about the same thing, though I am by no means an expert and would urge you to ask a friend from the Southern part of Asia.), and after years of using this flour for various things, I found that I had about four cups left. Four cups of chana flour… acres of cornmeal… Sounded like cornbread to me.

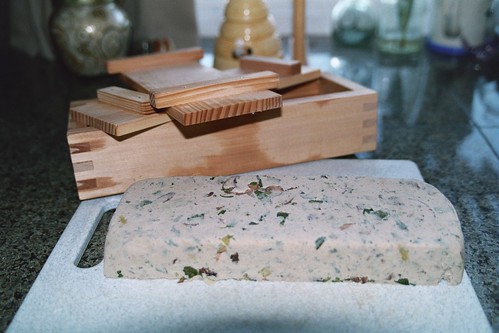
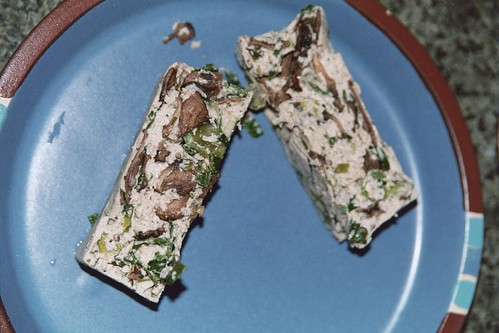
I layered a healthy sausage alternative on the bottom of the pan, mixed fresh corn from our leftover corn-on-the-cob meal (eaten before I looked in the cabinet and gaped at the surfeit of maize), with sweet onions and topped it with the chana flour and cornmeal bread, and voilà! It was really TASTY, and surprisingly light. No measurements were involved (I am down to a single plastic measuring cup, no spoons, even), but I have a smidge more of the crucial ingredients (and baking powder!), and I hope to reproduce this one on the weekend.


So heady was my savory cornbread experience, I rushed to create another one in a sweeter form. The first difference is that I believe measuring matters when using finely ground white cornmeal. It’s not like polenta, where you can fudge it and bodge in a few more cups of water or meal as needed. Fine-ground cornmeal is oddly like… sand. It doesn’t seem like it’s all that wet, or dry, until suddenly it… is. At first the batter was too wet. I added more cornmeal. From making grits, I should have known that was a bad idea.


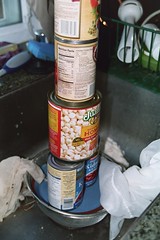
Thought pretty and covered with two cans (We had six! What was he MAKING!?) of pineapple chunks and lovely currants, the Upside Down Polenta Cake had the density and moisture of a …brick. And thus we scraped off the tasty caramelized fruit, and drew a veil over the rest…

This is what I would make, if it weren’t so warm tonight:

Onion Bhajii Bake

2 cups chana flour

1 c. water

2 tsp. freshly ground cumin

1 tsp./pinch salt

1 tsp. ground chili peppers – optional

1/4 tsp. baking powder

2 large onions, sliced thinly

1 tbsp freshly chopped cilantro/coriander

1/3 c. olive oil to oil, plus sprayed oil, optional

Mix water and flour together with cumin and salt, baking powder and optional peppers to form a batter. Let it sit for a half hour so that your batter will be lighter. Oil a baking pan (I used a shallow cookie sheet), and set your oven to 400 degrees, or ‘High.’ Once the batter has fluff-ified, dredge your sliced onions into it, and place them in your oiled pan. I dusted ours with more cumin and chili pepper, spritzed them with oil, and baked them for 35, removing the pan halfway through to shake and turn the onions and spritz them again. Eat them with freshly chopped cilantro leaves or a spicy mango salsa. Yum. If only it weren’t too hot to bother with the oven. (In two or three weeks, I will remember saying this and laugh.)

Scotland Has No Spice

So, we’re winding our way down through the odds & ends which didn’t ship, in terms of food. This morning we used the rest of the yellow cornmeal along with some Chana flour (Garbanzo / Chick-pea flour), some onions, and some meat analogue to make a breakfast cornbread pie type of thing. This afternoon’s experiment involves white cornmeal, potato flour, two cans of chunked pineapple, some dried currants, and miscellaneous other odds and ends in search of a sweet cake type of dish.


In the process of using up the last bits, we’re truly realizing how dependant upon our herbs and spices we’ve become, having had easy access to whatever the San Francisco Herb Company had to offer. And, oh, how we’re suffering. Today I scraped the remnants of our last batch of Garam Masala from the spice grinder, in an effort to provide some flavor to this … cakey thing we’re making. Those spices had to be at least a month old, but we’re desparate.

So, onto the great Internet I go, thinking I’ll just drop in a phrase like “Glasgow Scotland spice importer” and end up with a company. Umm … no. Nothing. Lots of stuff about Posh Spice, but that’s just not anywhere even close to where I want to go. After about an hour of fruitless searching, I’ve about concluded that the people of Glasgow eat curry … and pickles … and beer … but seem to avoid spices. Or, at least, they don’t actually go out and buy them in anything like the quantity we’re interested in.


ANYBODY with an idea about where to obtain bulk herbs, spices, and tea, please let me know? Because I’m about to the end of my rope as far as trying to figure out how to phrase “herb” so that it’s intelligible to the Scots. I’m certain there’s a spice importer in Glasgow – how can there NOT be?

Giving up on the Internet. Off to knit.

Emptying the Cupboards


So, since the cupboards are pretty much empty, we’re in the process of making do with whatever’s left in the freezer and those odd bits you always end up with in the pantry. In this case, we’re doing a stew of mung beans with a bit of soy-cheese … along with some of the last slices of sourdough. We have three loaves left now, and two of those are pumpernickel. So, we’re stretching the sourdough, delaying the end. It’s to last another three weeks, and then we’re on our way.

{EDIT: Leave it to some people to use this as a forum to only discuss the bread. That mung bean stew is a work of ART. With our one remaining tiny paring knife, two onions were sliced thinly and browned with bell peppers and… Thai curry paste. The only seasonings we have are things like vegemite, soy sauce and all the opened curry pastes. And guess what? Adding a can of tomatoes and some hominy made for a tasty and satisfying soup on a cool and windy day.}


Aside from the dearth of bread, though, is the absolute lack of spices. Even the “to hand” spice rack is empty, and all of the bulk spices are in a crate, on a ship by now. This makes cooking a real challenge – and makes us use things like those strange little packets of soup mix which have lingered for so long. This also gives us a chance, though, to really examine what is in the freezer … and to discover that we’re going to have to let go of about 40 Chocolate Habaneros, because there’s just no way we’re going to eat them in the next three weeks!

{EDIT: Also found in the freezer: three big bags of sliced bell peppers. Rock hard frozen bananas. Half bags of frozen berries. Popsicles. A half pint of soy ice cream. Except for the bells, that sounds like the makings of a dessert to me!!}


We’re also saying fond goodbyes to our Marsh Mallow, our newly-blooming Chiltepin peppers, whose flowers are about the size of your little fingernail, and to the also-flowering Oregano, which has flowers about the size of a grain of rice. They’ll stay with relatives, and hopefully provide great flavors for years to come.

{EDIT: Not having to actually “give up” my plants makes this so much easier. Yes, my sister will probably kill them all — but inadvertently,see? And they’ll go out well-loved… *sigh*}

Strawberry Raspberry Mirror Cake

This is my first entry into the world of the Daring Bakers’ monthly challenge. This month’s challenge recipe was something called a Strawberry Mirror Cake (but which I did in Raspberry instead). It involves heaps of dairy, and is about as far from anything Vegan as I’ve done in a loooong time. However, the people who consumed it said it was wonderful, so here’s to feel-good food.

The biggest surprise for me in this recipe was the complexity. In reading through it, you end up having to follow footnotes, essentially, to see how to make the components. Once you’re there, though, it’s not really as complicated as it seems, so I’d encourage you to simply step through, and you’ll get there. That said, the assembly involved quite a lot of work, and I found myself thinking that it must have been an “industrial” recipe or something; if you were to scale it up, and make a dozen of them, then you’d have just a bit more work (in terms of laying out cakes, slathering on Bavarian Cream, pouring gelatin), but you’d have a dozen cakes instead of just the one.

This was very much an effort for me, as I’m not particularly inclined to follow instructions on a good day – I tend to treat recipes as a list of ingredients that somebody thought was a good combination, the quantities as rough guides, and the instructions as a not-so-interesting narrative which has caused the ingredient list to be written in too-small of a font to be useful in the kitchen. That said, I tried and tried to follow the instructions, as per The Rules. I balked, however, at the idea of cutting away nearly 1/3 of the cake and simply throwing it away. I read the recipe over, concluded that I wouldn’t be throwing away all that cake, and deviated by using 3 8-inch pie plates to bake the cake in. I apparently should have then thrown away that extra cake, but I just included it in my cake.

What I ended up with (because I also was unwilling to go buy a bigger springform) was an enormous cake which threatened to escape the pan. I had to basically use my trowel spatula to carve out an area in which to pour the gelatin mirror, and then had to cover up the edges of my little pond of gelatin with cherries (I figured that, since the recipe used cherry liquor, it could benefit from some cherries on top, too).

If I were to make this cake again, I’d probably pipe in the Bavarian Cream, because I ended up with some irregularities around the edges, which detracted from the overall presentation. I’d also invert the bottom of the springform pan, so that it’d be easier to remove the cake (avoiding that annoying little lip). Other than that (and, well, using a larger springform pan), I think that the recipe is fairly straightforward, if labor intensive.

The mirror had bubbles: I slurped them off of the top with a straw … and I poured the mirror with the cake already settled onto a shelf in the fridge. I’m certain that any production kitchen would be horrified at the picture of a long-haired guy squatting in front of an open fridge … slurping away with a straw. But there it is, and was. It was the only possible way I could get the mirror onto the cake!

Just as interesting as the recipe, though, is the nutrition data for the strawberry version of this cake, and for the raspberry version (substitute 20oz frozen raspberries for the strawberries). Notice that I’ve got 24 cherries around this cake? Yep – each cherry is a single serving. So, if you’re like my dad, and you took 3 cherries on your first plate … well, let’s just say that you’ve eaten over half of your daily allowance of saturated fat in that one piece.

Strawberry Mirror Cake

Special Pans: 11 x 17″ Jelly Roll Pan, 10″ Springform Pan, 8 1/4″ Cake Round or Tin (or pattern)

Ingredients/Steps:

A. Strawberry Mirror Cake

  • 3 eggs
  • 3 egg yolks
  • 0.75 cup sugar
  • 1 tsp vanilla extract
  • 3 egg whites
  • 1/8 tsp cream of tartar
  • 2 TBSP sugar
  • 2/3 cup sifted cake flour
  • 0.5 cup water
  • 1/3 cups sugar
  • 2 TBSP kirsch or strawberry liqueur
  1. Preheat oven to 450F. Butter and flour the sides of an 11-by-17 inch jelly roll pan(rimmed baking sheet). Line bottom of pan with a sheet of parchment paper cut to fit bottom pan exactly.
  2. Beat eggs, egg yolks and.75 cup sugar together in a medium bowl until thick and light. Beat in the vanilla.
  3. In a separate bowl, beat the egg whites until foamy, ad cream of tartar and beat until whites begin to form peaks. Add the 2 TBSP sugar and beat until the whites hold stiff, glossy peaks(do not over beat).
  4. Sift flour over the egg yolk mixture and fold in . Stir in one fourth of the whites. Then carefully fold in the remaining whites.
  5. Spread batter evenly in pan. Bake until light brown and springy to touch (7 to 10 minutes).
  6. Cool in pan 5 minutes. Run a knife along edge to loosen. Invert cake tin to cut out 8.25 inch circles of cake. Wrap the cake layers, separated with waxed paper, and set aside. Cake may be frozen at this point.

B. Strawberry Bavarian Cream

  • 2.5 TBSP unflavored gelatin
  • 1.5 cups strained strawberry puree(1.5 baskets)
  • 5 egg yolks
  • 2/3 cup sugar
  • 1.5 cups milk
  • 1 TBSP lemon juice
  • several drops of red food coloring
  • 1.75 cups whipping cream
  1. Sprinkle the gelatin over the strawberry puree in a small bowl and set aside until spongy.
  2. Combine egg yolks and sugar in a bowl’ beat until light. Bring milk to a boil in sauce pan. Pour hot milk into yolk mixture ans stir with a wooden spoon(it doesn’t say so but I would temper the egg mixture first to be safe). Return this mixture to the saucepan and cook over medium heat, stirring constantly, until your finger leaves a clear trail in sauce when drawn across the back of the spoon.(Do not boil or mixture will curdle.) Immediately remove from heat and stir in softened gelatin mixture. Pour into a stainless steel bowl places over a bowl of ice water. Stir in lemon juice and a few drops of red food coloring. Cool over ice water, stirring occasionally, until mixture thickens to the consistency of softly whipped cream.
  3. While gelatin mixture is cooling, whip the whipping cream until it holds soft peaks. When the gelatin mixture resembles softly whipped cream, fold the whipped cream into the gelatin mixture.

Strawberry Mirror

  • 1 tsp lemon juice
  • 1 TBSP kirsch
  • 1 TBSP water
  • 1 TBSP unflavored gelatin
  • Few drops of red food coloring
  1. Prepare strawberry juice.
  2. Place lemon juice, kirsch, and water in a small bowl. Sprinkle gelatin over this mixture; set aside until spongy and soft.
  3. Measure 1.5 cups Strawberry juice into a small saucepan and bring to a simmer; pour over gelatin mixture and stir to dissolve gelatin. Tint to desired color with red food coloring. Place bowl over bowl of ice water and stir occasionally until the mixture is syrupy and just beings to thicken(do not let jell); remove from ice water.
  4. When mixture is syrupy, pour a 1/16-inch layer over the top of cake. Refrigerate until set.

Strawberry Juice

  • 1.5 pints of strawberries(18 oz)
  • .75 cup sugar
  • .75 cup water
  1. Wash and hull strawberries; coarsely chop.
  2. Place strawberries in saucepan; crush to start juices flowing. Place over low heat; add sugar and water; simmer slowly 10 minutes.
  3. Pour juice and pulp through damp jelly bag or cheesecloth-lined colander and drain into a bowl for 15 minutes (Do not press down on fruit).

Bombed


We had made the GROSSEST TOFU EVER.

It was a day or so before news of the Upheaval, and we thought we’d experiment with sundried tomatoes and fresh basil in our tofu-style bean curd quiché-y thingy. We had a counter crammed with fresh vegetables from the CSA, and were washing and chopping and minding the stove — we thought. Turns out we got a little panicky when we saw how the acid from the tomatoes curdled the soy protein, and we added maybe a bit much in terms of coagulant. And then I had tucked it in the oven — and forgotten it.

It was foul. It wasn’t just the overbaking – there was still moisture under a fairly substantial crust, but the texture was off, the flavor was horrid — Oy, nasty, like shoe leather and bitter, and just awful. And I couldn’t understand it. We compared notes on seasoning, we discussed the relative acidity level of the tomatoes, and finally we simply looked at each other, said, “Oh, what a waste of calories,” scraped the mess off of our plates and made a salad.

There is a point to this little tale of tofu woe: that is, sometimes, Yeech! Happens. I find that as I peruse the countless food blogs out there, some of us have gotten so far into reading the airbrushed, sun-drenched, photo-op types of foodie pieces that we rarely, if ever, admit failure, defeat, disaster or distaste for our creations. Creating with food is a dicey art. Some things combine to create unexpected pleasures for the palette; others should never have been combined — but in many cases, you simply don’t know until you’ve tried. And trying and bombing? Is simply… well, maybe not part of the “fun” per se at the time, but part of the experience, anyway. And I’m not one for pruning away the unpleasant for the sake of looks.

I recently someone if they had been following the blog of a mutual friend of ours, and they replied, “I just can’t seem to …read it lately.” Well, again — the myriad perfectly staged photographs complete with starched white linens and sugar-dusted herbs and berries can actually get …a little depressing. I don’t know about you, but most of the time my life cannot be mistaken for a photo spread from O, or Martha Stewart Living, and while I am NOT against the display of perfection, I do wonder why so many allegedly amateur cooks, bakers and bloggers strive towards it.


A lot of this society’s entertainment is built upon the schadenfreude of others’ failure — I think of the stupid televised baking contests where people have to MOVE a decorated, six foot high cake (despite the fact that in their normal bakeries they would constructed it in, maybe, PIECES?!), or even (sur)Reality shows. I think sometimes we all have the idea that so many eyes are upon us that we don’t dare produce anything BUT PERFECTION. [EDIT: AND we also have such twisted and Puritanical notions of goodness and perfection that the automatic reaction also seems to be a need to punish both perfection AND imperfection – the hammer comes down on the nail if it stands too tall, and pounds in the short ones further – but that is a rant for another day.} But perfection …isn’t really all that interesting, not when life is so real, and we learn so much from mistakes and missteps. Not everything that is perfect is right; neither is everything that doesn’t turn out the way you intended an unparalleled disaster. Words to live by, I guess.

The creative process is wildly unpredictable, and I expect that we will have more MANY more exciting — and disturbing — incidents as we explore the foods and traditions of another place (I mean, skink? Cullen SKINK!? Er, isn’t a skink a LIZARD!?). You can certainly rest assured that we will continue to experience our share of culinary clashes, diet disasters and have less than House Beautiful style kitchens and lives. We’re real, after all.


The CSA has gone from us. Siiigh. Less than the newspaper, I regret having to cancel our CSA. In the height of the glorious summertime of plums and nectarines and white corn, we simply don’t have the time or the bandwidth or the space to process much fresh food – we’re simply grabbing and going. (Please check out A CSA if not ours at Riverdog — keep the link with the farmers and the land and the good pesticide free food that is out there. That’s my PSA for today.)Thusly is the deep freeze being shared out to a few well-loved friends, because it, too, has to go — it’s a chest-style deep freezer, and we can’t leave it in a rental where a parent less obsessive may leave it unlocked, and a child climb up and fall into it. Ach. We were so proud of our beautiful freezer and all our jars of put up fruits and veggies and bags of frozen goodness! But – adventure awaits.

You know what else awaits? WORK. Between waves of fever from this !@$*&&^!# inoculations (now approaching day three of pneumonia, diphtheria, meningitis, and whatever else I am pseudo-having), I really am doing my level best to finish my revision because NEXT WEEK the container shipping thingy will arrive and ALL of what is going aboard must get aboard. And so I must get MOVING. Light a candle for us – we have GOT to finish…

SO — ciao for now —

DIY Tofu Continues

The Spicy Tofu Salad we saw the other night on “A Lyon in the Kitchen” was part of an episode in which the host, a Nathan Lyon, visited a restaurant which made its own tofu.

Man, talk about jealous (and no, not of the gleaming-pated host, but the happy man in his restaurant)! The tofu-maker had obviously had a few moments with a welder’s torch. His hand-crafted machine ground soybeans and spat out okara in one direction, and soy milk in the other, and came with big pans for draining out milk and pressing tofu curds. He used food grade calcium sulfate (gypsum), which we haven’t yet tried, and came up with a really small curd, out of which he had far less liquid to press. Apparently calcium sulfate creates a more ideal flavor in tofu as well – which will go well with our next experiments, which may our dehydrated cherry tomatoes, leeks, fresh basil and thyme, or might include making a sweet tofu studded with dried fruits and Moroccan spices! A big potential “Mmmm!”


Since our efforts have been so tasty thus far, we’ve been fiddling with the idea of getting a soymilk maker, and went so far as to wander around our local Asian supermarket to see what we could find. It was instructive, as always — candied jackfruits, fresh lychees, packaged papadums and unidentifiable (well, to me, anyway) silvery fish swimming in large tanks made shopping much like a sort of culinary field trip — but sadly, no tofu makers, just lots of rice cookers, which we already have. (No trip to the Asian market is wasted, however; we were well entertained and came home with sacks of soybeans and sticks of agar, which is dried seaweed, and which is useful in making things gel hot, so it makes soups and gravies velvety without added starch or fat.) We considered borrowing my mother’s soymilk maker, but when we dropped by (she wasn’t home), it was spread across her kitchen counter (So is it broken already, Mom? Or are you cleaning it?). It’s called a ‘soy toy’ or something, anyway, which we weren’t too sure of (Toy!? Tofu is serious, people!) so we’ve been looking and wondering how worthwhile it would be to cobble together something of our own.


Today our deliberations concluded in a draw: no soy milk maker for now, but — we’ve decided that we’re going to get …a sausage attachment to the KitchenAid. Yes, I know. Weird. But here’s the thing: the soybeans have to be soaked and ground, and what better for that than a sausage grinder/food grinder? That way we’ll save what’s left of the poor blender engine before we burn it out completely. With a finer ground bean-mass, the okara will be easier to sieve out, and more of the flavor and richness in the milk will be left. Next, we’re in the process of finding or making a metal tofu press of our own, so the whole undignified tower of cans will be a thing of the past (Um, maybe. We’ll see…). It seems to be just a metal pan with holes in it, inside a larger metal pan topped by a metal lid… it just doesn’t seem that hard to make a decent press for a larger scale operation.

It does look like we’re going to need to order food-grade calcium sulfate. I find myself oddly not eager to hop down the street to Ace for gardening gypsum for my tofu (although I seem to have no issues with going to the drugstore for Epsom salts? Maybe it’s a hardware store stigma. Such sad prejudices!). We’ll lay in a supply of muslin cloth, and voilà – we’ll be in business.

Hope springs eternal, anyway. Stay tuned for more random food adventures… As the weather is suddenly quite cool and breezy, someone’s spare time is being spent concocting scones and other things I shouldn’t be eating — but my attention is turning toward making apricot preserves with ginger and citrus, since another friend’s tree is just loaded, and they’re on vacation until August and don’t care what happens to the fruit. Also, experiments are afoot with the dried apricots and the lovely pounds of mustard seed – a spicy hot/sweet apricot mustard with champagne vinegar – lovely tasting, we hope! Stay tuned!

Using Garam Masala: Chai Tea


As I’d said in my post on making Garam Masala, we like to do up our own. As to what to do with it, well, we usually end up using it in shakes or in various sweet dishes, but as I was making my morning pots of tea (I have two French Presses … so I make two), I realized that I’d left out an important bit: you don’t necessarily end up with one batch when you grind whole spices into masala.

You see, when you grind up all of your spices using a blade grinder, you usually get sick of the whole fine-mesh strainer process after about half an hour of grinding, sifting, grinding, sifting… so you just give up & bodge the larger bits into a jar & leave well enough alone. What to do with the leftovers, though? Well, if you’re like me, you put them into cheap black tea, and have your own version of Chai Tea. You get a subtly different flavor from the coarse bits than from the fine bits, primarily because the pieces which get left behind tend to be largely comprised of coriander hulls. But there’s enough of the other spices to give you that distinctive Masala flavor, and it’s a good use of something which would sit until chutney-making season. Of course, for the decaffeinated version, you can still use the fine-powdered Masala with your hot soy-milk & a bit of sweetener, but for the tea version, the coarse grind make for a clearer brew.

The Tofeta Experiment, Part II

Now, we hadn’t forgotten that we were going to try and really do something with tofu, but sourdough starter… sort of takes over the world when it gets going. But eventually we knew we had to make tofu again — after all, freshly ground chai-spiced soy milk and hot cocoa tastes best with fresh soy milk. We finally had a good excuse — well, another good excuse, anyway, to pull out the beans.


The other night, we put a pound of dried soybeans in to soak, and started the usual drill: beans double in size and are drained, then ground in the blender and the resulting white goopy paste is boiled in a monster pot for twenty-five minutes after its first foam appears.

(NOTE: If there’s ever any doubt about whether or not the foam has appeared…? Then it hasn’t foamed. It’s like watching what happens when you put dish detergent into the washing machine. BIG bubbles, fast.)

Normally, after this step, the okara is cooked and rises to the top. Usually, we simply take the milk off the heat, then pour it through a muslin strainer. This time, multi-tasking led us to leaving it on the stove. It grew a skin. A light went on in our brains. “Hey! We made yuba!” Yuba is a thin bean curd… skin that is sometimes fried in Chinese restaurants and served with various spices as “Buddha’s (Buddha being a vegetarian Deity.) “Mock Duck,” (recipe via The Vegan Feast Kitchen). Yuba is very high in protein — higher than either tofu or milk. Seasoned and fried or eaten with condiments, it’s quite tasty – but pretty high maintenance to make if you’re making soy milk from scratch…

So, we set aside our Yuba Quest for another day, and continued on our path. We loaded the okara on drying screens and then pondered the hot soy milk. Our original quest was to experiment our way toward something like feta. We’ve seen recipes for something like ricotta, with cashews and almond, but we wanted to create something …else.


“What if we flavored it?” one of us asked. (Who knows which one of us. Genius generally strikes anonymously.) “Well, we’ve got these dried leeks and mushrooms…” the other of us mused. The consensus of “why not?” meant that before adding coagulant, we added a quarter cup of whole, dried sage, two cups of dried leek pieces and about two cups of dried champignon mushrooms. Then we added the coagulant, poured it through the strainer (sheer polyester mesh, since with the newly organized kitchen, who knows what happened to the rest of the cheesecloth and muslin) into the molds (one a Japanese sushi mold, not really meant for tofu, but it works, and it’s beautifully made, so it gets used, and the other “mold” is a stainless steel strainer. With a dish and cans on top of it for weight Again: it works.), and we waited.

Our first fear was that the coagulant — magnesium sulfate, and truly awful, if you’ve ever had the misfortune to taste it — would alter the taste of the vegetables put into the soy milk — but since the horribly sourish-bitterness is undetectable in homemade tofu, we took our chances. Our second fear was that we should maybe have added something else — the leeks were making it look a little greenish. Maybe we should have added saffron or turmeric. Perhaps the consistency would be strange.

Well, as you can see, we worried needlessly. You can SEE what it LOOKS like. My goodness, I wish you could smell and taste it. Think of savory onions and mushrooms…

Many people are ambivalent about tofu, thinking “meh” because it is basically white, somewhat gelatinous (if it’s silken, really gelatinous), and entirely tasteless (unless it’s made from a stronger milk source and then it has a heavier soy flavor that still basically tastes like… not much). Many view the vegans and vegetarians who enjoy it as humorless (and tasteless) ascetics, but I’m here to tell you that I don’t bother eating things that don’t taste good. This. Tofu. Tastes. Good.

If we were coming up with a name for this, I would say it is ganmodoki-style — almost. Ganmodoki is a Japanese method of mixing crumbled tofu, vegetables and mountain yam (yama-imo) and forming it into patties or balls and deep frying it. Without the yams (darn) or the frying, this is close. We could simply call this ‘flavored tofu,’ or ‘vegetable tofu,’ but we’ve been calling it …quiche. I know. That name’s taken.

We ate this “raw,” and warm, straight from the press with just a little soy sauce, and it was really nice. We baked it with a smidge of olive oil, and about a teaspoon each of garlic powder, salt, curry powder, freshly ground black pepper, and smoked torula yeast, and wow — it took on subtle flavors that were unexpected. Paired with a green salad, it becomes a most satisfying egg-and-onion pie. Lightly stir fried and paired with grilled tomatoes, it’s amazingly like a breakfast bake of eggs and mushrooms. It’s an unbelievably versatile food, and now we’re wondering: why stop at tofeta? The possibilities are endless…

Pumpernickel 2.0

It was difficult for me, but I held back from adding any truly interesting ingredients to this bread. It’s the first attempt, you see, at trying to duplicate Westphalian Pumpernickel bread. After my first attempt, I did a bit more research, and arrived at the Wiki article, and then realized that what I’d been making was American Pumpernickel. Long article short (for those who don’t want to go there), American Pumpernickel adds a whole bunch of things to duplicate the color of Westphalian Pumpernickel (namely chocolate, molasses, prunes and the like) and also adds Caraway Seeds in an attempt to duplicate the flavor.


So, I held back on the things I’d usually throw into a savory bread, and ended up with a truly basic, sourdough rye. I started it off with 1 cup of my sourdough starter, but everything past that point was rye. I fed it on rye flour, gave it whole, steamed rye berries, and stirred it every couple of hours for two days (except at night, of course, because that would’ve awakened the birds, who would awaken the rest of the house). It was necessary to let it sour to some degree, because rye flour tends to be a bit alkali, so yeast doesn’t work properly unless you let it sour or give it something to acidulate the flour. Next time I won’t let it go quite so long, as it is truly a sour bread.


I was told at the time that I should have let it raise a bit more, but I was concerned about not letting it over-rise. I shouldn’t have worried, and should’ve let it go, because I ended up with quite a dense couple of loaves. That said, though, the incorporation of such a quantity of whole rye berries gives a good, chewy texture, and the aroma is uniquely rye: slightly bitter, slightly floral, somewhat reminiscent of barley, but its own. Baked at 250°F, the crust is essentially nonexistent. As you can see, it slices quite thinly, which isn’t possible with wheat, necessarily. I don’t know if it’s due to the density, or due to the lower gluten content, but it certainly lends itself to those strange little sandwiches one encounters at parties.

Whole Spices

I don’t know if you all have figured it out yet, but we buy whole spices.

Other people go to the warehouse stores for food … we order from an herb & spice importer. Not only do we get a tremendous discount over what we’d pay at the supermarket, we get fresher, higher quality herbs & spices. We also get forced into using a whole lot more herbs & spices, because, really, who can afford not to use them in profligate amounts when they’re taking up cabinet space?

I’d finally run out of brown mustard seed (it took me about a year), so I ordered two pounds this time. It’s truly irritating to run low on such a staple. Yes – mustard seeds are a staple, because they go in just about every batch of sourdough bread, to the tune of about 4 Tablespoons. Same with yellow mustard. The caraway seeds are by way of experimenting, as are the celery seeds and psyllium husks (we’re going to try to incorporate those into protein bars, so that they’re not so … slow in the system).

All this is, of course, by way of sharing the sheer quantities of spice we buy, and because I was told that our recipe for scones was intimidating in its sheer number of ingredients. When you’ve got a pound of whole cloves, a pound of star anise, a pound of fennel seed, and 1-pound bags of just about every other spice which might go into a recipe? Well, you use them! And you get familiar with them! And you learn how to balance them against one another, and you experiment more with them, and cooking becomes much more fun.

Now, to reorganize the cabinets, because we’re out of room. And out of spice cannisters. Sigh.