Soy Heresy

So, the heresy here is that we only make tofu when we run low on okara. Don’t get me wrong: we enjoy homemade tofu quite a bit, but we can buy high quality tofu in the grocery store and truly can’t tell much of a difference. Yes, the homemade tastes a bit better when you eat it by itself … but who does that? Okara, now, that’s the stuff which can’t be obtained anyplace that I’ve been able to find, and it adds so much to quickbreads and cookies that I don’t think I’ll ever be without it again.

We get about 3 times the volume of okara as we do tofu, by the way, so in a typical batch we’ll end up with probably 3 cups of tofu, but easily 8 or 9 cups of okara. We take that and dry it out either in the oven or in our dehydrator, depending on how lazy we’re feeling (the dehydrator lives down in the garage, and requires carrying trays of steaming Okara down the outside stairs). After it’s dry, we put it into an airtight bin and it keeps just fine for months (see, if you cook cookies and quickbreads, you eat cookies and quickbreads … hence the shelf-life here).

Coconut Macaroons aren’t the only things you can make with okara, but they’re the only thing I’ve found which absolutely requires okara. Everything else you can swap in some oat bran, some extra flax seeds, whatever, but the Coconut Macaroons require that you take the time to make okara, primarily because the okara’s texture matches better with the coconut, and the okara doesn’t add any more gelatinousness as flax seeds would. They’re worth making, and the extra protein & fiber are a great addition to anything else you might want to make.

Besides, you get the added bonus of people thinking you’re strange and cool for making your own tofu, and you get recipes that most other people have no hope of duplicating.

Season of Soup

It’s ridiculous, the lengths some people will go to, to be holiday-esque.

The thought was: “Ooh! Chestnuts! Let’s roast them on our Thanksgiving beach bonfire!” The reality was: “The coast in November is bloody cold, and the windchill is making it below forty, and what were we thinking, bring a post-surgical child out here in the dark, not to mention trying to lug firewood and marshmallows out here while keeping track of irresponsible teen-aged pyromaniacs?!” So, no 
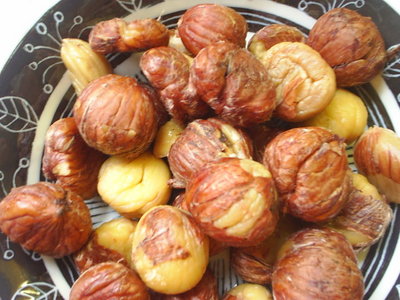
chestnuts roasted on an open fire (but marshmallows roasted over candles: good fun. Except for that bit with the sooty wax. And the skewers on fire. Look, I said pyromaniacs…) At any rate, post-holiday, we were left with a great bag of beautifully smooth nuts which look gorgeous, but which are just too …something for my taste. Sweet? Starchy? Something. Really, I’m just not that big on nuts, and I don’t care for even things like pecans and macadamia nuts, which most people are wild about, but I try to eat some nuts every once in a bit, because they’re supposed to be full of copper and trace elements Americans don’t get, unless they’re combined with sports and beer — which aren’t two of my big interests either. But I digress. Me, with bag of glossy brown nuts, rapidly rotting (NEVER have I run across any nut that decomposes so fast. Ugh!). So, my idea was an autumnal soup. I came up with one that combined a chestnut soup from a Vegan Lunchbox recipe with leftover roasted butternut squash and pureéd the whole thing. That cut the cloying sweetness/richness of the chestnuts, to good effect, but the fact is that peeling/shelling the rotten things was a huge pain in the neck — and in the thumbs. Tasty though it was, I am not surprisingly more fond of soups that take less work.

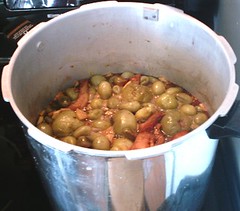
Now that the cool, wet weather has come in to stay for a bit, the farm is churning out those cool, wet weather veggies, most notably leeks and carrots, broccoli, cauli, and soon, peas. Apparently myriad other cultures have long regarded the whole carrot — as well as the tops of radishes, beets, and other greens part of the usual culinary circus, but most Californians I know don’t know what to do with any part of a carrot that isn’t orange. Admittedly, I used to put carrot tops in a vase and admire them for the fifteen seconds they would stay pretty, and my chiropop chick juices them — but then, she juices everything. (She also gives her sweater-wearing dog filtered water and B vitamins, so I’m going to reserve judgment on her input here.) I decided, since I have an abundance of carrots and leeks from the farm box this week, to see if they’d make a decent soup. I tasted a piece of the top, and determined that it was a flavor close enough to celery to work well.

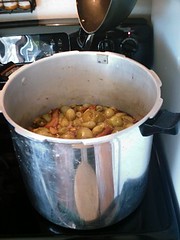
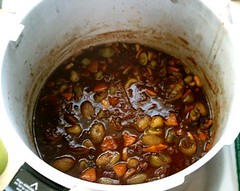
I began by sauteéing onions and leeks, adding dry-leaf sage and then the chopped and cleaned carrot tops and six cups of stock. I finished with some mung bean noodles, just for fun, and it was really tasty. Mac suggested quinoa for next time, and I think carrot tops might also go well with barley. This is what I’m going to try next for my Carrot Top Soup:

  • 1 ½ cup chopped carrot tops – and any carrots that go with them, diced *You can make this without adding the carrots; I did.
  • 2 tblspns olive oil
  • ½ cup short grain rice or quinoa
  • 2 large leeks, white part only
  • a clove of garlic, smashed, or 1 tsp. garlic paste
  • one stalk of celery, diced
  • 2 pinches of rubbed sage
  • 2 tblspns chopped dill or parsley
  • 6 cups vegetable stock, plus ½c. white wine
  • Salt and pepper to taste

After sauteèing the leeks, garlic, carrots and celery in your olive oil for about five minutes, pour on the white wine, give it another minute or so, then add your broth and bring to bubbling stage. Once your broth and veggies are boiling, add in your rice or quinoa, and your sage, then simmer for fifteen minutes until tender. Add the chopped carrot tops and cook for 5 more minutes, mixing well. The Italians serve a soup much like this over garlic-rubbed bread and sprinkled with parmesan. You could also add cubed potatoes in lieu of quinoa or rice. One of the best things about soup is that you can hardly mess it up, so I always enjoy making whatever variations on a theme I can come up with. It combats the rain and fog fug, makes the house smell wonderful, and fills me up so I don’t overdose on the lovely cranberry muffins being churned out of the oven.

It may not be exactly ‘holiday-esque,’ but it’s seasonal, which lasts longer.

A note about the booze, Julia… After another email to my collegiate friend in Spain, I realized I have a habit of coming up with all of these great recipes where one can just drop in a bit of white wine or rum, and all will be well… This is to disprove the Booze As Food thing I seem to have going: For the under 21 set, lemon juice, vinegar, vegetable stock or possibly even V8 will work as well as the other libations I’ve suggested. Don’t let me get you into trouble, Julia… it would be a shame to get kicked out of your university just for cooking, after everything else…

Cheers!

Coconut Macaroons

Coconut Macaroons

  • 4 C Shredded Coconut (unsweetened)
  • 1 C Okara
  • 1/4 C Xylitol
  • 3/4 C Sugar
  • 6 Tbsp Flour
  • 2 Tbsp Coconut Cream Powder
  • 3 C Boiling Water
  • 1 C Shredded Marshmallow Root
  • 1/4 C Candied Ginger, chopped
  • 3 Tbsp Flax Seeds
  • 1 Tbsp Baking Powder
  • 1/4 tsp Salt
  • 1/4 tsp Almond Extract
  • 1 tsp Vanilla Extract

Add marshmallow root to boiling water and boil for 5 minutes, stirring constantly. Strain out the resulting green goo and discard fibrous remains. Grind flax seeds and add them to the green goo, along with the remainder of the wet ingredients plus the coconut cream powder. Add sugars if you haven’t already, followed by the remainder of the ingredients. Order isn’t important so much as getting in the baking powder towards the end. There’s no gluten formation here, so don’t worry about overmixing.

Form into spoon-shaped cookies using spoons. Forming is important, as these won’t melt or smooth out at all, but will retain their shape, just puffed up a bit.

Bake at 425°F for 20 minutes on a silicone baking sheet, until very slightly browned.

If you don’t have Okara … well, modify. For those of you who don’t know, Okara is the fiber-filled left-overs from making tofu, and is fabulous stuff. We wrote it up Here, but Makiko is where you’ll get the real info on the process.

Despite having no fat and being completely vegan, these cookies are tender and chewy, largely due to the marshmallow root, we think. They take a bit of chewing, due to all of the fiber, but as you chew you get more and more of the marshmallow flavor. They’re truly unique.

Now, this recipe is our own, so go ahead and make it but … well, understand that our feelings of proprietary greed have been at war with our desire to share, and the spirit of the season has caused this lapse, so don’t abuse it.

White Whole Wheat?

Just a quick note to say that “White” Whole Wheat (King Arthur) is truly odd, and caused me a strange couple of hours waiting for it to rise. I don’t know what the deal is with it, but I used a mixture of about 1/2 regular whole wheat and half “white,” both from King Arthur, and followed my standard, can make it without thinking recipe … and it wouldn’t rise. Just plain wouldn’t.

Finally I took it out of the oven, where I had it stashed with the light on to keep it a bit warmer than the 68ºF of the room, and added a whopping 2 Tablespoons of commercial yeast & sent it for another knead. This added another 1/2 Cup of warm water, and which I soaked up with more of the white stuff. Back into the oven and an HOUR later it’d risen enough to bake.

Nothing different about the water, the yeast, the sourness of the starter. Nothing different in the amounts of fiber, the size of the batch, nor the added yeast. I even shorted the salt, as I usually do. Just the flour was different.

I will continue to try this flour, but something about it just doesn’t seem right, in the acidity or something. It felt more like working with Rye or Spelt than Wheat. Strange.

In any event, it turned out nicely, with a perfect balance between sourdough and sweet dough (honey and molasses), so it can go either way. I’m quite pleased with the consistency, although it truly is a dense loaf. We’re down half a loaf by way of tasting … so it’s up early in the morning to slice up the remaining three and carry them off to friends, lest we eat them ourselves.

Hasty Pudding & Other 4th Grade Memories

At the chiropop’s office the other day, I ran across this months issue of Real Simple, and found — well, a lot of aggravation, for one thing, since ‘real’ in the title should be adverbial, as in Really Simple, but aside from that, in the November issue I also found a recipe for what’s called Indian Pudding.

Hmm. Indian pudding. It seems like I have a faraway, foggy memory of something like this pudding from a 4th grade study unit on Plymouth Rock, Puritans, Pilgrims and First Nations peoples… but that can’t be right, since I very much doubt that First Nations people went around popping things in the oven and topping them with whipped cream. A little research informs me that in reality, this dish is called “Indian” pudding because the early settlers referred to the main ingredient as “Indian meal” – the meal used by the First Nation peoples. Generally, John and Mary Puritan weren’t all that creative, so any recipe using Indian meal as the main ingredient was called Indian… . Over time, the plant became known as corn, and the meal made from it as corn meal.

History lesson aside, the Americanized version of this British steamed ‘hasty’ pudding thing (sans myself and classmates grinding the cornmeal ourselves on indented rocks ) sounds fabulous. These are the ingredients I’m dragging on our Thanksgiving Odyssey:

Indian Meal Pudding

  • 4 cups whole milk (Oy! 2% or skim makes it too thin, I suppose.)
  • 2/3 cup finely ground cornmeal
  • 1/2 cup molasses
  • 4 tablespoons unsalted butter, plus more for the dish
  • 1/4 cup light or dark brown sugar
  • 1/2 teaspoon kosher salt
  • 1 teaspoon ground ginger
  • 1 teaspoon ground cinnamon
  • 1/4 teaspoon ground nutmeg, plus more for garnishing
  • 1 teaspoon vanilla extract (I’m going to go for vanilla beans, I think.)
  • 2 cups (1 pint) heavy cream, whipped to firm peaks (Whoa! Not a lowfat dish.)

Heat oven to 350° F.

In a large saucepan, over medium-high heat, bring 3 cups of the milk to a boil.

In a small bowl, whisk together the remaining milk and the cornmeal. Whisking constantly, slowly add the mixture to the boiling milk. Reduce heat and simmer gently, stirring frequently, for 15 minutes. Remove from heat. Stir in the molasses, butter, brown sugar, salt, ginger, cinnamon, nutmeg, and vanilla. Transfer to a buttered 1 1/2-quart casserole dish. Set the casserole in a roasting pan, pull the oven rack out halfway, and place the pan on it. Carefully add enough hot water to the pan to reach halfway up the casserole. Cover both pans with a single large sheet of foil. Bake for 1 hour.

Remove foil. Bake until the pudding is almost set but still wobbly, 1 1/2 hours more. Transfer casserole to a wire rack for at least 30 minutes. Spoon onto plates. Serve with the whipped cream and sprinkle with nutmeg.

Makes 8 to 12 servings

This sounds very simple… a slow-cooked cornmeal dish that probably made its way from New England to the South in some version or other. The Pilgrims, I’m afraid, were everywhere. Dare I say this dish sounds like sweetened grits? I can’t wait to try it out, and I’ll tell you how it goes after I figure out how to substitute all of the dairy ingredients so that it’s something I want to eat.

It’s been a funny month. I’ve got so much going on, what with NaNo Month, the Cybils, and the crazy Thanksgiving thing this weekend, not to mention substitute teaching and sibling-sitting while my sister is in recovery — I’m busy! Yet all I want to do is cook and putter and completely ignore actual WORK. It feels like my psyche is slowly but surely unraveling, and the downtime that cooking brings is essential to my sanity. I don’t wanna work… but just banging on the drum all day is overrated. Bring on the baking!

Weekend Baking, etc.

Sourdough Starters will take over your life, if you let them.

So, I was looking through Sourdough Home about the proper care and maintenance of sourdough starters, because I’ve been wondering about mine. I’ve been keeping them rather stiff – more like a dough than a slurry – and was wondering, ’cause they seem to work quite well like that. I’d seen somebody on one of Julia Child’s shows do that and call it a levain, so it seemed right to me to maintain them like that (one white, the other whole wheat, as Alton suggests). Well, Sourdough Home agrees that it’s OK to do that, but gave me some new information about the refreshing process, so that you get the proper rise out of them.

Long and short, we ended up taking my starters from their jars & radically growing them, so that they wouldn’t smell sour any more, and so that they’d be a bit healthier. Out of all this? 16 pizza crusts, pre-baked & dropped in the deep-freeze, and 4 loaves of broccoli-cheese-onion bread. Oh – and a couple of very happy starters.

Other than the starters, this weekend involved making and canning 9 quarts of mincemeat (mango / pineapple / ginger) and 14 half-pints of chutney (mango / onion / chocolate habañero). We haven’t given any away yet … and it’s going to be a hard, hard decision as to who gets the chutney! Last year’s chutney we weren’t too hot on, ’cause it really wasn’t a finished sauce so much as it was a marinade. This year’s is definitely a finished sauce, and has just the right balance of hot / sweet because of the chocolate habañero (yes – just one single pepper for the whole bunch). I believe that we may be saving these things up for the next Brunch (you know who you are, people) … but there’s been some who have made other plans during this holiday season.

To get your tastebuds appropriately interested in Chutney, I’ve been told to include a recipe which might get you salivating enough to participate in social events (and, maybe, if you’re lucky, receive some chutney):

Flaxseed Falafel with Tzatziki

16 pieces/serves 8

Flaxseed, ground for the batter, and left whole for the coating, give this adaptation of a recipe from Johnson & Wales University in Charlotte, N.C., distinct flavor and texture.

The tzatziki:

  • 1 cup cucumber, peeled, seeded, diced into ¼-inch cubes
  • 1½ teaspoons kosher salt
  • 1 cup low-fat plain yogurt
  • 1 cup regular or reduced-fat sour cream
  • ½ teaspoon sugar
  • 2 cloves garlic, minced
  • 1-1½ tablespoons chopped fresh dill

The falafel:

  • 2 cans garbanzos, drained, liquid reserved
  • 1 clove garlic, crushed
  • 1/2 cup ground flaxseed
  • 1/2 cup chopped parsley
  • 1/4 cup fresh-squeezed lemon juice
  • 1/2-3/4 teaspoon salt + more to taste
  • 1/2 teaspoon ground coriander seed
  • 1/2 teaspoon cayenne pepper
  • 3/4 cup dry bread crumbs
  • 3 tablespoons whole flaxseed
  • 1 egg white
  • 2 tablespoons water
  • Cooking spray as needed
  • 2 tablespoons olive oil

To prepare the tzatziki: Mix diced cucumber with salt, place in a colander set over a bowl; cover with plastic wrap and refrigerate for one hour. Rinse off the salt, drain well and dry cucumber on several thicknesses of paper towels. In a bowl, combine cucumber with yogurt, sour cream, sugar, garlic and dill. Cover and chill at least 30 minutes and up to four hours.

To prepare the falafel: Place garbanzos, garlic and 2 tablespoons reserved garbanzo liquid in a processor and pulse about 5 times, until coarsely chopped. Add ground flax seed, parsley, lemon juice, salt, coriander and pepper and pulse just until mixture is combined. It should retain some texture. Divide into 16 portions and shape into patties about 1½ inches in diameter. Combine bread crumbs and whole flax seed in a shallow dish.

In another shallow dish, combine egg white and water. Dip each patty in the egg white, then lightly dredge in crumb mixture. Set on a rack over a baking sheet to dry for half an hour. Heat a large nonstick skillet over medium-high heat and add oil. Brown falafel well on both sides, turning once.

Serve with tzatziki.

Per serving: 300 calories, 11 g protein, 33 g carbohydrate, 15 g fat (5 g saturated), 15 mg cholesterol, 497 mg sodium, 11 g fiber.

Instead of the tzatziki, it could go with chutney easily!

Early Baking

So, this morning rolled around … at about 4:00 am. Don’t know why, but I was wide awake, so … bread. 9 loaves. 4 loaves of whole wheat (well, my version, anyway, with flax seeds, oat bran, quinoa flour, etc.), and 5 loaves of sourdough olive.

And, of course, after getting everything set up, getting the first batch into pans to rise, and getting the sourdough out and fed and back into the fridge … I realize that I don’t have enough flour. And that the stupid store doesn’t open until 6:00.

However, we are a household of experimental foods, and it’s not like we don’t have other flour, so the olive loaves ended up being at about a ratio of:

  • 1x King Arthur Whole Wheat
  • 2x King Arthur All Purpose Wheat
  • 2x Quinoa Flour
  • 2x Potato Flour
  • 2x Oat Bran
  • 0.25x Vital Wheat Gluten

Of course, that’s just the flour; the wet was 2 cups sourdough starter, 2 cups warm water (to get the starter happy), and one mini-bottle of wine (don’t remember what varietal, but it was red, from Sutter, Napa Valley). Oh, and of course about a pound of black olives. And commercial yeast, and a teaspoon of salt.

All in all a successful experiment. The sourdough loaves ended up wonderfully crusty, and you can really tast the potato flour when you add butter. There’s still the bitter of the olives, of course, but it’s somewhat mitigated by the potato flour. I’m sure that it’ll mature a bit more (after all, we ate it straight from the oven, at 6:45 am), but the cell walls were well developed, so there was enough gluten present, and the crust was thick enough to give crunch but not too thick to cut, and everything was quite tender inside.

Now, to a day of work. And then, perhaps, this evening to bed early to make up for it.

Olive Bread 2.0

It’s been a busy, busy, BUSY week… Between Mac starting the new consulting gig for the fabulous company that doesn’t care if he works in the office or not (Oh, we need so many more jobs like this, please and thank you, God!), me substitute teaching for the first time in aeons while trying to read 47 (at last count!!!) books for the Cybils, and concurrently for that elusive 50,000 words in the National Novel Writing Month competition… and spending every spare weekend moment visiting the Little Sib in the hospital after her major surgery — well, you’d think we’d have no time for baking. And… you’d be kind of right.

As a matter of fact, I’ve actually managed to LOSE a few visibly noticable pounds because not only hasn’t there been time for baking… there just hasn’t been a lot of time for eating, which is actually funny. But, never fear, we who Wish We Were Baking will always find a way… and a means… and a little bit of dough…

So thus is born Olive Brode 2.0. The first loaf was lovely, tender, chewy and tasty… and about three grains of salt short, which we thought would be made up by the ultra-salty olives. Nope. The olives were Italian and rather green, instead of the lovely dark “black” kalamatas, which we are using this time. Also, the good old KitchenAid tends to be really, really hard on olives; we could barely find them after we added them early in the baking process. We’re hoping this time that, by adding them later, we’ll end up with bigger pieces!

Mince … uh … Meat?

Looking fairly disgusting, to the left is the beginning stages of MinceMeat. In the pot is an unfortunately small amount of our green tomatoes, mixed with some pears, apples, orange peels, lemon peels, raisins, dried cherries, orange juice, lemon juice, balsamic vinegar, port wine, sherry, Pomona’s Universal Pectin, sugar, and spices. This is the first of what looks to be around 100 quarts of mincemeat (with maybe some of that 100 turning into chutney).

To give you some perspective upon the size of what turned out to be 10 quarts, please note our poor stove straining beneath the massive cooking vessel. It performed admirably, I must say, but wrestling that pot into a position from which to move lava-like liquid into jars? Terrifying.

I had intended this batch to be a full twelve quarts – ’cause that’s how many quart jars I’d dragged up from the garage/basement – but in this pot it’s difficult to measure 1 quart. It turns out that a quart is about 1/2 an inch as measured against the side of the pot … and that’s difficult to figure when you’ve got lumps in your liquid. So, 10 quarts it is.

Shown in jars it’s not so exciting – yes, that’s an excuse for having not taken any pictures of them yet – but here’s the final shot before being jarred up. We’ve got some nice caramelization, and the green tomatoes? Can’t even tell what they are when you taste it, which is as it should be. They really do suck up whatever flavor you throw at them, and aside from being nutritious and a great filler, that’s all you could ask for.

Note that this, as most everything we make, is vegan. No meat involved, I’m sorry, but the idea of mixing Suet (beef fat) into this lot? Utterly disgusting, and never crossed my mind until I was writing this post and realizing that the name “MinceMeat” had to come from somewhere. Bleh.

Each 1-quart jar will fill a couple of pies: just add corn starch and bake in a blind-baked shell for about 1/2 an hour and you’re there.

Just for Sarah, here’s some idea of the recipe we used. It originated with the Ball Blue Book of Preserving. It’s sort of a variation / combination of Tomato-Apple Chutney (page 50) and Brandied Mincemeat (page 84), but with our own twist to it.

  • 10 Quarts chopped, de-seeded tomatoes
  • 2 Quarts diced apples (Fuji, Granny Smith, or something which holds up to cooking)
  • 3 Pounds raisins
  • 2 Cups candied ginger, diced
  • 2 Cups dried apricots, chopped
  • 2 Cups dried cherries
  • 1 Cup dried mango*, chopped
  • 1 Cup dried papaya*, chopped
  • 8 Orange peels (use a vegetable peeler, to just get the skin), matchsticked
  • 8 Oranges’ juice
  • 4 Lemon peels (same technique)
  • 4 Lemons’ juice
  • 4 Cups brown sugar
  • 4 Cups white sugar
  • 1 Liter Port Wine (we used Christian Brothers brand; it really should be just the cheapest you can find)
  • 1 Liter Sherry (again, whatever’s cheap)
  • Freshly-Ground spices: 6″ cinnamon stick, 20 allspice berries, 10 whole cloves, 2 Tbsp dried ginger.
  1. Combine everything.
  2. Boil it until it doesn’t taste of raw liquor any longer (maybe an hour, maybe 2)
  3. Jar, leaving 1/2-inch headspace.
  4. Process 30 minutes in boiling-water canner**.

*note: vary these fruits as you see fit. We did one version that was a “tropical” version, another version that had pears instead of apples, one pretty much just tried to make them each unique. They all turned out marvelously, so … go crazy with the dried fruit!
**note: we processed ours 30 minutes in a pressure canner. We did this because 1) we had such a thing, and 2) we’re paranoid, since we varied the recipe by not adding apple cider as it calls for in the blue book. Yes, the brandy & sherry should have been acidic enough … but we weren’t going to risk it.

Pepper Preserving

So, we’ve been making our way through our supply of dried and drying peppers, trying to knit them into something suitable for storage … and also something decorative, if we’re going to have them sitting around. Shown to the left is the first bundle – of what we had thought to be Thai Bird chiles, but about half of which seem to have a miraculous lack of heat. We’re probably going to end up saving these as simply decorative … or giving them away as such. It’s sad, really, because we know that one of the two plants was Thai Bird – we tasted the peppers, and they were truly magnificent in their heat. The other, though? Completely decorative and devoid of heat. I’m hoping that one of the two bunches is the Thai Bird and the other is the decorative, because of the differences in color and in ripening speed. We’ll see.


Next up are our Bolivian Rainbow Peppers. There’s no doubt that these babies are hot – painfully so, and of a type of pain which comes back to get you especially cruelly if you try to brush your tongue to take away the pain.

We’re going to let them dry, to see what they’re like that way. Shown to the left are the ripe specimens, and to the right are the immature fruit. They start out life purple and progress through a cream into a yellow and then red. The red ones seem to be holding up to the drying process better than the purple, which are wizening into almost pea-sized little black nubbins. The reds are keeping their shape, and not wrinkling.

Everyone should have a good, white wall in the house, upon which to hang their herbs (and fruits).

Here’re the lot of them, hanging in an out of the way area to dry. They will probably not be joined by the remaining peppers, which will go into the cuisinart to hopefully provide some flavor for the winter. We’ll see.