Lime Cake – with Fondant!

Boiled Fondant 3

Thanks to Claudia ( www.healmyhands.com / www.8armscreative.com ) for the link to Joe Pastry‘s instructions for making boiled fondant! Notice the block of what looks like chalk, to the right? Well, it turns out that what I’d thought was a colossal (if tasty) failure … is merely the basis for fondant! It needs to be dissolved in a very-slightly-warmed simple syrup, and then it becomes fondant!

Boiled Fondant 9

So, when I couldn’t think any more, yesterday* … I made the wonderful lemon cake, but this time with a dozen key-limes instead of lemons! Our wonderful grocer** had a dozen limes for £1, so we couldn’t pass them up, and I’ve been wanting to try this cake out with limes anyway. So. Cake made – without the benefit of our immersion blender*** – and then buttercream icing made, and then fondant dissolved / melted.

Lime Cake 2

Cake & cupcakes came out of the oven to cool, while T. was wrestling with getting the fondant to dissolve. They cooled faster because I poked holes in them and poured in lime juice & sugar, to make the cake extra moist. Then, when cool, a thin layer of buttercream to fill the holes, and then a thin layer of fondant. You can see that I’m not exactly the deftest with the application of fondant.

Lime Cake 3

Some of that’s because this is my first attempt, really, and I hadn’t counted on the fondant stiffening as quickly as it did, nor on the buttercream melting to where the fondant wanted to escape. That said, though, the cake went to work and was gone for “elevenses” in about 4 minutes. People were just finishing their first slices, looking around for a second, and there was nothing left.

*One can only think so much in one day, and I was winding down in my work day and discovered that I needed to program my script to do a bunch of currency conversions on an unknown number of source currency values into an unknown number of destination currencies … well, I gave up for the day.
**We really ought to stop calling him the “bin end” guy, but … well, we’re mocking the locals, more than the grocer, because this grocer has actual ripe produce!
***I burned out immersion blender #2, here, on the last lemon cake. The company is replacing it, because, really, appliances shouldn’t overheat to the point where they smoke!

Finally, a Decent Oven!

We’ve been in Scotland, now, for a year and a half. We’re into our third flat, with the first two just not working out well in terms of a whole host of issues, but mainly the issue of noise. Glasgow is not a quiet city!

One of the things about renting a flat in Glasgow is that you can either rent a modern flat, which will have multiple showers and/or toilet facilities, or you can rent an older flat, which typically has a single, family bathroom. We’d avoided the latter, because … well, because when people visit – and we want them to visit – we’d also like for them to have their own space.


This time around, we went with the more traditional flat, and are enjoying it quite a bit. It has its drawbacks, of course, but for the first time since we’ve been here we have a good oven! It’s a Smeg, as is the stove (known as a hob or a cooker, here). We just can’t get over the fact that it cooks evenly, and well. This is, after all, our fifth oven since arriving here. Yes, folks: we killed off the existing oven in each of the previous flats. To be fair, they were probably only good for warming takeaway meals before we worked on them. After using them, though, they just gave in. Their replacements were just as feeble.

This oven even has room for the pizza stone we lugged with us from California. There may be French Loaves soon!

Sweet Rolls and Technicalities

Since we had no oat bran, and no whole oats, we were feeling a bit at a loss this past week: we’d have to make … ordinary bread. Yes, OK, it’s fine to have plain old bread every now and again. I suppose. If we have to.

Fortunately for me, T. was willing to jump in with a filling for sweet rolls:


  • Lemon Zest
  • Almonds, chopped
  • Vanilla
  • Brown Sugar
  • Raisins
  • Dates, chopped
  • Cinnamon
  • Nutmeg
  • Cloves

Now, you’ll notice that there aren’t any quantities. That’s ’cause this really is one of those things which was simply thrown together, rolled up, sliced into 9 rounds, and baked. Delicious!


I wanted to let you know that we’re undergoing a few technical changes in our feed distribution. We’ve offered our blog via email for some time, but it’s kind of buried over on the side panel. We’ve finally decided to route everything through FeedBurner (they were purchased by Google, after all, and since Google also owns Blogspot it seemed a natural thing to do). Thus, we can now be found at:

This should hopefully work out nicely, so that you can receive our content however makes you happiest.

Honey Oat Bread

Honey Oat Bread

  • To prepare the oatberries:
    • 1 C Oatberries
    • 4 C Filtered Water
  • For the initial proofing of the yeast:
    • 3 C Filtered Water
    • 1 Tbsp Yeast
    • 1 Tbsp Brown Sugar
  • For the bread itself:
    • 1/4 C Honey
    • 1 C Oat Bran
    • 1 C Flax Seeds (Linseeds)
    • 2 tsp Salt
    • 1/4 C Vital Wheat Gluten
    • 1 Vanilla Bean, scraped
    • Whole Wheat Flour – have a 5lb / 2kg sack on hand
  • For the final forming of the loaves:
    • Rolled Oats (Quick Porage Oats)
    • Olive Oil


  1. Boil your oatberries until they have absorbed all of the water they’re going to. Be careful, as they’ll boil over if covered. You could steam them, if you had a steamer, in which case reduce the amount of water to 2 cups and steam for 45 minutes.
  2. After the oatberries have cooked, remove from heat and let cool while you’re proofing your yeast.
  3. Microwave 1 cup of your water until nearly boiling, add 2 cups of cool / room-temperature water, and mix in sugar and yeast. Let this stand until yeast gets nice and bubbly (around 10 minutes or so).
  4. Combine oatberries, yeast ferment, honey, flax seeds, oat bran, and vanilla bean.
  5. Mix thoroughly, making sure to break up the vanilla bits
  6. Add in enough flour to get a good dough going, mixing with a spatula until you are able to knead it. (You could cheat and throw it into your food mixer until it’s the consistency of bubble-gum.)
  7. Knead until you feel like your arms will fall off or until the dough won’t easily absorb any more flour
  8. Set aside in a reasonably warm place (we put it into the oven – not turned on, obviously) until more than doubled in size (this took us about 2 hours).
  9. Gently knead for a minute or so, just to distribute the yeast again (it’s been sitting in there, eating, and is probably close to starving by now, and may have reproduced; it doesn’t have any legs, either, so you have to take it to the food).
  10. Separate into 3 equal sized balls.
  11. Form into loaves.
  12. Oil your pans well.
  13. Place loaves into pan.
  14. Liberally sprinkle the rolled oats over the tops, and then … perform something of the sort of action one usually performs with an omlette, tossing the loaf pan about so that the bread rotates through the oats. Yes, this is odd. It’s the way I do it, though, and it works. You can roll your loaves through the oats and then place them into the pans, if that makes you happy, but it’ll just dirty another dish.
  15. Let rise until more than doubled in size (this took about an hour, this time).
  16. Bake at 300F / 150C until internal temperature tests to greater than 195F / 90C (or until you think it’s done, if you’re that good at guessing).
  17. Remove to wire racks immediately and let cool thoroughly before slicing.

Best of the Baking, 2009

It started with a conversation about a cake “like my mother made,” and when you have a friend whose mother last made this cake before 1970, you’re actually interested in seeing if you can recreate it. Pineapple upside-down cake with red maraschino cherries? Sure, it’s the perfect 1950’s dessert — lots of butter, sugar and rum. Sounds like a perfect choice for the first cake of the new year.

(This cake isn’t remotely vegan, and our friend isn’t either. But we love him anyway.)

A lot of 50’s recipes for Pineapple Upside Down Cake call for boxed cake mix. We thought this wasn’t really necessary, as the cake is a really simple sponge — and if you can make a sponge cake, you’re ready to make any number of UK desserts by just adding a custard sauce. Women of the 50’s had just been introduced to the magic of mixes, but since they’re old news now, you can do this the “long” way — which is not so very long at all.

As with any recipe, before you begin, you should read all of the fiddly little instructions. Pretend this is 1950, and your standing among the neighborhood wives depends on making this just right. (Also pretend WE didn’t make the mistake of forgetting a whole bunch of steps, and are just remind you because we’re such great bakers. Yeah, right, huh?)

Pineapple Upside Down Cake


  • 2/3 cup butter
  • 3/4 cup brown sugar
  • 1/2 cup dark rum
  • 1 teaspoon cinnamon
  • 1 can pineapple slices
  • maraschino cherries (enough to fill centers of pineapple slices)
  1. Preheat your oven to 350° degrees.
  2. Next, place the butter, cinnamon, brown sugar and rum (Frankly, we don’t know if the kind of rum you use matters, as we don’t know from alcohol, but we used a brown Bacardi rum) in a medium-sized cast iron skillet over medium flame.
  3. Heat your rum, sugar, and butter until a slow boil is achieved. A cast iron skillet is THE best thing to use in this recipe, as it’s heavy, oven-proof, and is unlikely to scorch your cake.
  4. Carefully place pineapples in the rum, butter and sugar mixture. Even more carefully, place one cherry in the center of each pineapple ring. You might also cut slices of the slices of pineapple into halves and line the sides of the frying pan with them (standing up on edge).

While your sauce is just melting and cooking off all of that rum, assemble the rest of your cake:

  • 1 cup AP flour, sifted (we didn’t, but should have)
  • 1 teaspoon baking powder
  • 1 teaspoon almond extract
  • 1 teaspoon vanilla extract
  • 1/2 teaspoon salt
  • 2 eggs
  • 2/3 cup sugar
  • 1/4 cup milk

  • 2 tablespoons rum, optional
  1. Sift dry ingredients into a large bowl, then add wet. Beat with a wire whisk for one minute to incorporate air.
  2. Immediately pour batter over pineapples and cherries in their lava-hot sauce — be careful! Next, slide entire skillet into oven. Bake at 350°F for 35 minutes or until a toothpick comes away clean.
  3. When cake is baked, allow it to sit and cool for two minutes (or, you know, one minute – if you wait too long it’ll stick to the skillet).
  4. Brush on the optional rum.
  5. CAREFULLY set a large plate over the skillet, and with carefully swaddled hands, flip the cake onto the platter. (This might be a two-person operation.) Don’t wait on this step, or the cake and pineapple will stick. The buttery rum sauce will still be somewhat liquefied at this step, and will run down the cake, leaving it candied and coated with sticky loveliness.

Now, call in the bridge club — it’s time to eat.

Bagels 2.0


Over a year ago, I made bagels for the first time. This morning, in celebration of our purchase of Canadian Brown Flour from The Flour Bin (and, no doubt, to avoid having to do research), I decided to give it another go. This time there was nothing fancy about them. The recipe included flour, oat-bran, flax seeds, yeast, water, and salt. I shaped them, boiled them, and baked them. Were they worth it? Well … let’s just say that we’re eating them, and that I’ll probably have to bake bread again next weekend.

C is for Cookie (That’s Good Enough for Me)

Cookies are not generally my friend.

For one thing, they’re too small. They don’t require a commitment, like bread or cake does. You don’t have to slow down and think, or get out a knife and a plate. No. You pick those bad boys up, one in each hand, and usually one in your mouth, and, well, then, do you have the two cookies you said you could have? Or have you had one more? What are you mumbling with your mouth full? Stop chewing, darn it. This is your Conscience speaking.

Tsk. Cookies. Too small for their own good.

But sometimes, a girl’s just gotta have a cookie. Or, a biscuit, if you’re British. Although apparently cookies exist here, I just can’t figure out how come those cookies are cookies and they’re not biscuits. But then, if you’re Scottish, there are like six words for HILL, so don’t worry too much trying to figure out this one. Let’s get back to the point: COOKIES.

(I have to apologize for the craptastic nature of the first couple of pictures. We have ONE nice fancy camera, and then… my phone. I did my best, but because of the low lighting in the kitchen, these are fuzzy and make our house look like it’s back in the 70’s. Sorry.)

A friend sent me a box of chocolate bars from Portland, apparently secure in her sympathetic belief that there is no chocolate in Scotland. Actually, she was just worried that I hadn’t found any chocolate covered crystallized ginger here, and while it probably exists, I’m just as happy I don’t have to look anymore. Not only is this bar divided into tidy little squares, inside each wrapper is a love poem — in this one, the Bard’s famous 18th sonnet. Gotta love that. I decided to use these hot/sweet chocolate bars as my chocolate chips.

Fortunately, the Post Punk Kitchen Blog and I were on the same page. I used their same basic recipe, but as always, I couldn’t resist the tweaking. So, here’s mine:

Chocolate and Chipper

  • 1/2 brown sugar
  • 1/4 white sugar
  • 1/3 cup oil
  • 4 Tablespoons applesauce
  • 1/4 cup milk (I used unsweetened soy)
  • 1 tablespoon tapioca flour
  • 2 teaspoons pure vanilla extract
  • 1 1/2 cups whole wheat flour
  • 1/4 c. oatbran
  • 1 Tablespoon baking powder
  • 1/2 teaspoon salt
  • Two 3.2 ounce crystallized ginger chocolate bars, chopped, or 3/4 c. chips
  1. Preheat your oven to 350° and make sure your cookie sheets are ready to go,
  2. With a fork or a stick blender, blend together sugar and oil until it is thoroughly combined. Since my applesauce was chunky, I had to throw that in, too.
  3. I added the wet ingredients in order and then the dry, and by the time I got to the chocolate chunks, I had to sort of just fold them in. It’s a stiff dough.
  4. Using a tablespoon measuring spoon, make ping pong sized balls and flatten them on your cookie sheet. Mine were about an inch across.
  5. Bake each pan for 8-9 minutes, tops — chocolate chip cookies are always molten and then do their last baking on the sheet. Let them rest for five minutes before even attempting to move them!

This yielded two dozen cookies, plus the three tiny “taster” cookies I made.

Because of the dual sugars, these cookies are soft and will stay soft and yummy. You’ll note that I cut the amount of oil used in the original recipe; I prefer to rely on the sugars and applesauce to keep the moisture instead of the oil.

You’ll also note that these cookies do not even remotely resemble Tollhouse, or even the Post Punk cookies — and that’s because of the flour. The original recipe calls for AP, I had whole wheat, so that’s what I used. A simple substitution involves using oat, AP, or even white flour to make the cookies look a little less scary to the fiber-averse. (On the other hand fiber AND chocolate should be a win-win.)

If you don’t have tapioca, experiment with using a tablespoon of ground flaxseed. The tapioca flour is an egg substitute; I didn’t grow up using eggs in cookies very often, so I doubt a whole lot is needed to keep the cookies held together. Just — try making it without, and see what happens. If the first batch crumbles, you can always spoon the rest of the dough over sliced fruit and call it a crumble.

There was a tiny hitch in this project; I intended to simply bake a batch of cookies, eat one or three, and then set them free into the wider world. Unfortunately, D’s department put on a full sit-down luncheon the day I packed him off with the goods, so he triumphantly returned the cookies home, made a few statements which began with the word “Mine,” and retired happily to a dim corner.

Cookie Monster is in the house.

All In Good Taste

Last night at The 78 pub we came across this tasty morsel — what our friends called a hozuki, and what our server called a physalis. It’s a cape gooseberry — and we’d never had one. It’s really tasty!

Another foodie meme/survey is floating through the blogosphere today, one that doesn’t require anyone to be tagged, which is a good thing. A food blogger has created what he calls the omnivore’s hundred which has of course since spawned a vegan’s one hundred, a vegetarian’s one hundred, an American’s one hundred, etc. ad nauseum, ad infinitum. (We bloggers are nothing if not self-obsessed.) Anyway, blogger Andrew wants to know — what have you eaten?

The rules are (or were, about five hundred responses ago — who knows if he’s even reading them anymore):

  1. Copy this 100-item list on your blog or site.
  2. Bold the foods you’ve eaten.
  3. Strike through foods you will not eat.
  4. Post a comment on Very Good Taste (where the challenge originates).

Obviously, this isn’t going to work for me — I’m not an omnivore. But I did think that the list was interesting. Kaolin — clay dirt that some people eat — sits in the same list as carob chips, durian and fugu, Krispy Kremes, Big Macs and pho. Head cheese, dulce du leche, carp, aloo gobi… the list is really unique. If you’re an omnivore, you might want to check it out.


Meanwhile, the cool, misty days are accompanying the running down of the clock. D.’s dissertation is coming due, and my end-of-the-month deadline is approaching all too quickly. Which is, of course, the reason I decided to do some baking — because what’s life without a little more procrastination?

An impulse buy of two sweet potatoes was staring at me reproachfully from the potato-and-onion basket, and threatening to sprout leaves, so I skinned and boiled them. (Yes, Mama. I skinned them. Yes, I know all the nutrients are under the skin. I know, I know. I’m sorry. I’ll eat some extra kale.) And then, I set them in a bowl and looked at them. Where was I going with this?

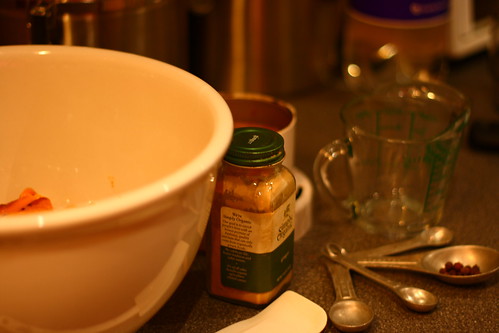
I finally decided on bread. I mashed the sweet potatoes, and discovered I had a little over a cup and a half, so I decided to make two loaves of sweet potato bread. Before I did anything, I seasoned the potatoes — adding a scant 1/4 tsp. of salt, two teaspoons of our garam masala mix, 1/2 c. of brown sugar, 1/4 cup of oil, and a little grating of nutmeg. Simply because I had it, I added 1/4 c. of clementine marmalade, for a little bittersweet zing.

Next, In my coffee grinder, I placed four allspice seeds, and 1/3 c. of flax seeds. I placed four cups of flour in a bowl, and added three tablespoonfuls of baking powder, and a 1 tsp. of baking soda to the flour. I mixed them together meditatively, and wondered if I could sneak in some coconut.

The coconut thing… has started to edge toward obsession. Coconut is common enough on the West Coast of the United States, but for some reason, here I find I’m having fun with all of its forms. Not just canned coconut milk, in full-fat and “skimmed” varieties. Not just dried coconut cream in familiar Thai packaging (we used the very same kind at home — was really nice to find it at Sea Woo!), but dried coconut milk, flakes, and sealed packets of paste, which are available at regular grocery stores. The ability to add the richness and flavor of coconut without adding the liquid was too good to pass. I added 1/4 c. of the coconut cream — next time I will use a single packet of the coconut paste, as it has a richer flavor.

Of course, since this was a random, dreamy, experimental dish, it didn’t come together even remotely as smoothly and coherently (hah!) as I’m writing this. Potatoes are starchy, and when starch is stirred it gets sticky. Sweet starchy potatoes? Are even stickier. I knew this… but didn’t remember. Therefore, do as I say, not as I do: mix your wet and dry ingredients separately, then combine. Things go much better that way.

The sweet potato dough was heavy and very moist — and a little worrisome but I went ahead and lightly spritzed two pans with oil, divided the sticky mass, and put them in pans. I would have had photographic evidence of this, but you know, some of us couldn’t be bothered to set up the tripod when we weren’t sure this would work out, anyway. We just snapped off a few pictures, and not surprisingly, many of them were blurred because we couldn’t just take our time. *Ahem.* We have paid for this lapse with receiving more tutelage in the art of using the camera… *sigh*.

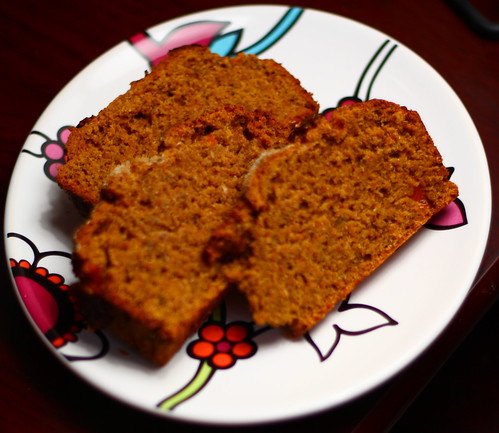
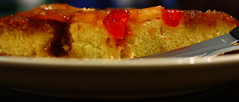
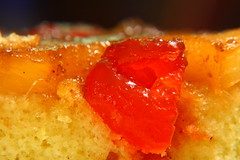
I divided a half cup of white sugar between the two loaves, hoping to make up some sweetness in case the potatoes were for some reason not as tasty as usual. With fingers crossed, I put it in the oven at 350° for about fifty minutes, doing the toothpick test to be sure it was baked thoroughly. This bread produced an even better crumb than I expected, and was still dense, moist, and slightly sweet, with a burr of pleasantly bittersweet citrus.

Even with the slightly more-than-caramelized top (the oven bakes seriously unevenly, due to the fact that the door doesn’t close all the way — what on earth the people who lived her previously did to it [lay on it?], no one knows. A new oven or a new door is on order, God help me, I cannot yet quite understand my trusty handyman. But he’s adorable, with his standing-on-end silver hair [I think I make him run his hands through it a lot — in aggravation] and his tone is reassuring — whatever the heck it is he’s said.) this bread was lovely. The sugar on top was a nice touch of sweetness, and next time, I think I’ll add more clementine… This was a lovely result for an experiment! Next time, I’ll make the loaves into scones. Sounds great, doesn’t it? Sweet potato clementine scones.

Until next experiment!

Sweet Potato Bread

  • 1 1/2-2 c. sweet potatoes
  • 1/4 tsp. of salt
  • 2 tsp. garam masala
  • 1/2 c. brown sugar
  • 1/4 c. oil
  • 1/4 c. marmalade
  • 4 c. flour
  • 1/3 c. flax seed
  • 1 tsp. freshly ground allspice
  • 3 tbsp baking powder
  • 1 tsp. baking soda
  • 1/4 c. coconut cream, dry

Preheat oven to 350°. Combine dry and wet ingredients separately, then combine. Divide dough, place in oiled pans and bake for fifty minutes. If you try this as scones, let me know how it goes!

The Bakers of Daring in June: Danish Braid


BUDD-ah. That’s what this one was mostly about. Buddah, as our Food Network buddy Paula Deen likes to say. There’s ‘buddah’ in this Danish Braid, and plenty of it. So, if you, like us, are a household of two and trying vainly to keep a leash on your fat and cholesterol intake what do you do? Substitute Benecol olive oil spread for butter, to work on lowering your cholesterol instead of raising it — and use just a bit less than the recipe requires. For some, it’s a gamble to substitute, but practice makes perfect, and this time it paid off in spades.

Yep, it’s time once again for another Daring Baker Challenge, my first in awhile, due to moving and a lot of other non-kitchen nonsense. It felt good to get back in the swing of things this week as I assembled the ingredients — no hand mixers or other accouterments, but this was a long, slow process and I had plenty of time to set up and clean up in between chilling the dough. This laminated pastry is something every croissant-lover wants more of, but it takes a lot of fridge time and cool hands to make it come out right. Fortunately, we’re now back in the land of cold weather — as I rolled out our dough, the rain drizzled down and the mists rose.


Perfect.

The detrempe came together easily, and because I kept mainly to the script, with a few small exceptions, I won’t repeat the recipe here, but you can find all the steps at KellyPea’s blog Sass & Veracity. I added a heaping teaspoon of our home made garam masala, and a whole vanilla pod to the dough, instead of the portion of a teaspoon of cardamom and half a pod of vanilla called for. I also added a splash of rosewater to compliment the cardamom, and the zest of three oranges, which made for an incredibly flavorful, fragrant dough. The olive oil spread worked as well as or better than butter, and because I turned the dough an additional three times more than the recipe required, the dough was incredibly tender, but not sticky, and puffed up beautifully.

For the filling, we used a combination of sweet-tart Braeburns and very tart Granny Smith apples, to preserve more of the shape and texture of the apple. We cut the sugar to a quarter cup, added a touch of complexity and bitterness with a bit of grapefruit juice in lieu of the lemon the called for, and then used pure vanilla extract instead of vanilla bean, mostly for the aesthetic reasons of confining the tiny black vanilla seeds solely to the bread (but also because we realized that the half-bean which was supposed to be left over in making the dough would have gone in here). We also cut out the butter and browned the apples in a stainless steel pan spritzed with olive oil. We really felt the filling didn’t need those four tablespoons of butter.


Once we got to the braiding bit, it was just a bit of wrap and stick, and we were home free.

The Danish was a slow starter in the rising department — because of that coldish weather once again — but once it got going, it was something to see. The baking filled the house with an amazing aroma, and when it finally came time to slice into it — Mmmm. A flaky, tender pastry. A tart-sweet filling. An immediate desire to eat both loaves, and an immediate understanding that it HAS to go to work with me on Monday or else.

For the record, I tried to share with the neighbor who held our FedEx package for us while we were in California.

He didn’t open the door.

I’m not going back.

Be sure to check out the rest of the Daring Bakers’ creations, over at the Daring Bakers Blogroll!

Oh – and, in case you’re like me and didn’t connect the dots: this is what is better known as a Danish. I didn’t catch that until I was eating a slice. Yeah.