Some Kind of Pot Pie

The problem is, I don’t really like pastry.

I have been known to eat the middles out of pies. I tend to leave the casings of sausage rolls and filled pastries. This makes me really, really weird, I realize that. Part of the problem is that growing up, I didn’t like the way oily things felt in my mouth — so shortbread was out, making me the lone child who didn’t enjoy seeing the tin of Dutch Christmas cookies arrive each year. I love small plates, and appetizer-y things like samosas — but only one of those a year is fine, sadly, or I feel a little sick. Bear claws or other store-bought Danishes, and laminated doughs of all types have made me a little queasy, and if the pastry is a minute past fresh, or I can taste or feel the oil on my mouth at all — oh, no. Bad, bad times.

Arriving in Glasgow, Land of the Fried, Home of the *Braue, this pastry aversion presented somewhat of a problem. There are tons of tasty Scottish items which are concealed in pastry, or fried (egg rolls — which are not Chinese food, I discovered. Egg+hamburger bun+frying= egg roll), and butter is, of course, as well-loved here as it is at home. (Paula Deen heaven, people.) Lovely Scottish shortbread, buttery crisp oatcakes, and the ubiquitous Scottish (vegetarian) sausage roll all presented a challenge (meanwhile, D. eats them up happily, claiming my forebears come from people who apparently ate leaves and twigs, while his properly ate fat and fish). I wanted to embrace the food of my current residence, but didn’t know where to begin.

I purchased a package of frozen pastry, deciding to start small, and make something with minimum effort. Unfortunately, nothing really suggested itself until one of those bitterly cold afternoons when I was expecting D. to come home frozen from school. He came in while I was hauling out ingredients, and frowned.

“Why aren’t you using the broccoli?”

“In pot pie?”

We then had one of our long, rambling and ridiculous discussions about what goes in what; my take was that broccoli never goes in pot pie, his view was that whatever you put in it goes quietly, or you should probably have killed it first.

We compromised by me sitting down and reading a book while he futzed with the broccoli, then lost interest.

(You see the rate at which dinner is prepared? You’d think we’d be much thinner, but no.) Eventually we returned to our project, and put together:

Some Kind of Pot Pie

  1. 1 whole onion
  2. 1/4 c. frozen corn
  3. 1 clove of garlic
  4. 3 chopped carrots
  5. 1 cup of the stems of fresh broccoli
  6. 1/2 c sliced mushrooms
  7. 1 package of silken tofu
  8. 2 c. frozen Quorn bite-sized “beef” chunks
  9. 1/2 c. milk or water,
  10. 1 tbsp. cornstarch
  11. 2 tsp. lemon juice
  12. various crumbled herbage, including chives, oregano, garlic and onion powder, black pepper and salt to taste,
  13. And one package of store-bought puff pastry


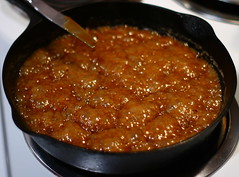
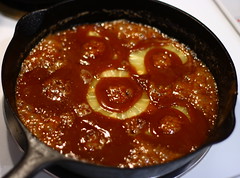
We started by using a stick blender and combining the tofu, milk and cornstarch, making the silken tofu into a kind of sauce. (If you’re not using tofu, you could just make a white sauce.) Next we threw in our herbs, spices, pepper and salt. Finally when we had a creamy sauce we dumped everything else in and gave it a quick stir, just to be sure everything was coated. This is a one-dish casserole, and so we left it in the dish in which it was combined.

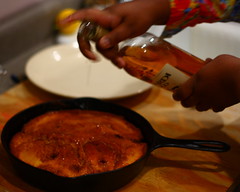
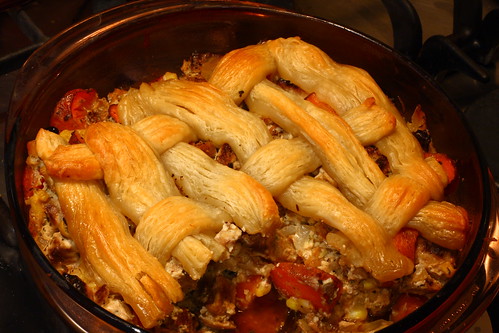
We intended to use the puff-pastry normally — take it out of the package, roll it out, etc., but D. had the bright idea to use the pizza cutter and slice the puff pastry against the grain. Together we wove it in a vague approximation of a basket-weave. We then popped it into the oven for 40 minutes, not because it really needed to cook for that long, but because we mostly forgot about it ’til we could smell it.

(Oh, come on. Honestly: isn’t this how many of your dishes begin and end?)

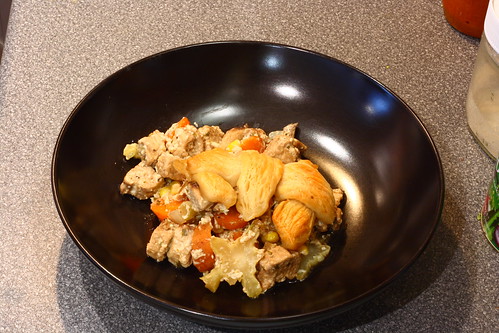
This was not a picturesque, pretty dish, but you know, most of the time, that just doesn’t matter. It was hot and savory and filling yet light — one of those really, really surprisingly good casserole-y meals that just worked well. And best of all, I really liked the top. It might be because there was no oil or fat whatsoever in the filling — the laminated pastry topping provided just enough richness to make a tasty dish, but not too much.

After that accidental beef-esque pot pie, I’m feeling brave, and may take on some of the recipes which have eluded me like pasties or the lovely tomato tarts I’ve seen other people make. Eventually, I may even learn to like D’s guilty pleasure dessert, millionaire shortbread!

But, for some reason, D. says that’s not really necessary.


*Splendid and brave, of course.

Apparently, I should also be trying to learn how to make a Brack this year… Oh, the horror.

Honey Oat Bread

Honey Oat Bread

  • To prepare the oatberries:
    • 1 C Oatberries
    • 4 C Filtered Water
  • For the initial proofing of the yeast:
    • 3 C Filtered Water
    • 1 Tbsp Yeast
    • 1 Tbsp Brown Sugar
  • For the bread itself:
    • 1/4 C Honey
    • 1 C Oat Bran
    • 1 C Flax Seeds (Linseeds)
    • 2 tsp Salt
    • 1/4 C Vital Wheat Gluten
    • 1 Vanilla Bean, scraped
    • Whole Wheat Flour – have a 5lb / 2kg sack on hand
  • For the final forming of the loaves:
    • Rolled Oats (Quick Porage Oats)
    • Olive Oil


  1. Boil your oatberries until they have absorbed all of the water they’re going to. Be careful, as they’ll boil over if covered. You could steam them, if you had a steamer, in which case reduce the amount of water to 2 cups and steam for 45 minutes.
  2. After the oatberries have cooked, remove from heat and let cool while you’re proofing your yeast.
  3. Microwave 1 cup of your water until nearly boiling, add 2 cups of cool / room-temperature water, and mix in sugar and yeast. Let this stand until yeast gets nice and bubbly (around 10 minutes or so).
  4. Combine oatberries, yeast ferment, honey, flax seeds, oat bran, and vanilla bean.
  5. Mix thoroughly, making sure to break up the vanilla bits
  6. Add in enough flour to get a good dough going, mixing with a spatula until you are able to knead it. (You could cheat and throw it into your food mixer until it’s the consistency of bubble-gum.)
  7. Knead until you feel like your arms will fall off or until the dough won’t easily absorb any more flour
  8. Set aside in a reasonably warm place (we put it into the oven – not turned on, obviously) until more than doubled in size (this took us about 2 hours).
  9. Gently knead for a minute or so, just to distribute the yeast again (it’s been sitting in there, eating, and is probably close to starving by now, and may have reproduced; it doesn’t have any legs, either, so you have to take it to the food).
  10. Separate into 3 equal sized balls.
  11. Form into loaves.
  12. Oil your pans well.
  13. Place loaves into pan.
  14. Liberally sprinkle the rolled oats over the tops, and then … perform something of the sort of action one usually performs with an omlette, tossing the loaf pan about so that the bread rotates through the oats. Yes, this is odd. It’s the way I do it, though, and it works. You can roll your loaves through the oats and then place them into the pans, if that makes you happy, but it’ll just dirty another dish.
  15. Let rise until more than doubled in size (this took about an hour, this time).
  16. Bake at 300F / 150C until internal temperature tests to greater than 195F / 90C (or until you think it’s done, if you’re that good at guessing).
  17. Remove to wire racks immediately and let cool thoroughly before slicing.

Odd Food


It’s been a fairly … well, odd week, foodwise. Since we kept saying that we ought to order groceries to be delivered when we got home, but were in so much turmoil as to whether we’d actually make it home, we never did. So, we’ve spent the week with the remnants of a few things we’d thrown into the freezer (the last of the pinto beans, some frozen bananas, a bit of Quorn ground meatless stuff, two onions, and half a fist of garlic). It’s been strange. We’re looking forward to the groceries arriving tomorrow morning, along with the vegetable box.

When everything has arrived, and we’ve finished unpacking, I think that we’re going to have to try some new and interesting foods: I just ran across an article on Bulgur Wheat. Could be that there’s something to it, and that we can certainly get it in the UK. So – we’ll get there.

In the meanwhile, we’ll eat the last of our banana bread.

#1 New Year’s Resolution…

…record recipes that we like on the baking site so that, when we’re in a strange kitchen far away from our ratty baking notebooks, we’ll know how what the heck we’re doing.

How bizarre. A quick check through the many breads and dishes we have on this site, and we discovered –far from home — that we had NO banana bread recipe on WIWB. None. Zero. Zilch. And we make banana bread so often that it makes no sense that we’ve never written it up!! What on earth is the matter with us?

Maybe it’s because most people have their own banana bread recipes — tried and true things they’ve had handed down from their mothers and grandmothers. Or, maybe because we’re experimental cooks, and rarely, if ever, make the same thing twice. Whatever our reasons — here’s a basic recipe that makes a really satisfying but basic banana bread. Feel free to jazz it up — adding raisins, candied ginger, citrus peels, or chocolate chips to make this loaf your very own. It’s perfect for tea or breakfast.

Here’s our most basic recipe — and it’s the lightest, most flavorful bread EVER, whether you add the two eggs or go with the flax or use yogurt in lieu of lemon juice. It’s so, so good, and we’re eating it tonight for dinner. And, eventually something else…

Basic Banana Bread

  • 3/4 c. brown
  • 1/4 c. white sugars (1 c. in all – I use two sugars to keep it moist)
  • 2 c. flour
  • 1 tsp. baking soda
  • 1 Tbsp. baking powder
  • 2 teaspoon freshly ground cinnamon
  • 1/2 teaspoon allspice
  • 1 teaspoon salt
  • 3 Tbsp. flax seeds, ground, plus 6 Tbsp. water
  • 1/2 c. soy milk
  • plus 3 tbsp. lemon juice, OR 1/2 c. plain yogurt

  • 1/2 c. oil
  • 4 large ripe bananas
  • 1 teaspoon vanilla

  1. Preheat oven to 350°F/175°C
  2. Sift together your dry ingredients, excluding the flax seeds, because they replace eggs, and we consider them… liquid.
  3. In a separate bowl, cream together oil, sugars, bananas and flax/water, lemon juice, and milk. Lightly fold the banana mixture into the dry ingredients with a rubber spatula until just combined and the batter looks thick and chunky. Scrape the batter into two prepared loaf pans.
  4. Bake until the loaves are golden brown and a toothpick inserted into the center comes out clean — this can take from 55 minutes if you choose to make one big loaf to thirty five minutes for two small loaves, depending on your oven.


And there you have it. One classic basic banana bread recipe, just add anything.

Best of the Baking, 2009

It started with a conversation about a cake “like my mother made,” and when you have a friend whose mother last made this cake before 1970, you’re actually interested in seeing if you can recreate it. Pineapple upside-down cake with red maraschino cherries? Sure, it’s the perfect 1950’s dessert — lots of butter, sugar and rum. Sounds like a perfect choice for the first cake of the new year.

(This cake isn’t remotely vegan, and our friend isn’t either. But we love him anyway.)

A lot of 50’s recipes for Pineapple Upside Down Cake call for boxed cake mix. We thought this wasn’t really necessary, as the cake is a really simple sponge — and if you can make a sponge cake, you’re ready to make any number of UK desserts by just adding a custard sauce. Women of the 50’s had just been introduced to the magic of mixes, but since they’re old news now, you can do this the “long” way — which is not so very long at all.

As with any recipe, before you begin, you should read all of the fiddly little instructions. Pretend this is 1950, and your standing among the neighborhood wives depends on making this just right. (Also pretend WE didn’t make the mistake of forgetting a whole bunch of steps, and are just remind you because we’re such great bakers. Yeah, right, huh?)

Pineapple Upside Down Cake


  • 2/3 cup butter
  • 3/4 cup brown sugar
  • 1/2 cup dark rum
  • 1 teaspoon cinnamon
  • 1 can pineapple slices
  • maraschino cherries (enough to fill centers of pineapple slices)
  1. Preheat your oven to 350° degrees.
  2. Next, place the butter, cinnamon, brown sugar and rum (Frankly, we don’t know if the kind of rum you use matters, as we don’t know from alcohol, but we used a brown Bacardi rum) in a medium-sized cast iron skillet over medium flame.
  3. Heat your rum, sugar, and butter until a slow boil is achieved. A cast iron skillet is THE best thing to use in this recipe, as it’s heavy, oven-proof, and is unlikely to scorch your cake.
  4. Carefully place pineapples in the rum, butter and sugar mixture. Even more carefully, place one cherry in the center of each pineapple ring. You might also cut slices of the slices of pineapple into halves and line the sides of the frying pan with them (standing up on edge).

While your sauce is just melting and cooking off all of that rum, assemble the rest of your cake:

  • 1 cup AP flour, sifted (we didn’t, but should have)
  • 1 teaspoon baking powder
  • 1 teaspoon almond extract
  • 1 teaspoon vanilla extract
  • 1/2 teaspoon salt
  • 2 eggs
  • 2/3 cup sugar
  • 1/4 cup milk

  • 2 tablespoons rum, optional
  1. Sift dry ingredients into a large bowl, then add wet. Beat with a wire whisk for one minute to incorporate air.
  2. Immediately pour batter over pineapples and cherries in their lava-hot sauce — be careful! Next, slide entire skillet into oven. Bake at 350°F for 35 minutes or until a toothpick comes away clean.
  3. When cake is baked, allow it to sit and cool for two minutes (or, you know, one minute – if you wait too long it’ll stick to the skillet).
  4. Brush on the optional rum.
  5. CAREFULLY set a large plate over the skillet, and with carefully swaddled hands, flip the cake onto the platter. (This might be a two-person operation.) Don’t wait on this step, or the cake and pineapple will stick. The buttery rum sauce will still be somewhat liquefied at this step, and will run down the cake, leaving it candied and coated with sticky loveliness.

Now, call in the bridge club — it’s time to eat.

Our Lady of Leftovers: Still with the sweet potatoes!

It’s just one of those things — after Thanksgiving AND Christmas, there’s always still so much food left! It’s worse for us, since we’re house sitting, and our host left Christmas Day — he just shoved his leftovers in the fridge and said, “Eat up!” Well, we tried. And we’re still trying. But there’s only two of us, and without his three little boys to help, well, we’re kind of stuck.

Without my little ramekin dishes, I’m not inclined to make sweet potato custard, but I did run across several versions of a tender and tasty sweet potato cookie. It’s so far out of what I usually would do with sweet potatoes that we whipped up a quick double recipe. Turned out really well — and I could see substituting mashed carrots, too, if you have any leftover glazed or roasted carrots lurking in the fridge.

Sweet Potato Cookies

  • 1 cup all-purpose flour, sifted
  • 3/4 cup quick-cooking oats – instant packaged oatmeal will work
  • 1/2 tsp baking powder
  • 1/2 tsp freshly ground cinnamon
  • 1/4 tsp salt
  • 1/2 cup unsalted butter or margarine, room temperature
  • 1/2 cup granulated sugar
  • 1/2 cup packed brown sugar
  • 1/2 cup packed sweet potato mash
  • 1 egg OR 1 tbsp. freshly ground flax seed + 2 tbsp. water
  • 1/2 tsp vanilla extract
  1. Preheat oven to 350°F or 180°C.
  2. Cream butter with both sugars until light and fluffy.
  3. Next, sift together your dry ingredients – flour through cinnamon — and then mix well together with oats.
  4. Lightly beat the egg and add into the sweet potato mash, together with vanilla extract. If you’re using flax seed, mix your water with the vanilla, and then add the freshly ground seeds. Let them sit for about a minute, then beat into sweet potato mash.
  5. Mix in sweet potato mixture into creamed butter and blend well. Then add in the dry flour mixture and combine thoroughly. Your dough will be a bit moist, but never fear! These cookies are quite tender, so this is normal.
  6. Drop the cookie dough by tablespoonfuls. Slightly flatten the doughballs as these cookies do not spread too much. Bake for 14-16 minutes until the edges are starting to brown.
  7. Remove from oven and let cookies rest on the sheets for a couple of minutes to firm up further before removing them to cool completely on a rack. Enjoy! Makes about 26-28 teaspoon sized cookies, and you’ll never get them all in one cookie jar, so eat up!

Those are quite tasty! And now we need something to go with them…

Driving By the Blue Box

(This picture is from the FIRST time we set the table. Four more people showed up, which totally threw off settings and the amounts in our nice wee serving bowls — but hey, we put another leaf in the table and refilled the crystal bowls, and had a good time.)

Happy Continuing Holidays, Craftastic Foody Buddies! Hope your celebrations of Yule, Solstice, Eid, Christmas, Hanukkah, Kwaanza, Festivus, etc. are progressing nicely, and that you’re rolling contentedly toward the New Year.

My sister is 12, and believes the height of culinary genius is mac ‘n’ cheese — in that happy blue box from Kraft. Our mother is vegan, and since she’s the main cook in the house, unless J. buys and makes her pasta herself (or bribes one of three older sisters) she doesn’t often get this treat.

For Christmas dinner, she asked me to make her a Mom-approved mac and cheese — and me without my orange food coloring handy! I knew there had to be something close out there — after all, the big draw to the boxed stuff is that it’s SALTY, not really cheesy, so a vegan version couldn’t be too hard.

Drawing from the incomparably insane Alton Brown as well as from the old-school vegan chef Jo Stepaniak, whose baked vegan mac recipe is practically legendary, we came up with a few slight twists — something close to the boxed stuff, and quite tasty.

A Crafty NonCheese

Tweaked from: The Ultimate Uncheese Cookbook

  • 2 1/2 cups dry pasta rings (Kraft makes one whole wheat — who knew?)
  • 2 tablespoons olive oil
  • 1/3 cup flour (any kind; your choice)
  • 1 tbsp. dry mustard
  • 2 tsp. onion powder
  • 1/2 tsp. paprika
  • 1/4 tsp. turmeric — optional, for color
  • 1 tsp. of cayenne or 2 tsp. Louisiana hot sauce, depending on eaters
  • 1 3/4 cups UNSWEETENED nondairy milk or water, if you prefer (experiment with almond or rice; soy can be too sweet)
  • 1/2 cup sweet/mild onion, finely diced – optional
  • 1/2 cup nutritional yeast flakes
  • Salt and white pepper to taste — and please DO taste it

  1. First, you need to boil your pasta — and you already know how to do that, yes? Because this is not going to be baked, however al dente you prefer the pasta will be how it’s served, so cook it how you like it. To keep it separated and prep it for sauce, you can add a tablespoon of margarine when it’s hot and freshly drained.
  2. Next, you need to make a roux. Grab a heavy-bottomed saucepan, add your oil, and put the pan over medium flame. Before the oil gets hot, dump your flour, mustard and onion powder, paprika, turmeric and cayenne into the pan.(NOTE: If you’re going to add onions, add them immediately after you add the oil, and let them sweat over low heat until they’re translucent. You want them to be finely chopped and unobtrusive to the texture of your pasta and sauce! Only if all your eaters are confirmed onion-lovers should you do this — otherwise go stealth and add the onion powder.)
  3. Let the flour mixture brown for approx. three minutes, and then, whisking constantly with a fork, add your yeast flakes, and then, about a quarter cup at a time, add your milk. Pretend you’re making gravy, and keep that fork moving. Obviously you don’t want lumps. The Rule du Roux is don’t use a high flame — medium/low is your friend.
  4. This sauce mixture should cook down for about ten minutes — keep your flame low! — and be ready to be poured onto your pasta. Taste it first before you add to the pasta, and tweak the salt/pepper content. Begin with a teaspoon of salt and go from there. Especially if you’re using whole wheat, avoid over-stirring the pasta and sauce mixture together, as you need it to stay creamy and saucy, not sticky and starchy. Serve hot, with a few grinds of fresh pepper or chiffonaded marjoram or thyme.

Mom and I stuck fairly closely to the recipe the first time through, but immediately afterward, my mind was buzzing with inspiration as to how I could add to this — and make it better. Thin slices of onion. Garlic powder. Smoked yeast. Peas and chopped spicy sausage. And why not bake it? A quick cup of whole wheat panko breadcrumbs, sautéed with margarine to seal in the crunch, nicely tops this pasta, and baked for fifteen minutes makes a nice side dish. There’s tons of stuff to try, if you’re in the mood.

All that matters to me, of course, is that my sister likes it.

Spelt Crackers

While we’re here, hanging out with the relatives, we’re getting to do quite a bit of cooking. Mostly it’s just ordinary things, but some of it is simply to get some of the joy we used to get regularly: cooking to feed to other people!

To go along with a pumpkin curry soup (made from a lovely Rouge Vif d’Etamps pumpkin), we decided to make spelt crackers. These were inspired by Smitten Kitchen, who basically says, “add stuff to spelt!” It’s a wonderful recipe, and they were wonderful crackers!

For flavor we added poppy seeds, whole cumin, celery seeds, and flax seeds. Baked for around 15 minutes, they came out of the oven soft, but quickly hardened (those which make it past the hungry mouths, that is).

I do wonder whether I shouldn’t have gotten a bit of a yeast dough going for these, as they were quite dense. It seemed to me that they were a bit more … well, reminiscent of unleavened bread than they needed to have been. And I probably would add more seeds next time, as well, and of different varieties (I’m thinking brown mustard seeds would go well). Other than that, though, these didn’t last the evening!

Sweet Success

After the EPIC fail and the loss of our precious starter, Sadie, we were pretty blue. We’ve been baking bread for ages, and nothing prepared us for that whole… disgusting, gummy, horribly-sweet smelling… goo that was the inside of what should have been a toothsome, wholesome loaf of bread. *Shudder*

After we buried Sadie in the trash, we were in search of something quick and simple and — satisfying to make for D’s oral PhD presentation on Tuesday. Because his presentation takes place in an open forum — where any and everyone is basically there to critique one’s arguments, we figured we could glue a few critical mouths closed with some judiciously applied peanut butter. Celine’s recipe provided a tasty looking and clearly written jumping off point for us, and we only adjusted our recipe slightly from there.

Peanut Butter Cups

  • 20 cupcake liners – should be mini, but use what you have. Ours were larger
  • 3/4 cup dark chocolate chunks, or 10 ounces of 70% dark chocolate, broken
  • 2/3 cup natural creamy peanut butter + 2 T to add to the melted chocolate
  • 1/4 cup powdered sugar + 2 T in which to roll log
  • 2 T pure vanilla extract
  • 1 T ground ginger, optional
  • optional pinch fine salt – we didn’t add extra, but you may prefer to

First, set out your cupcake liners on a cookie sheet. You’ll want to move them as a unit when they are filled, and you’ll regret your messy hands later if you don’t do this step now.

Then, melt your chocolate. We first set our chocolate chips in a bowl and …left them on the radiator for an hour or so. This melted them very slowly and thoroughly. If you have a house without this nifty radiator option, break your bar into small chunks and microwave on high. We checked our chocolate every thirty seconds, and it took a minute and a half in our microwave to achieve meltage. When the first chunks melted, we simply added our two tablespoons of peanut butter and stirred until the rest of the chocolate succumbed. Melting the remaining chocolate this way prevents burning and allows the chocolate to keep its tempering.

Next, we spooned one teaspoon of melted chocolate into the bottom of each cupcake liner.

Then, in a separate bowl, we combined the rest of the peanut butter, the powdered sugar, and the vanilla. The peanut butter stiffened up fairly rapidly, so we turned it out on a plastic cutting board to knead it for a minute or two, to be sure that the sugar was well incorporated. We rolled it into a log and cut twenty one inch slices from the roll. Natural peanut butter won’t let you fiddle with it for too long without getting even less malleable, so be fairly quick about this step!

Next, we took each of the little slices and flattened them and set them right in the middle of the first chocolate layer. If you use mini-cupcake liners, this is probably a lot harder, and using Celine’s method of coating the liner might be easier. We did it this way so that we could easily and quickly fill all twenty cups, and be ready for the final step.

In between working with the chocolate, we replaced it on the radiator. If you need to, you can zap yours for another ten to fifteen seconds in the microwave.

Finally, we added one generous tablespoon of powdered ginger to the last of our chocolate, stirred it thoroughly, and then ladled one generous tablespoon of chocolate atop each of the peanut butter slices.

And that’s really it. Chill your beauties in the fridge for forty minutes to an hour. They set beautifully — have that distinctive peanut butter cup fluting on the edges when the paper is pulled away — and melt on your hands almost instantaneously, so by all means, pop that sucker in your mouth!


After the bread disaster, our small daily eating successes — a gorgeous crock of zesty mustard, a rustic “beef,” penne pasta and black kale stew, and now this quick and fun treat — sort of salve the loss of losing our starter, and having to deal with an oven which requires the bread to be turned repeatedly so that it will cook evenly (!#$%Z^%&*@!). Eventually, we’ll live in a house with a model kitchen — but that’ll probably be in a house we own and that’s three long years and a graduation from now. Still! Success is success, and you can’t argue with salty-sweet, addictive, peanut butter cups! These things are truly amazing.

Look forward to more baking and experimenting through the holidays as soon as we get home and in a decent kitchen…!

Bread Failure, etc.


Alas, I’ve had my first truly hideous bread failure. There are no pictures (the bread pictured to the side was a long-ago success). The bread needed to be thrown entirely away, along with Sadie, the sourdough starter. We’ll start again after the Christmas holidays, and will hopefully go another many years without seeing something like we saw this morning.

We had Rope Bacteria in an entire batch of bread.

Rope Bacteria happens when your bread is kept too warm after baking (thanks, yes, the heater is back on in the flat for the first time since October). If it doesn’t get a chance to cool down quickly enough, you can be providing the ideal environment for a truly nasty surprise.

The bread looked … well, raw in the middle. It wasn’t – the bacteria had eaten all of the gluten in the bread, leaving the middles completely soggy and disgusting. As Baking and Baking Science says, rope bacteria has the “odor of overripe cantalope.”


On another note, entirely, we’ve decided to switch feed readers. We’d been using Google Reader, and had been quite happy. Then … Google gave Reader an overhaul. This was not just a cosmetic touch-up, but a significant change to the way we do our blog reading (and some buggy annoyances like not being able to click on a post and have it tick over to “read” status). So – we exported our feeds out and uploaded them to Bloglines.

We’re still not used to it, of course, and haven’t really begun to scratch the surface of what we can do with Bloglines. But we’re enjoying it, and particularly enjoying reading back over the history of some of our favorite blogs (We’re talking about you, Kansas). Bloglines shows you all of the feed, rather than just the last 20 posts, so we’ve just finished reading over two or three years worth of some of our friends’ blogs, and having a great time. One other cool thing about Bloglines is the fact that you can tell it to sort older posts first. Yes, you can do this for Reader – one feed at a time – but Bloglines will let you do it globally. So, we get to read things chronologically by default! Yay!


7 days from now will find us packing, shutting things down, tidying up, and making sure that nothing in the house will be in a position to spoil … because we’ll be getting ready to get on a plane to go back to the sunshine. We’ll be in California through the Christmas Holiday! While we’re there, we have all manner of things to take care of (getting new visas and biometric ID cards for the UK, visiting T’s web developer). But … we also just have plans to do “nothing much” for quite some time. Perhaps we’ll do some baking (those with bread lust, I’ll give you lists of ingredients required, and you will be doing some of the labor). Perhaps some knitting. Generally, though, we’re just going to unwind from city life.